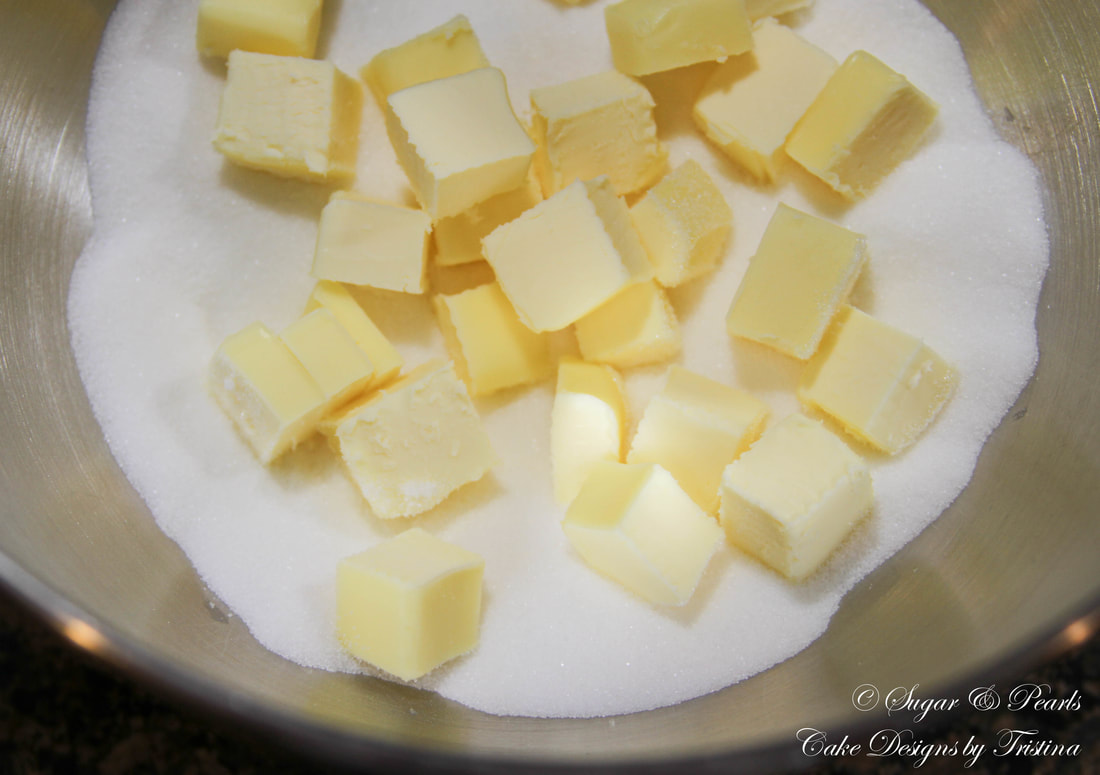
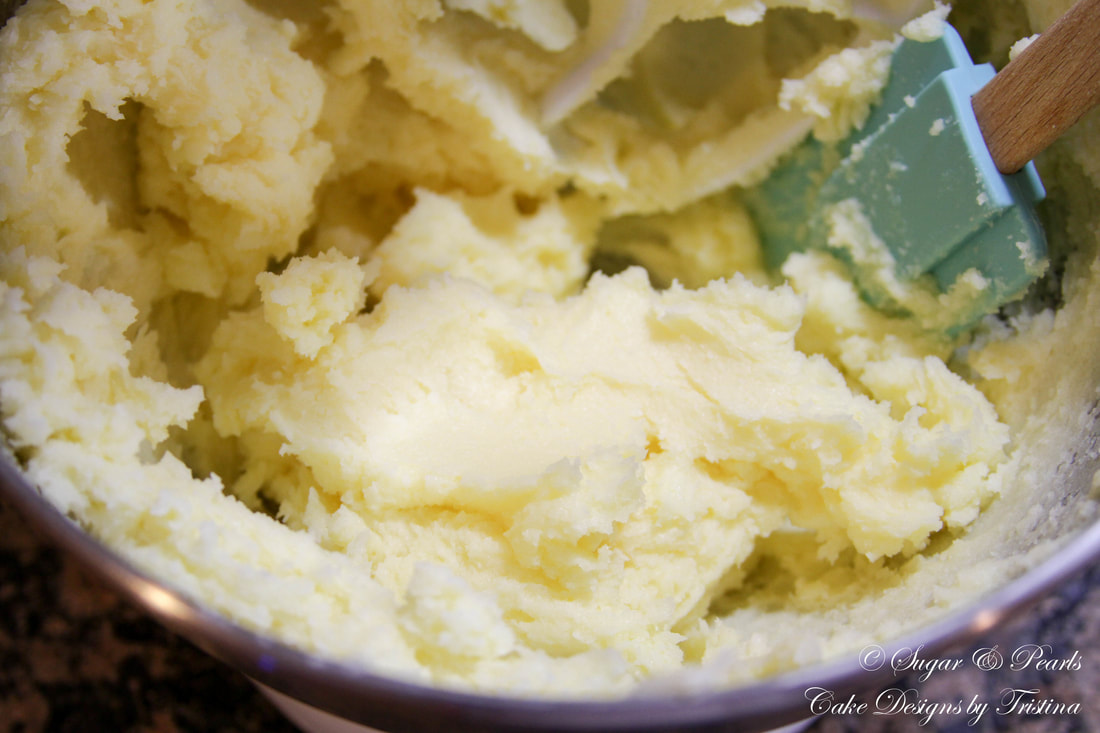
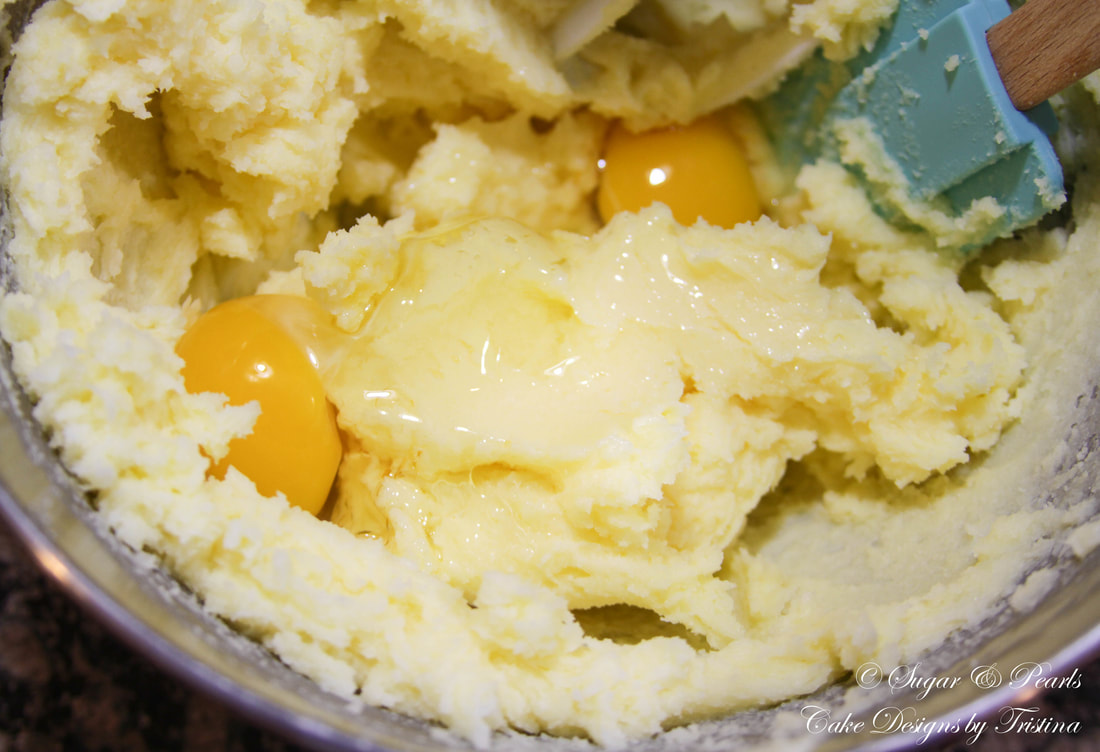
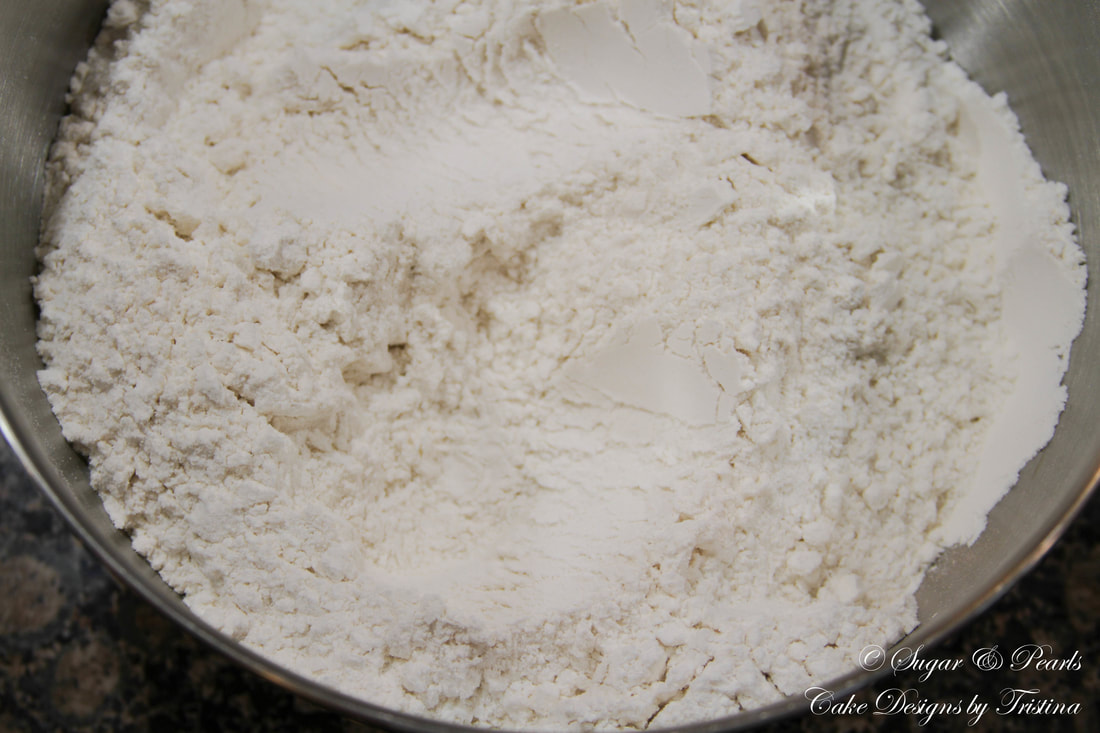
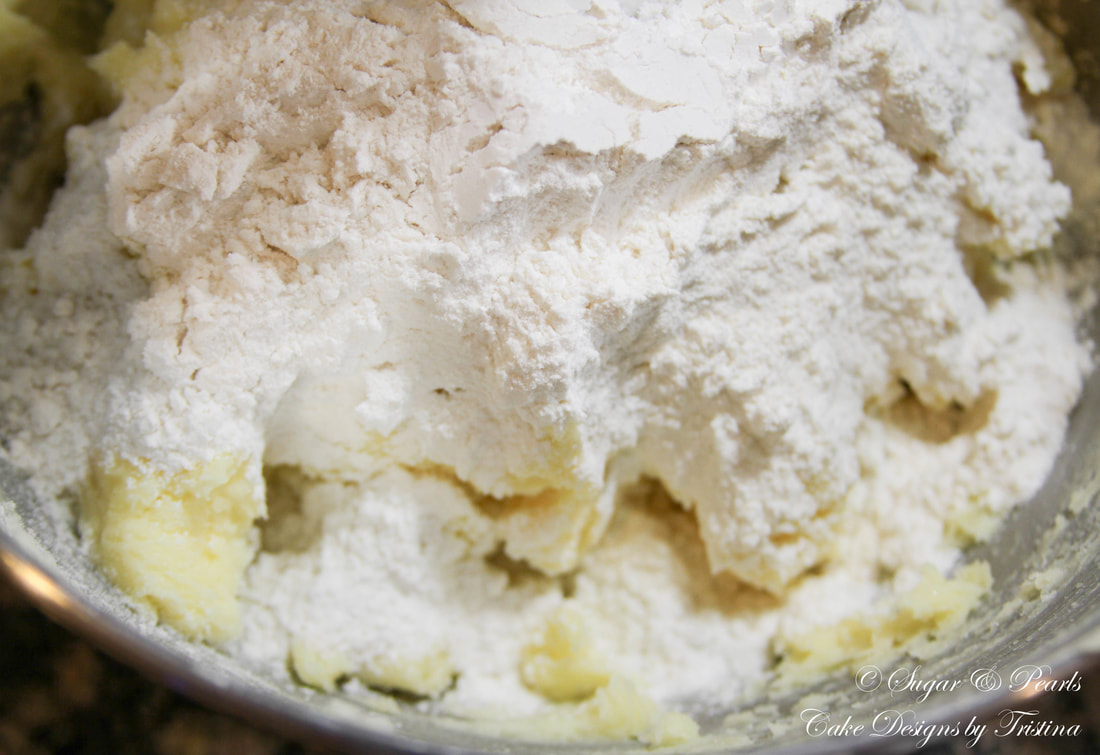
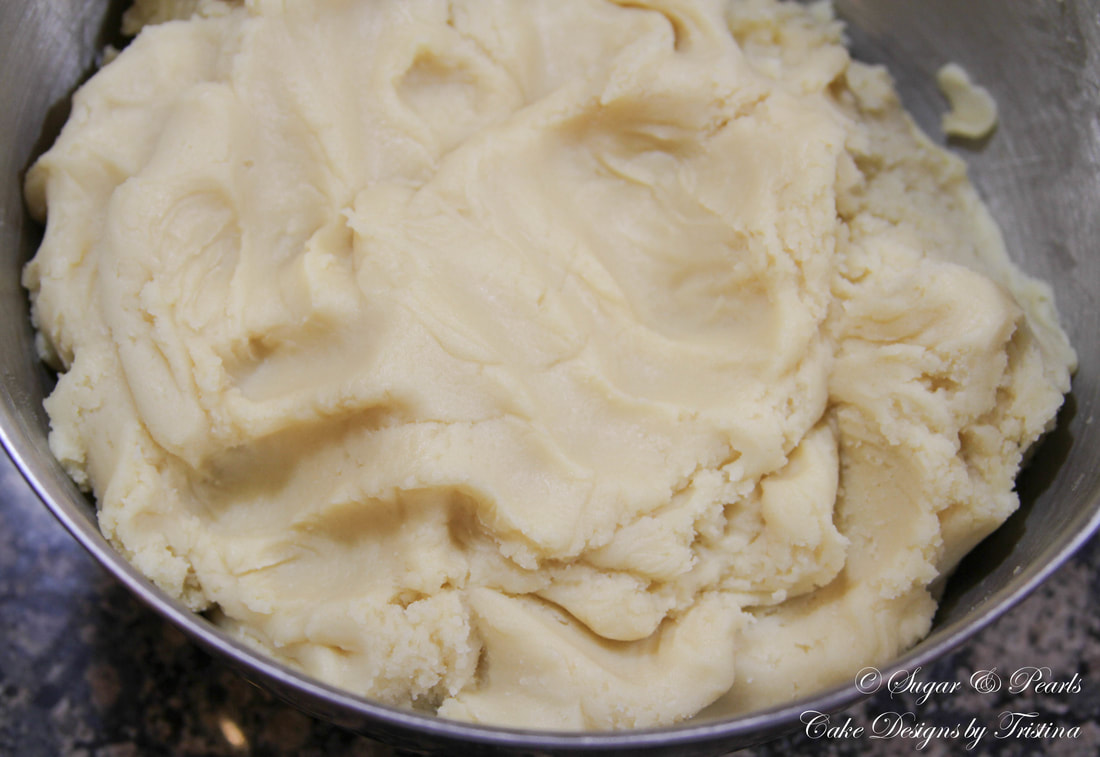
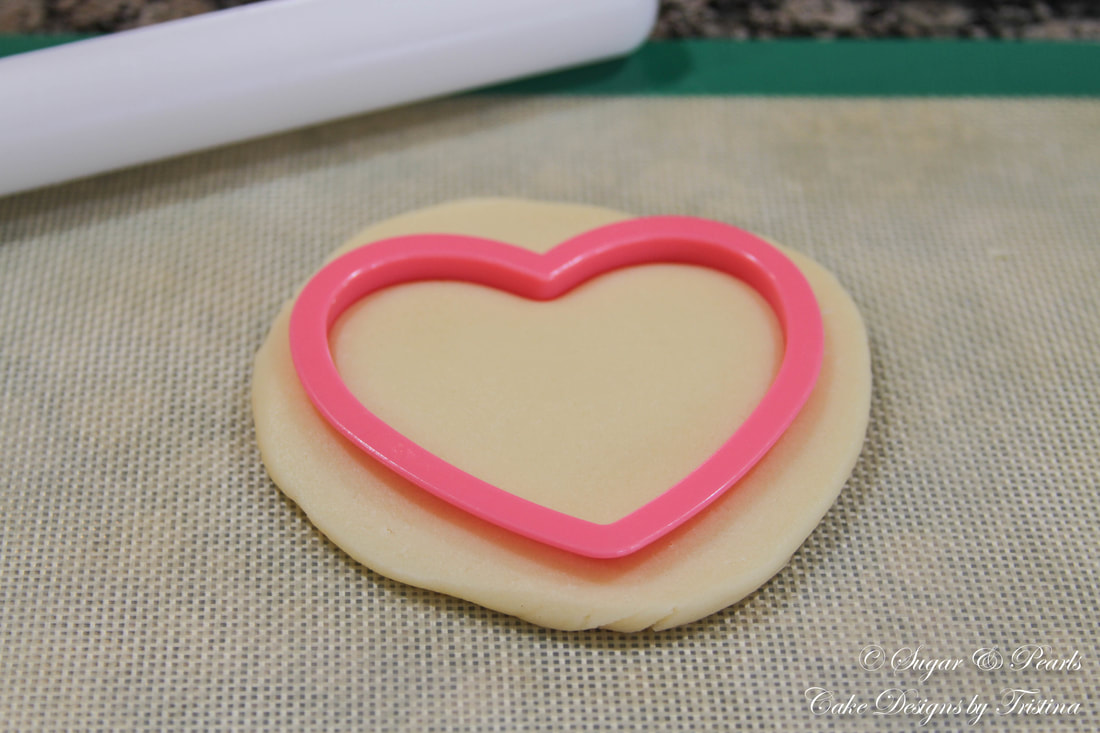
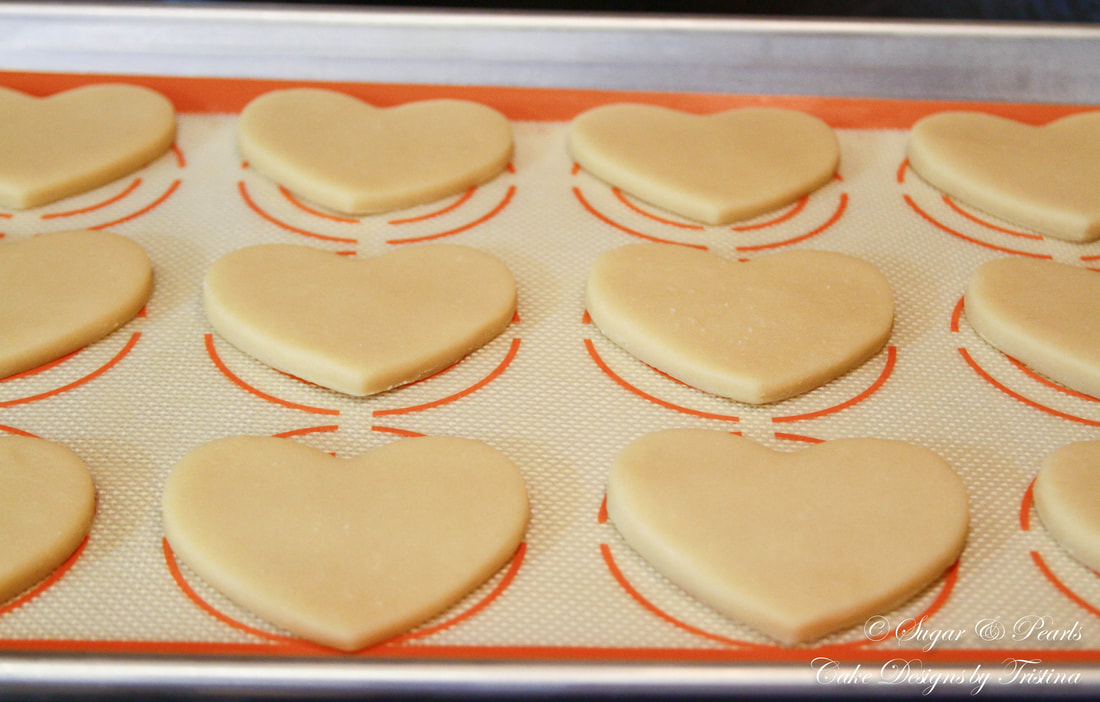
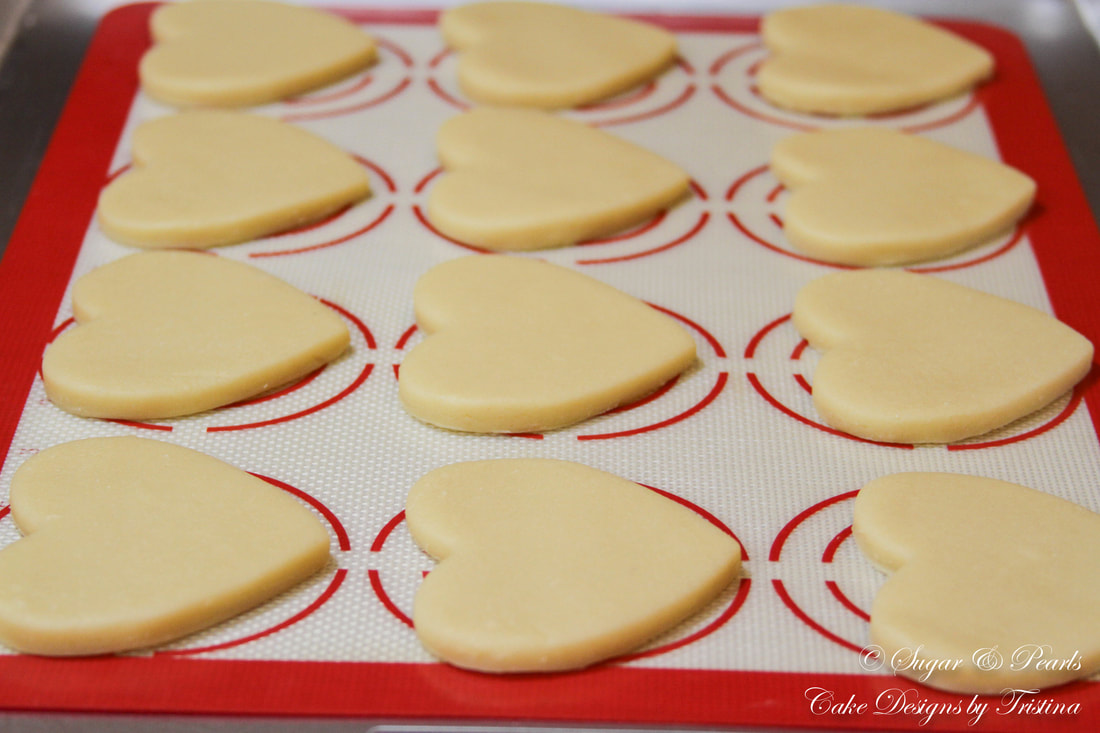
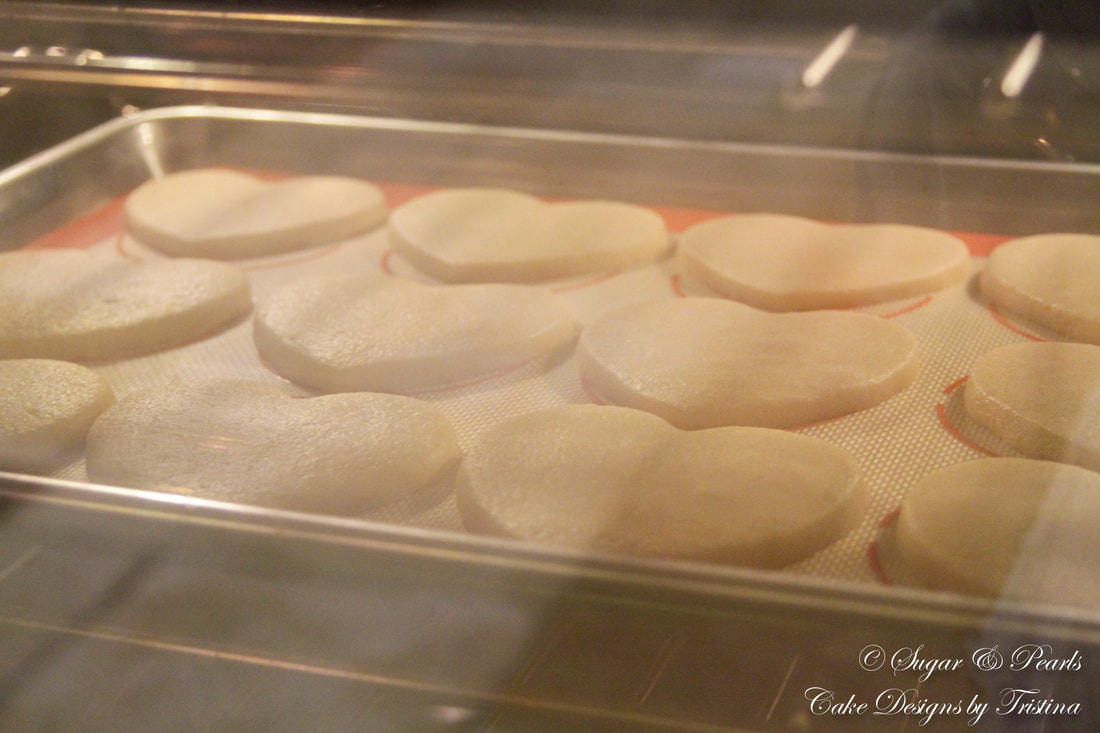
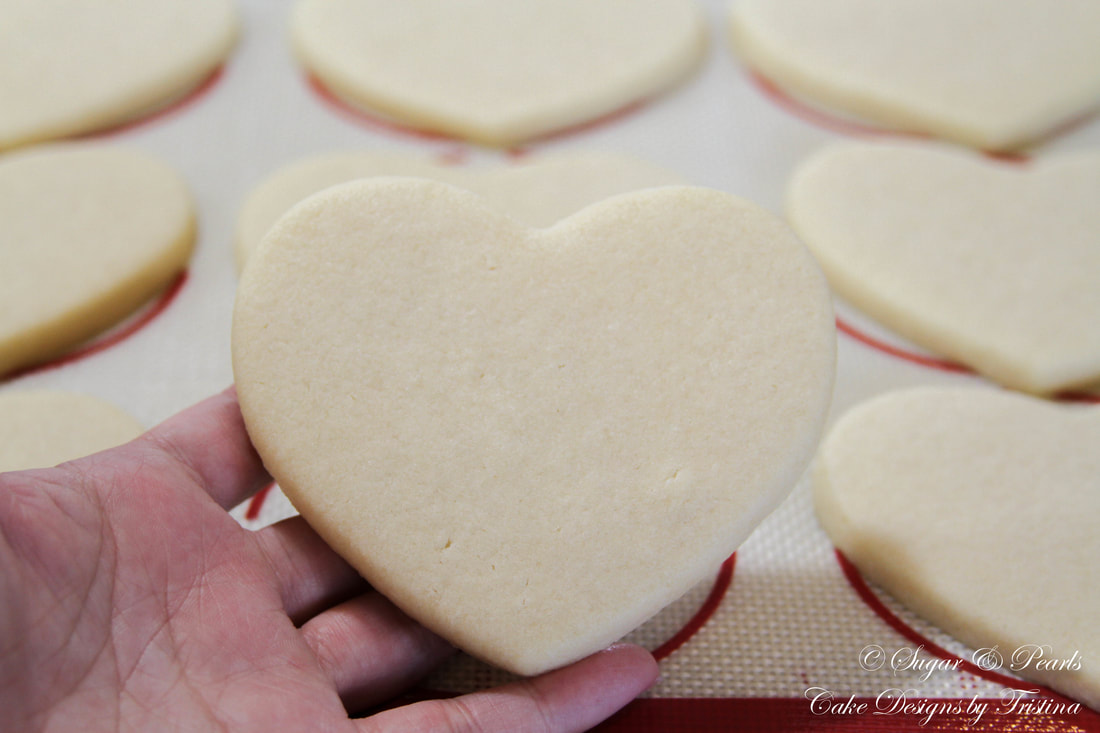
 Whew! I just spent the last few days wrestling with these sugar cookies. I made it just in time again to have them leave the house with the kids on Valentine's Day to pass out to their classmates and teachers. Like every year, I told myself that this time I will be ahead of the game, but I'd always ended up at the same time-crunching spot I did the year before. And, it does not help when the Vietnamese (Lunar) New Year falls so close to Valentine's Day either. Not that I have to do much cooking on the new year (thanks for Mom and Mother-In-Law), but my husband wants to clean the house and to attend all of the family functions, leaving me little to no time for baking. There is really no such a thing as "free-time" when you're a working mom.  We made cupcakes last year for Valentine's Day, so the kids decided to give out sugar cookies to their friends this year instead. We went through a bunch of non-sweet gifts but circled back to these sugar cookies anyway. We settled for heart-shaped cookies, after all it is "LOVE" that we're celebrating on Valentine's Day. My son wanted "lovebirds" cookies and my daughter preferred the polka dot designs. Honestly, I did not come up with these designs. I found them on Pinterest and just duplicated the designs using my color themes. Although it took me a lot longer than I expected, this project really make me wondering about spending more time on decorating sugar cookies to enhance my piping technique using royal icing. In this posting, I will show you how to bake these soft, chewy sugar cookies, how to modify them to your liking (in terms of taste), and how to decorate the lovebirds and polka dot hearts.  MAKING SUGAR COOKIES I never know when I will be baking sugar cookies, so I always end up cutting my butter into cubes just right before I cream it with the sugar. I begin by beating the sugar and the buttercream together on medium speed (Speed 4 on a Kitchenaid stand mixer) with a paddle attachment for about 2-3 minutes, or until the mixture is light and smooth. I add in eggs and vanilla extract and continue to beat at the same speed for another 1-2 minutes until the mixture is well-combined. In a clean mixing bowl, I whisk together the flour, baking soda, and salt. I replace the paddle attachment with a hook. Then, I add to the butter mixture, 2 cups of flour at a time, and beat on low speed (Speed 2) until it forms a dough-like appearance. This process takes about 2-3 minutes after all the dry ingredients are added. It will be slightly sticky and that is normal. Next, I remove the dough and start kneading on a clean and floured counter for another few minutes until the dough is well-mixed. I put the dough back into the mixing bowl and cover it tightly with saran wrap. I place the bowl in the refrigerator for at least 1-2 hours or overnight. I have done both as I needed two batches for this project, and they both worked well for me. I remove the dough from the refrigerator and leave it on the counter for about 15 minutes while I clean the counter and get my utensil ready. I divide the dough into small portions for ease of kneading. I roll the dough out to about 1/4 of an inch, and punch out "hearts" using a medium-sized cookie cutter. I place the cookies on the prepared baking pan that has been lined with a silicone mat. I make sure the cookies are at least an inch apart to allow spreading during the baking process. Once the baking pan is filled with the appropriate amount of sugar cookies, I place the tray into the freezer for at least 15-20 minutes. I bake these cookies at 350 degrees F on a preheated oven, immediately after I remove them from the freezer. I bake my cookies for 16-18 minutes, and they come out soft, without a trace of browning. However, I notice that my oven is not as hot as others. I also hate (it is a strong word and we don't use it as often at home) under-cooked baked goods. I rather have my sugar cookies on the crisper side than having them under-cooked. Baking time also varies depending the thickness of the dough and the size of the cookie cutter, and the oven. The "baking time" is probably the hardest stage for sugar cookies, if you ask me. Knowing when these cookies are "done" is not easy. I see a lot of recipes out there called for 6-8 minutes for their cookies, and when I followed that, my cookies are not even half way done. This truly depends on your oven temperatures as well. I would start checking the cookies at about 10 minutes. Another good indicator is that when you could start smelling the "sweetness" aroma of the cookies, they are "almost" done. I usually open the oven door to peak at the cookies, and then close it if they are not quite ready. I also like to bake them longer just to make sure I don't under cook them. I still get very soft sugar cookies with 16-18 minutes of baking time. Tips for baking sugar cookies:
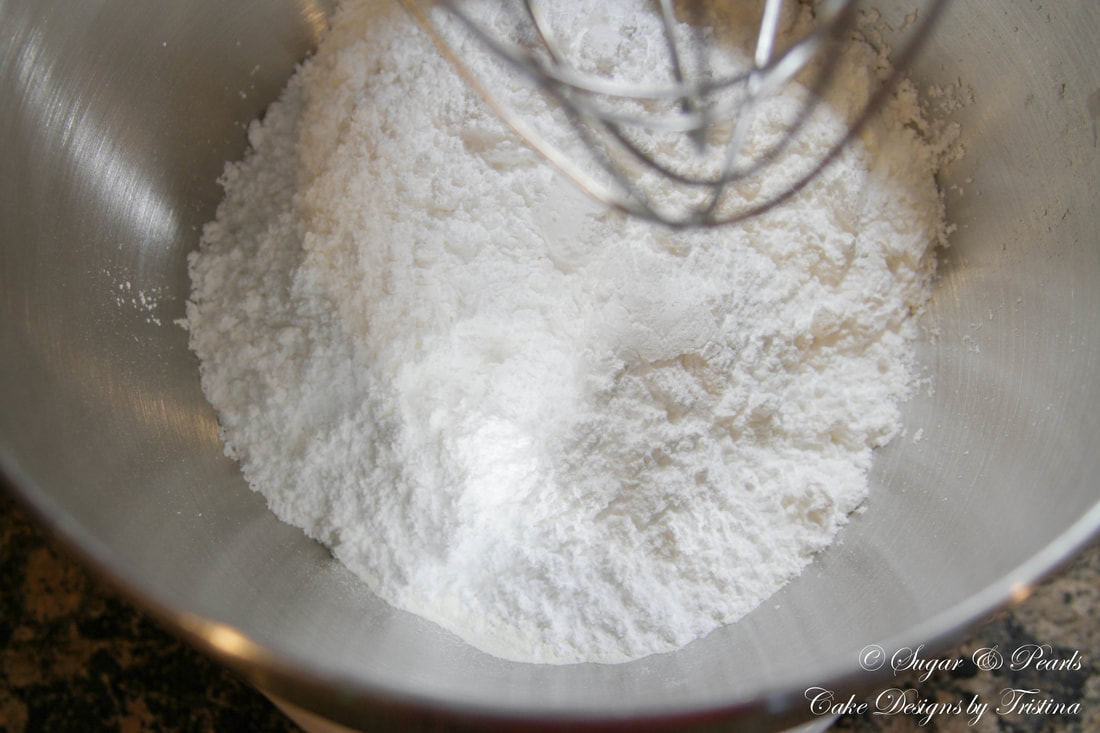
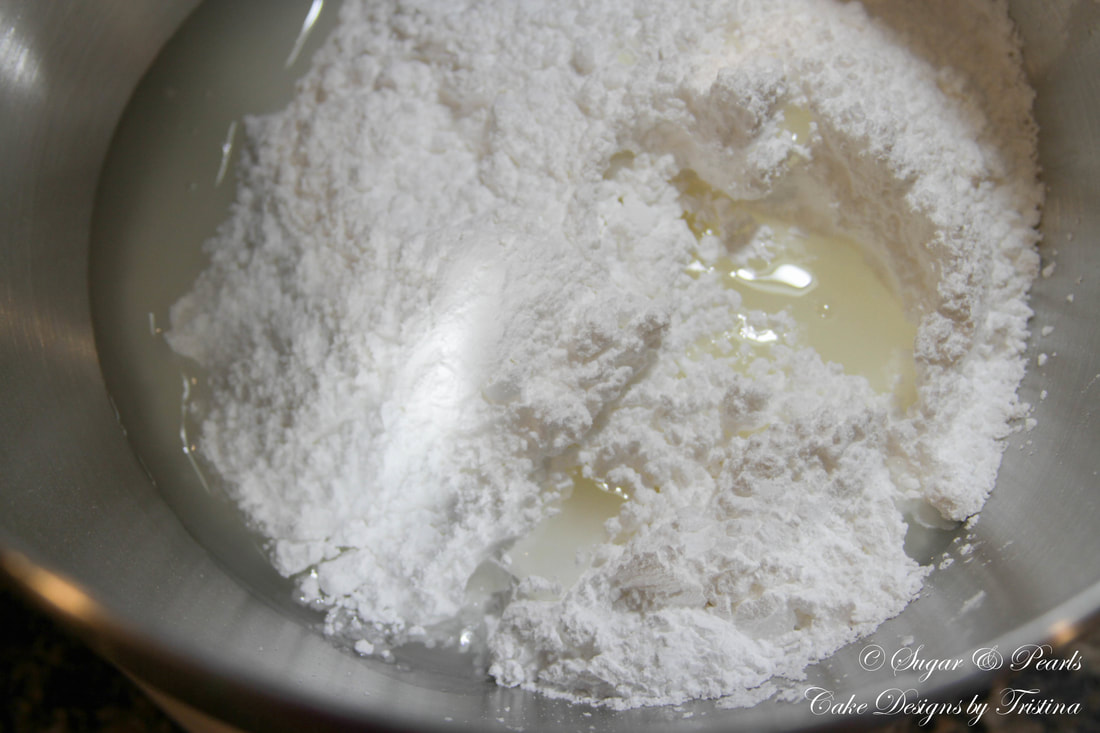
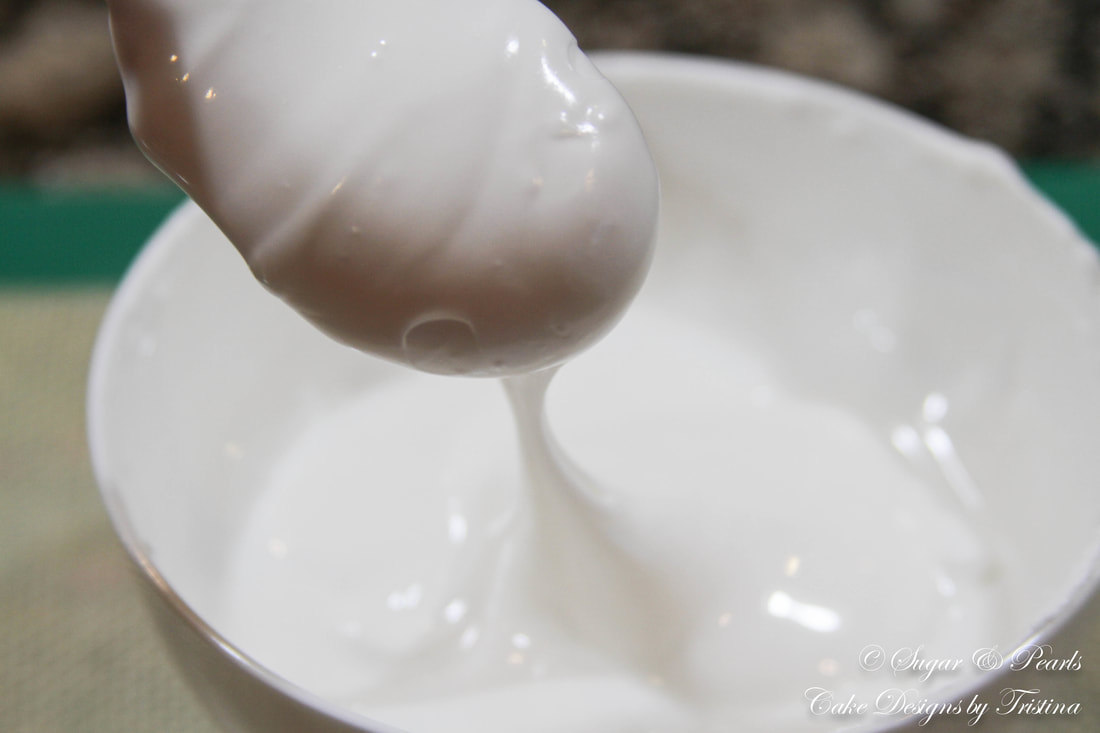
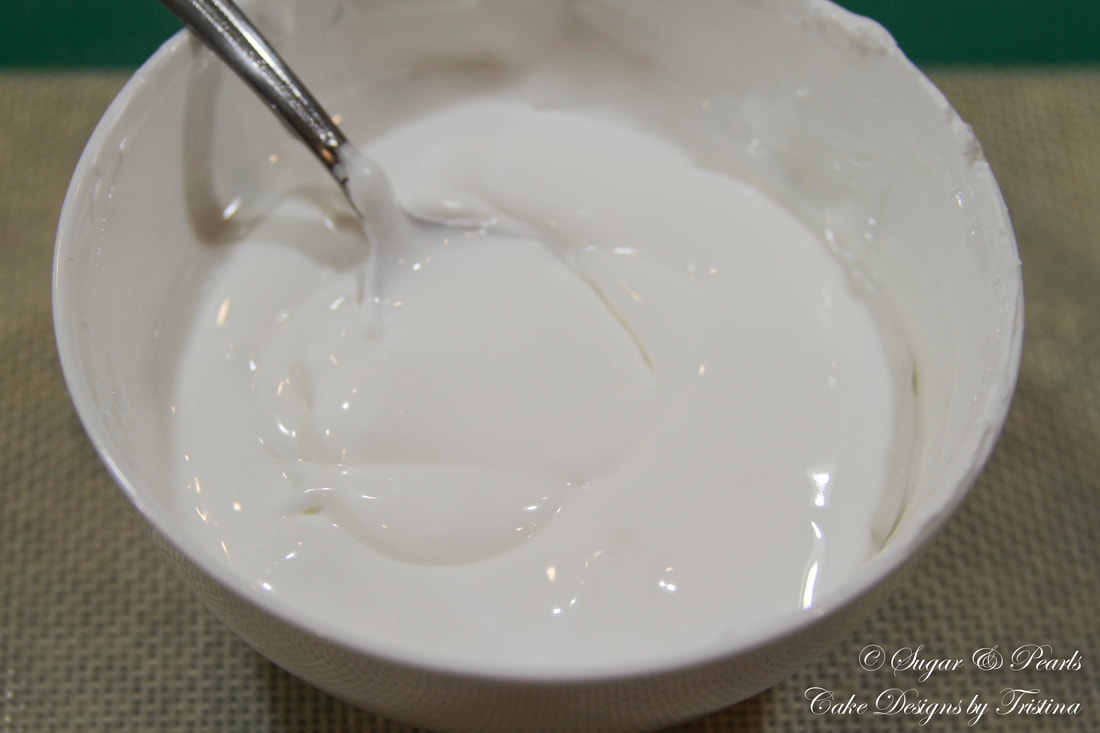
 MAKING ROYAL ICING I am still learning how make the perfect consistency of royal icing. After all, making the icing itself is simple and easy. But to determine the right consistency for each design to pipe on the sugar cookies is definitely an art that I have yet to master. I am going to warn you. Sugar cookies decorating is a tedious task that is TIME CONSUMING! That is especially true for me as a beginner. You can spend hours on these cookies at times. So, I usually don't rush through them. I specially designated a few hour-interval (or a full day) to decorate these cookies. It takes a lot of work to "determine the consistency" and to create arts on these beautiful cookies. If you are ready to spend at least the next 4 hours decorating cookies, then read on. In a clean mixing bowl with a whisk attached, I beat meringue powder, water and powdered sugar on low speed (Speed 2) for about 1-2 minutes to prevent powder sugar from slashing all over the counter. Once the mixture is almost wet, I add in vanilla extract and increase the speed to medium (Speed 4) and beat for about 3-4 minutes or until light and airy. Here, you can then add in more water, 1 teaspoon at a time, until the mixture reaches the desired consistency. I like to work with thicker royal icing to begin with as I can always add more water to thin out the icing. You can always add more powdered sugar to the mixture to thicken it as well, but I find that working with water is much easier. I divide the icing in smaller bowls, depending on the number of colors you need to mix. I also like to mix 2 colors at a time to prevent the icing from drying out. I cover the main batch of royal icing with a saran wrap and a damp towel while I work on the smaller portions. This method allows me to keep the icing from drying out for up to 6 hours or so. 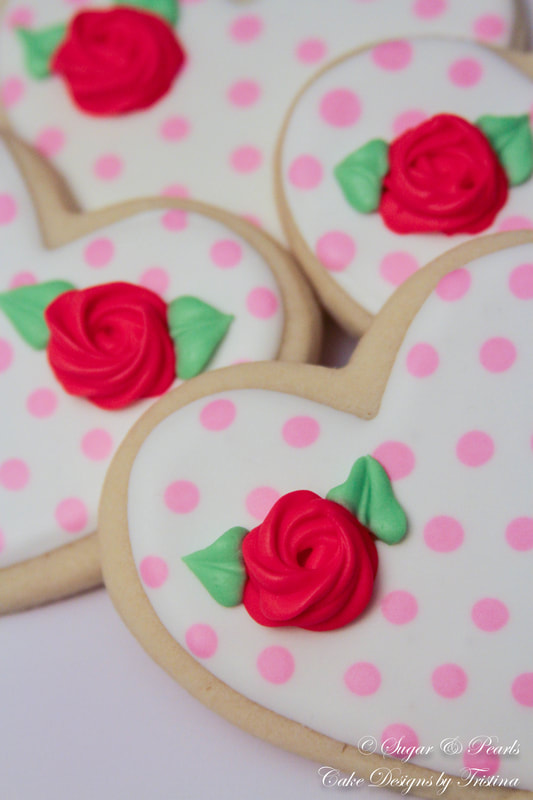 Tips to determine royal icing consistency:
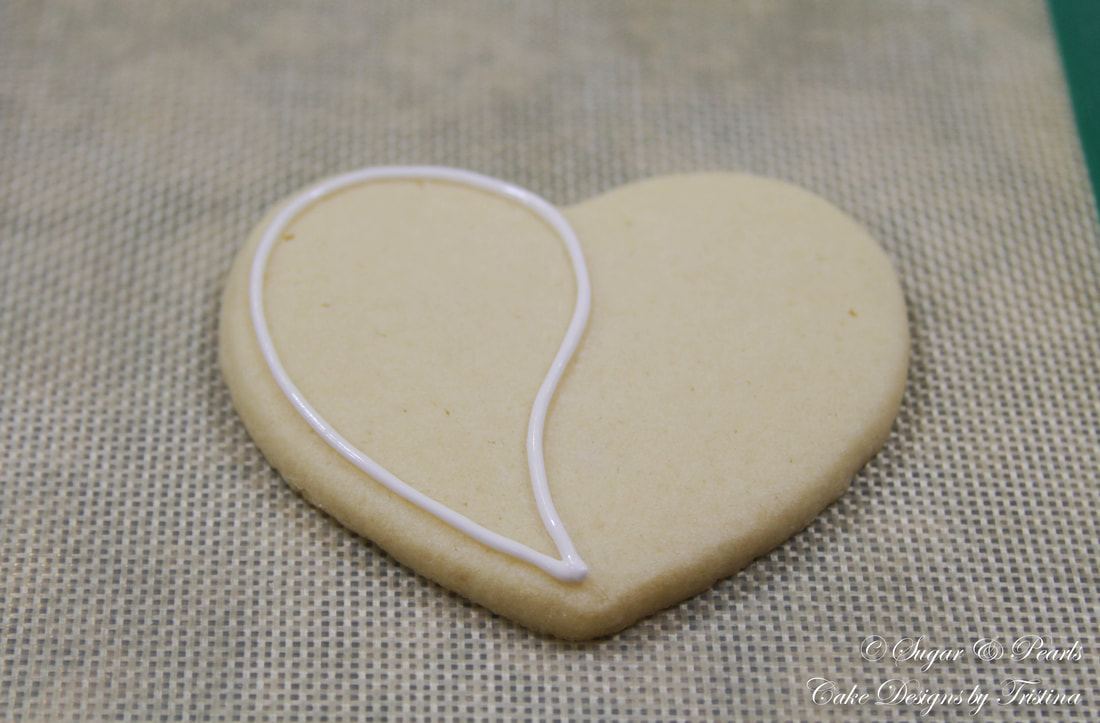
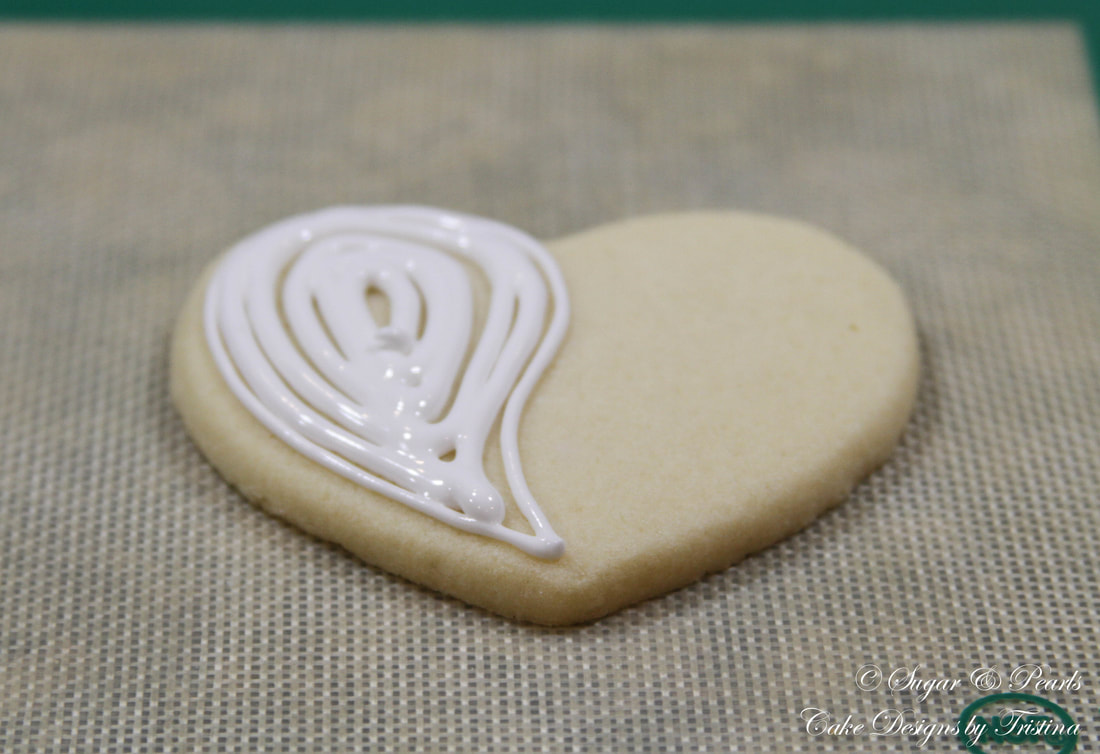
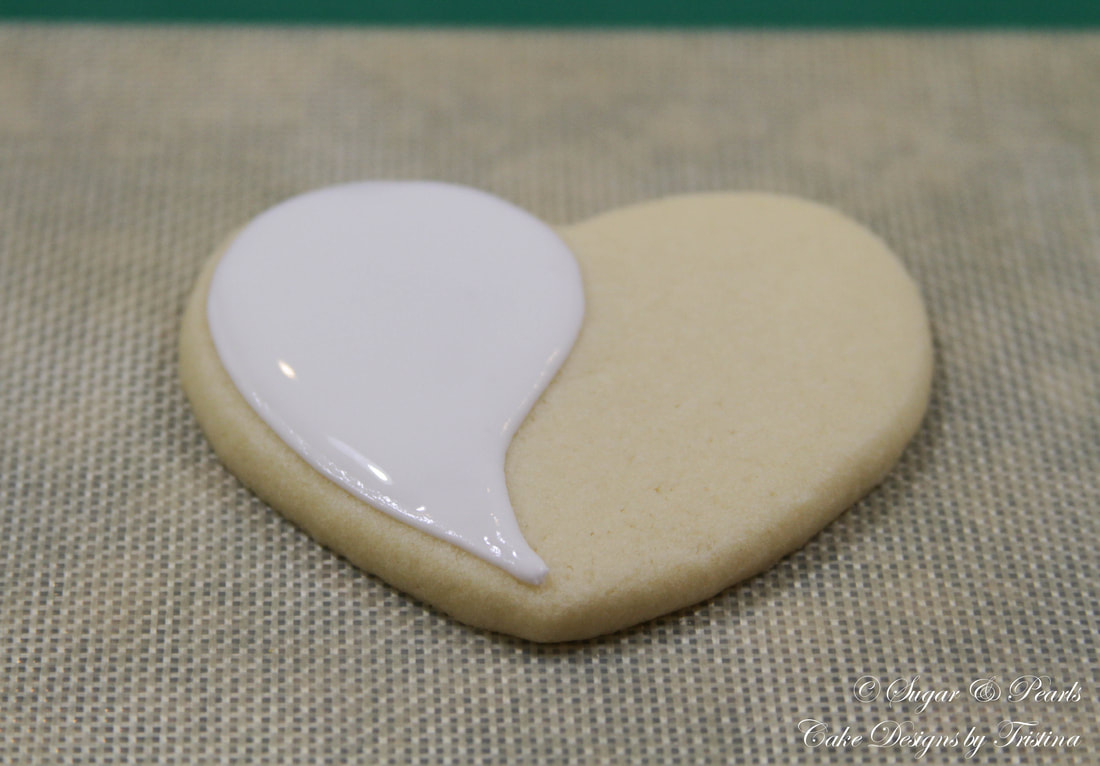
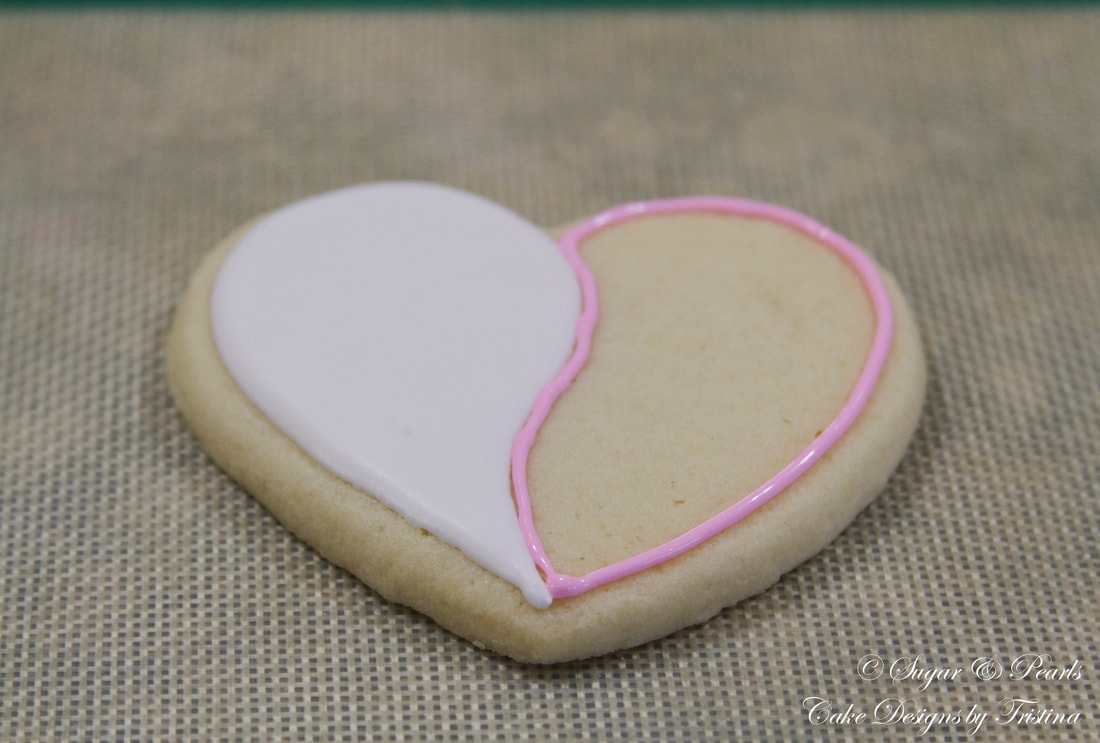
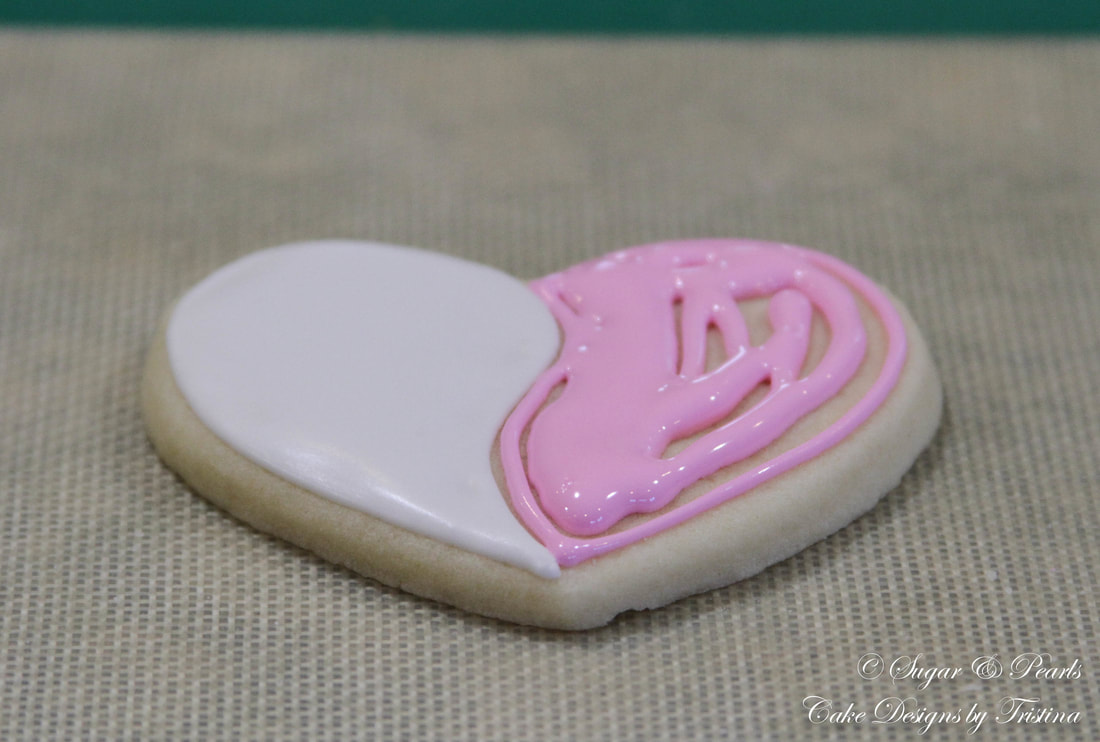
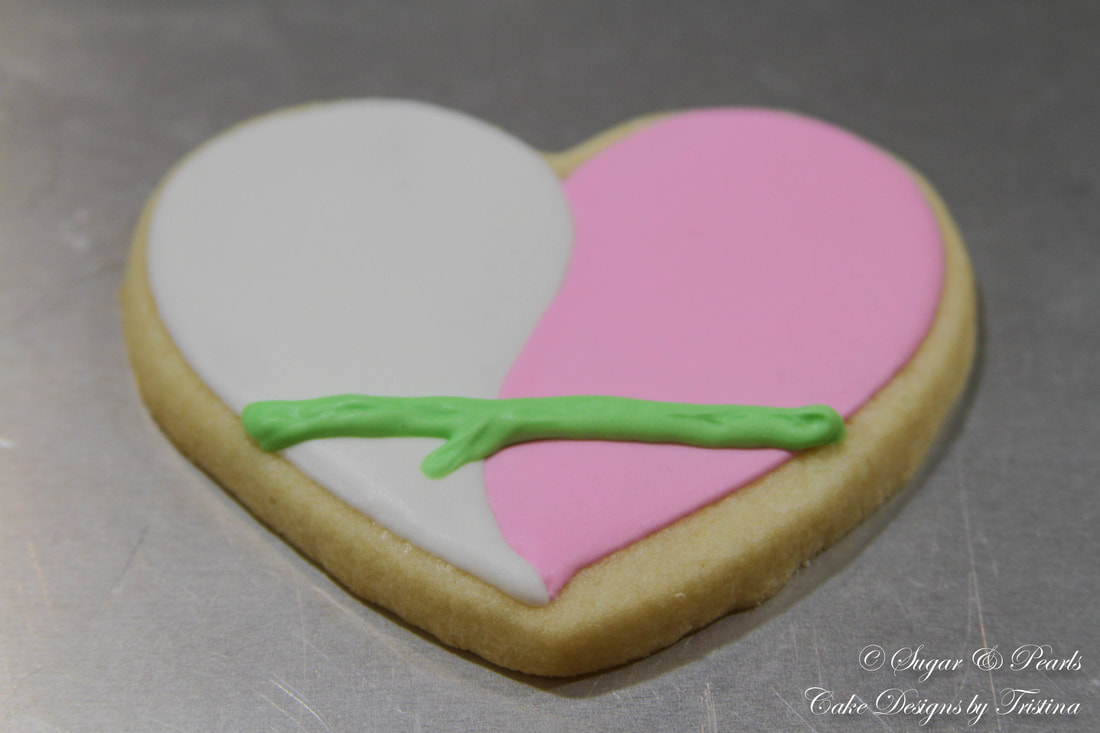
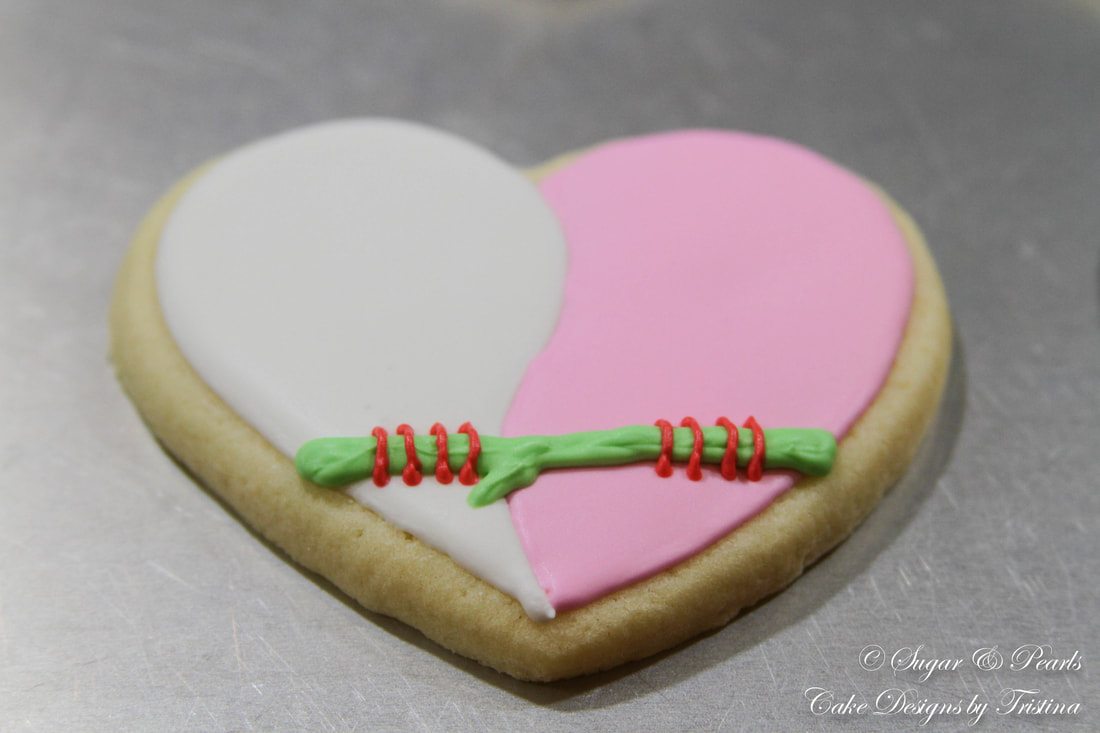
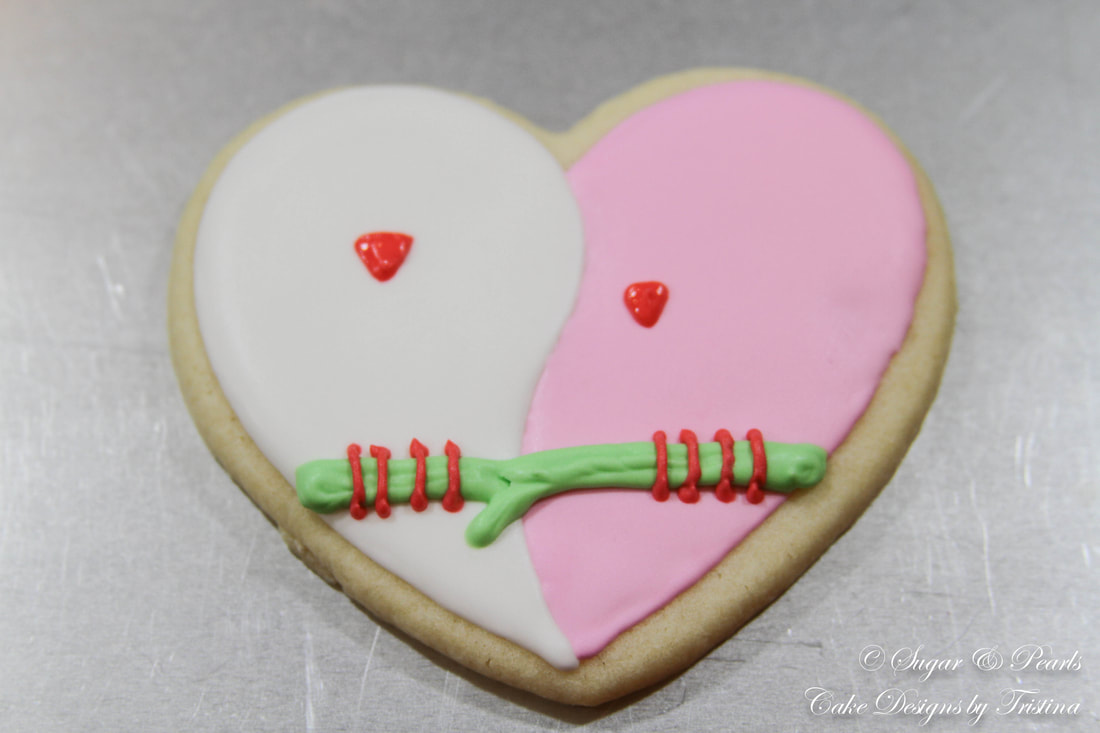
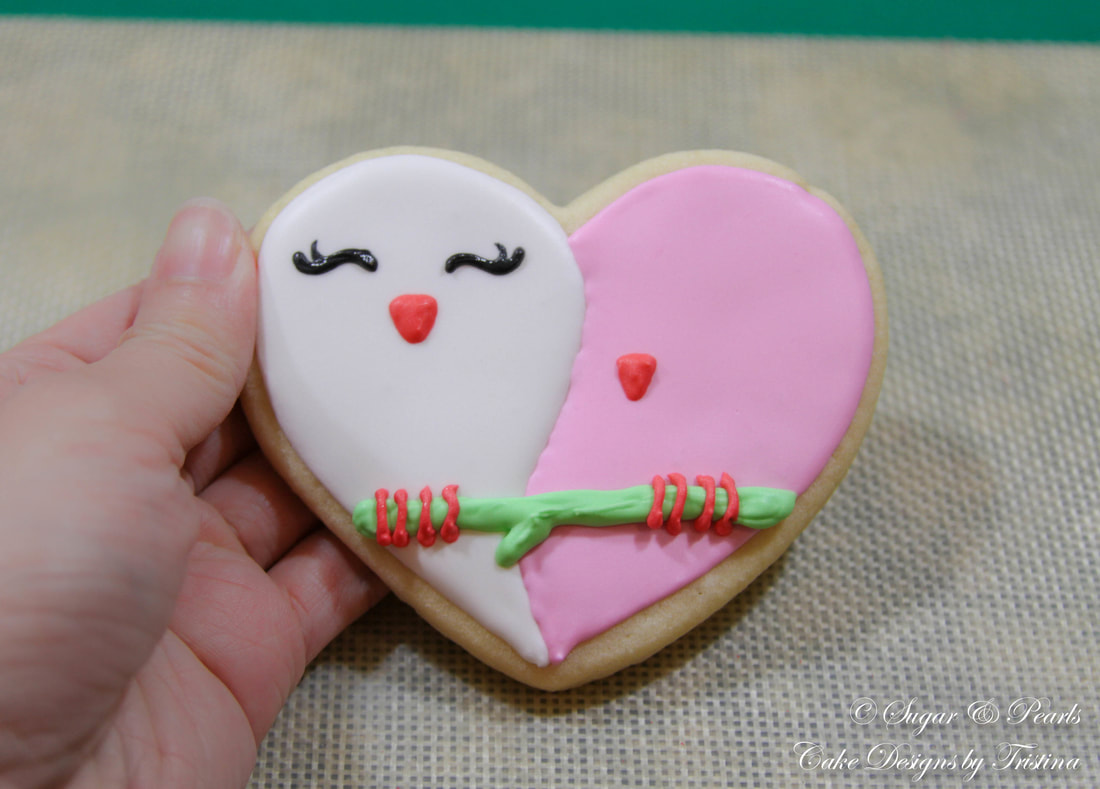
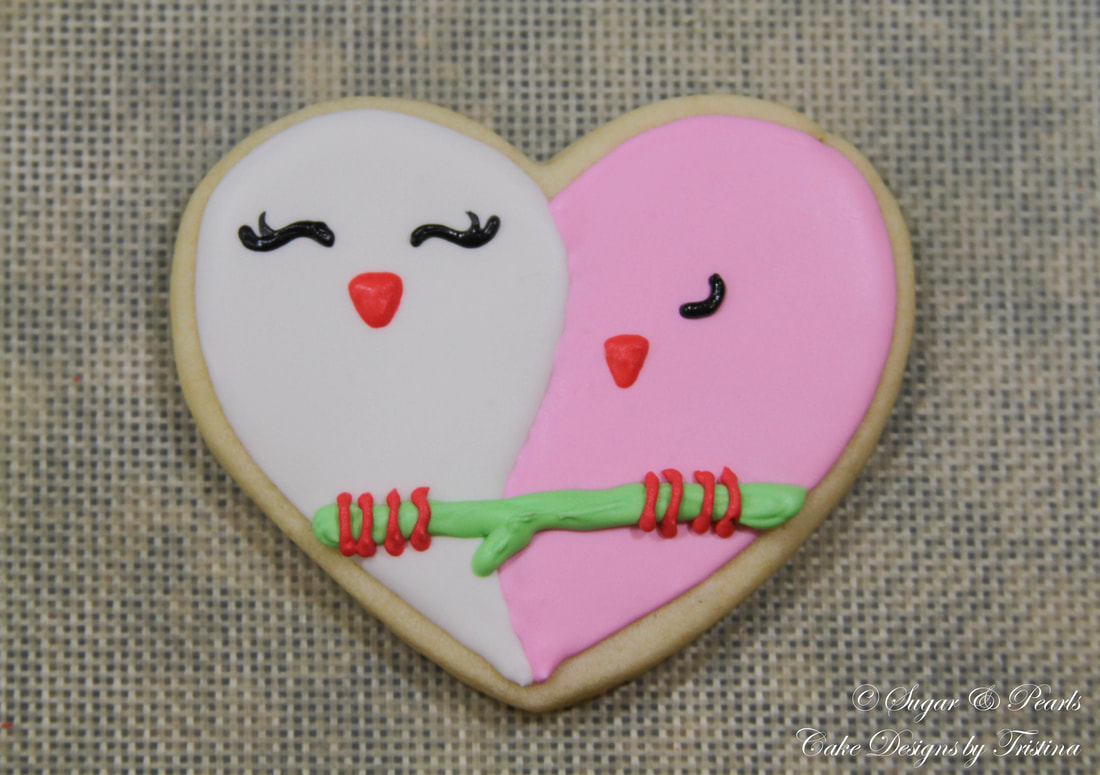
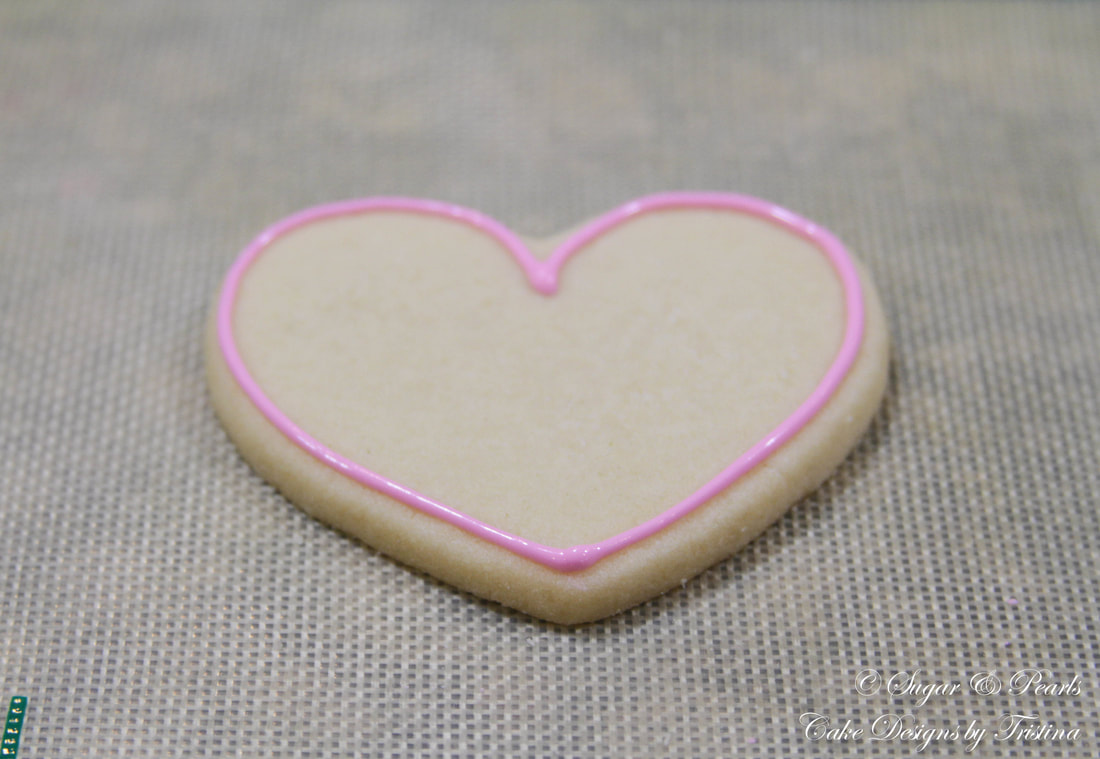
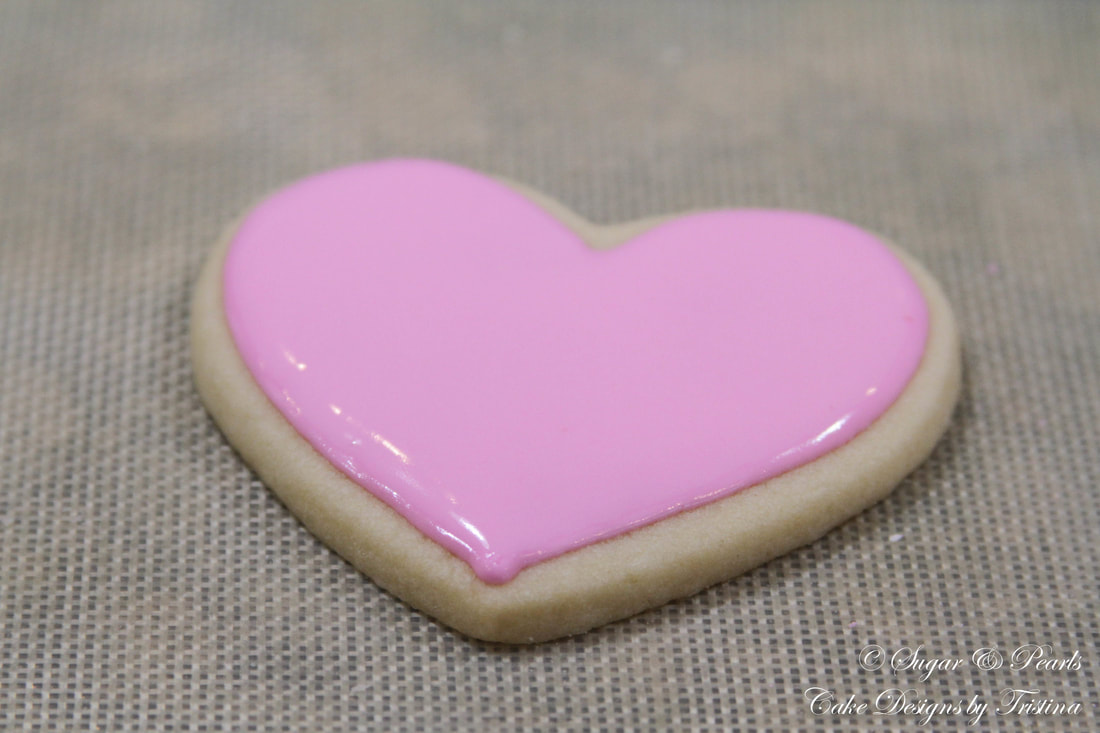
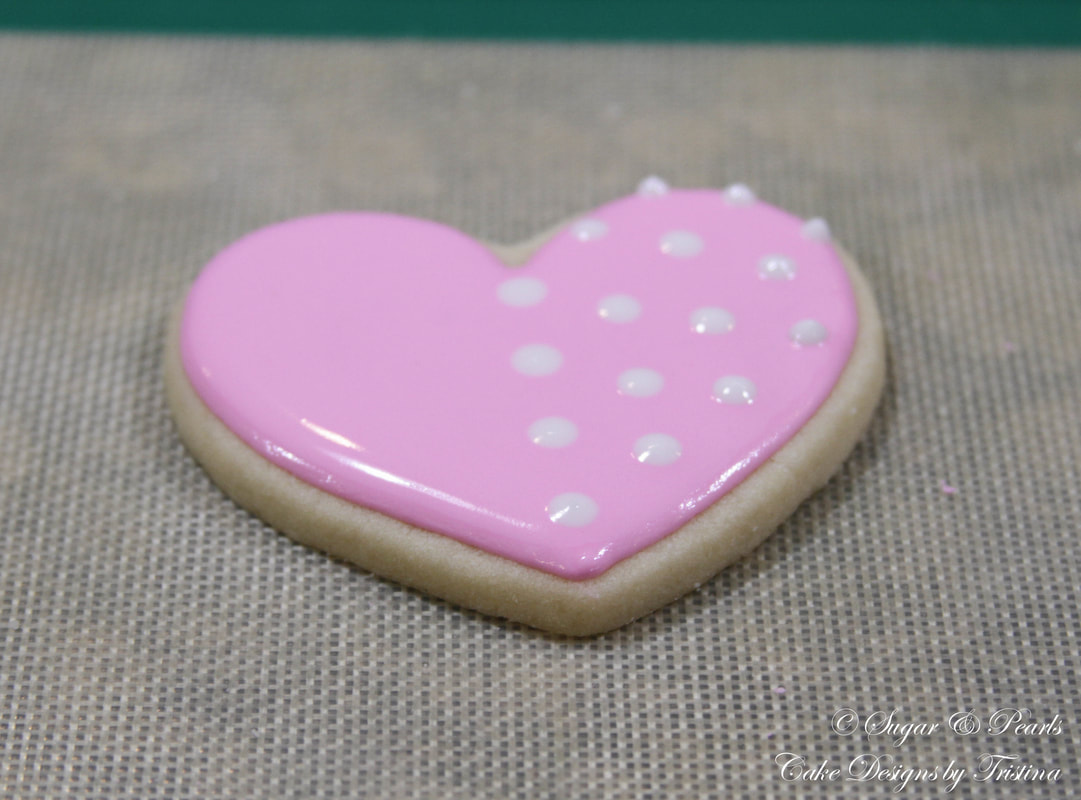
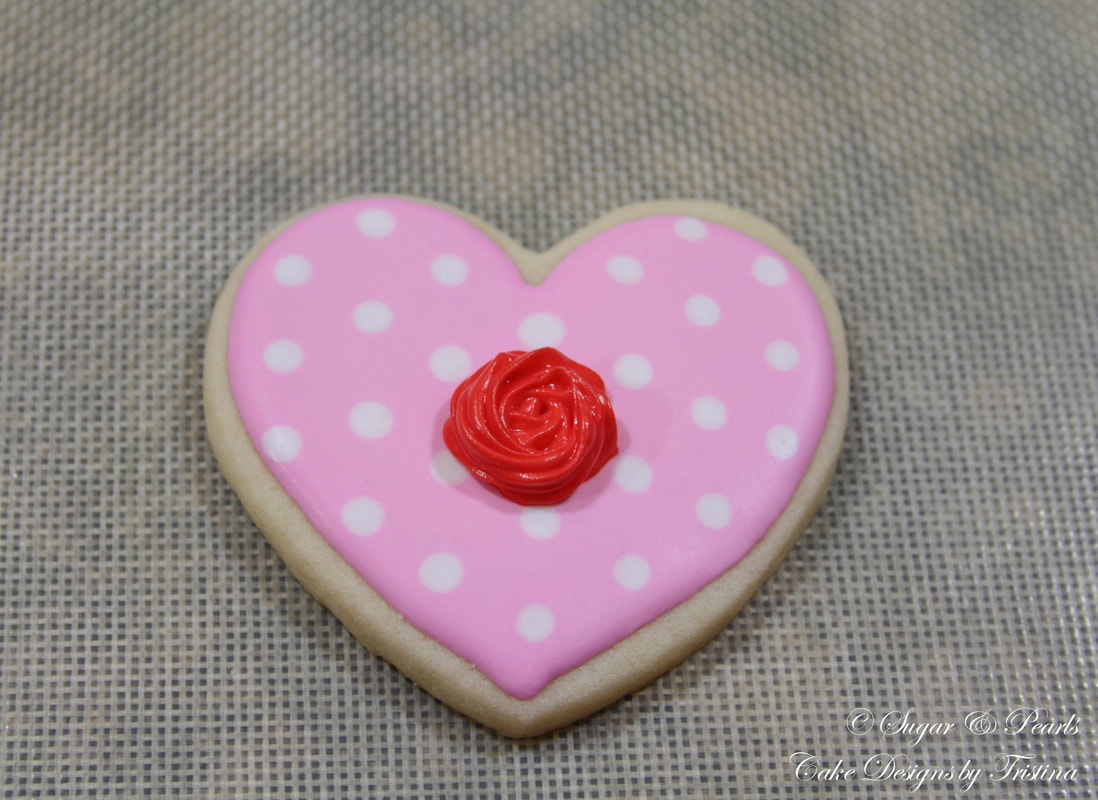
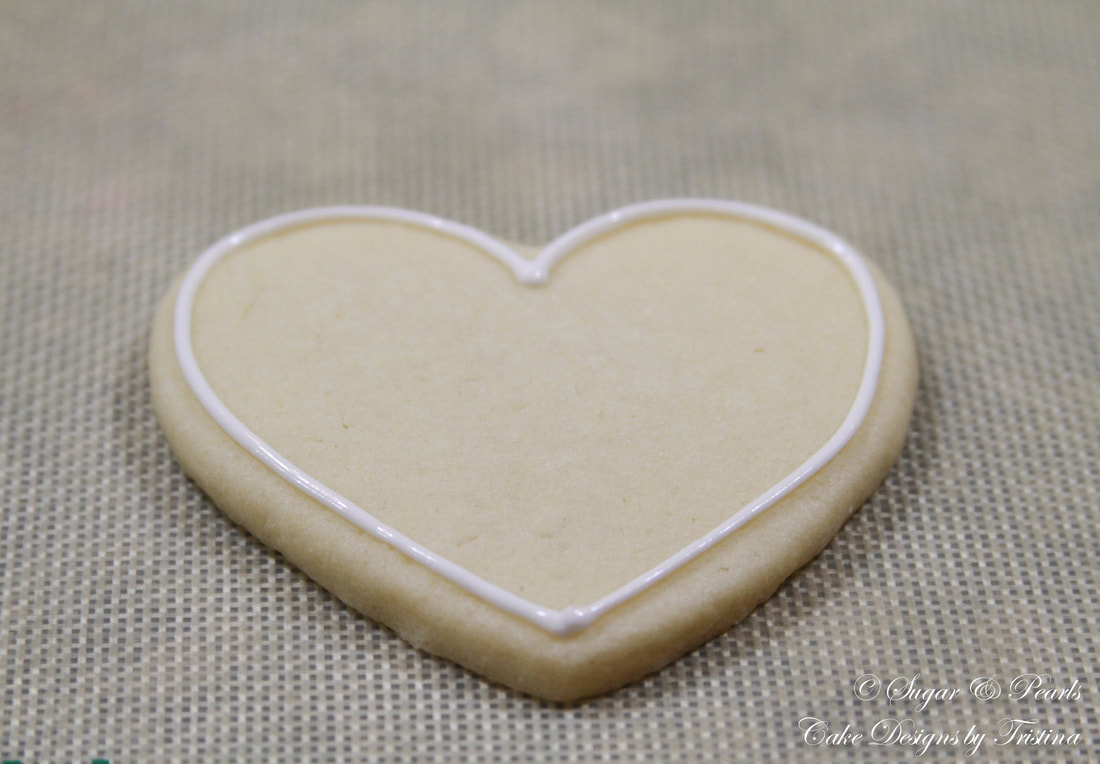
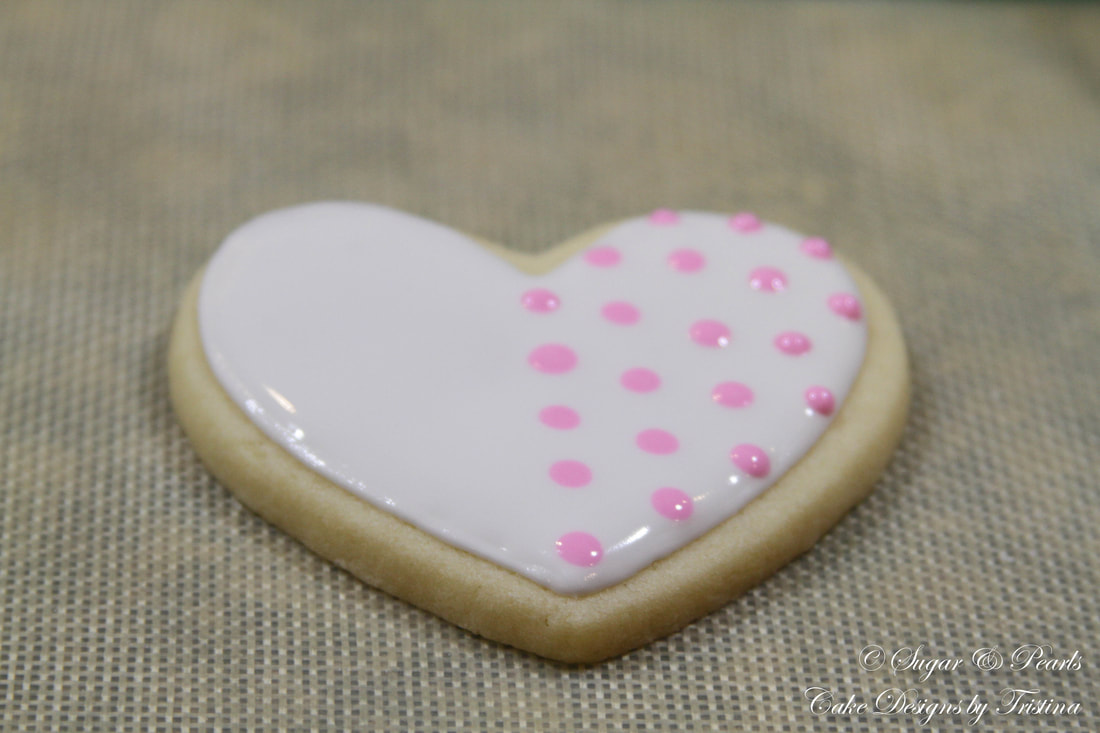
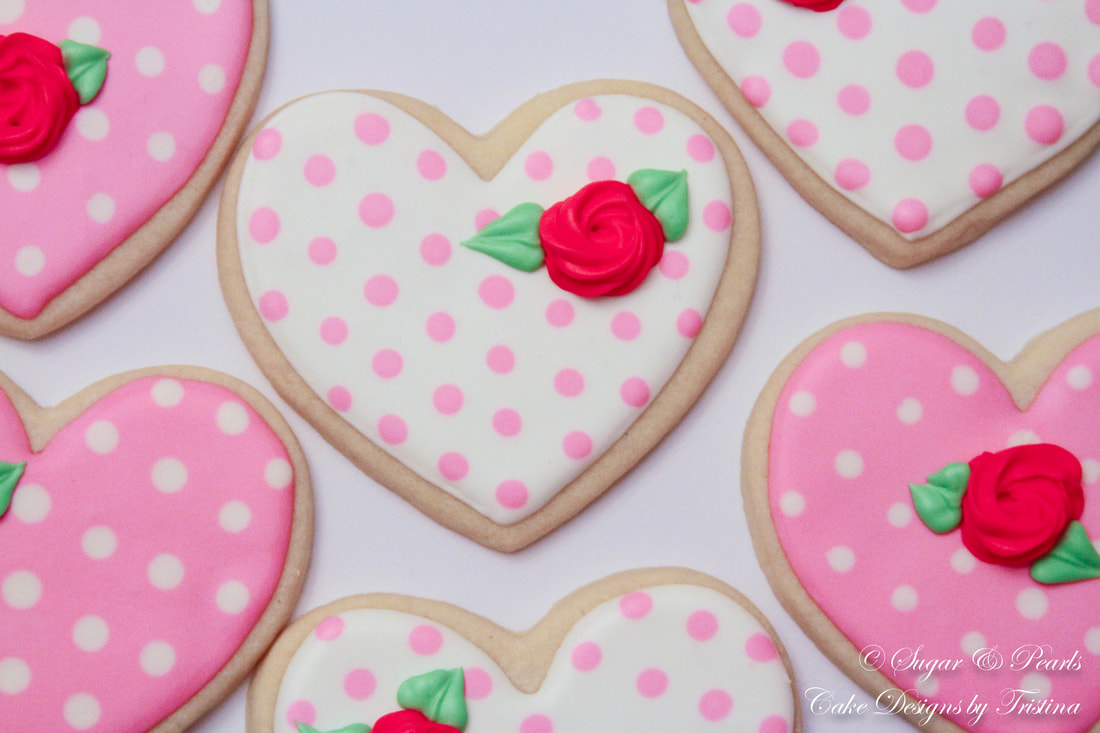
DECORATING SUGAR COOKIES This is the best part of making sugar cookies. At least it is for me. But you really have to go through the above steps to get here (whewww!!!). I suggest to prepare all of the icing and different colors before you dive into decorating. That would save you a some time. I don't always get to do this, because I hate having to leave my icing overnight. So, I usually make fresh icing as I go. The reason being is because I still need to whisk the icing up again the following day. The icing will separate as they sit over a long period of time, so the consistency will not be the same. You cannot skip this step or your icing will be runny. For decorations, I don't like using the plastic bottles to hold my icing for piping. I have seen a lot of folks do this, but every time when I tried to do this, it failed me. The plastic bottles are too hard for me to squeeze; so, I go with the pastry bags instead. I also find that having different consistency of icing, even for the same color, are helpful in decorating these cookies. It is time consuming (I already warned you), but it works out way better for me. I also like to flood all of the cookies first, leave them overnight to dry, and then add decorations the following day. This is essential if you don't want to see "bleeding" which had happened to me in the past. Or you can blame it on the humidity during the warmer months. 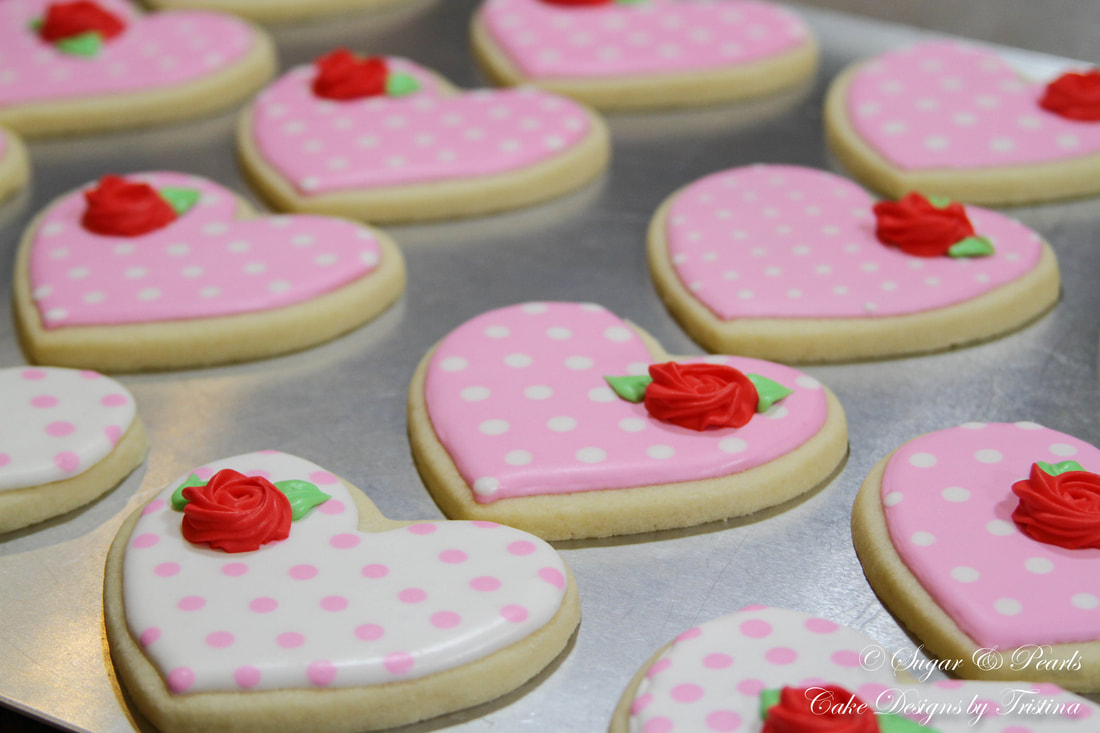 Lovebirds cookies I decorate the "lovebirds" cookies first because they require much more decorations. I start with piping the border and then flooding the entire surface. I make the white bird first, following by the second pink bird. Then, I make the green branch for the birds to stand on. Noted the consistency of the branches here are thicker and I make the bumpy birches on purpose. Next, I pipe the claws and the beaks of both birds using red icing. I finish the cookies with the black eyes and the wings for both birds.  Polka dots cookies I pipe the border around the entire cookie, and then flood it with the same color accordingly. Once the entire cookie is covered nicely, I immediately pipe the polka dots using the "wet method." I start out at the center and spread out on one side before starting on the other side. If you wait for too long, the polka dots will not blend into the background and will create bumpy dots. This step requires you to be very fast and accurate. If you make a mistake, there is no turning back. To add a rose to the cookie, I use the hard consistency icing coloring with red, and the pastry bag fitted with a Wilton tip to pipe the red rose. 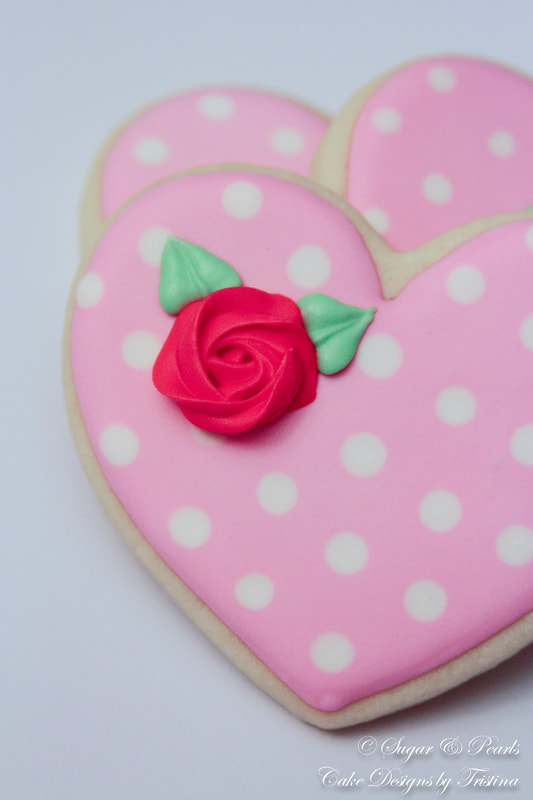 I use the same technique to make the white heart with pink polka dots and add the red dose in three different areas of the cookies. 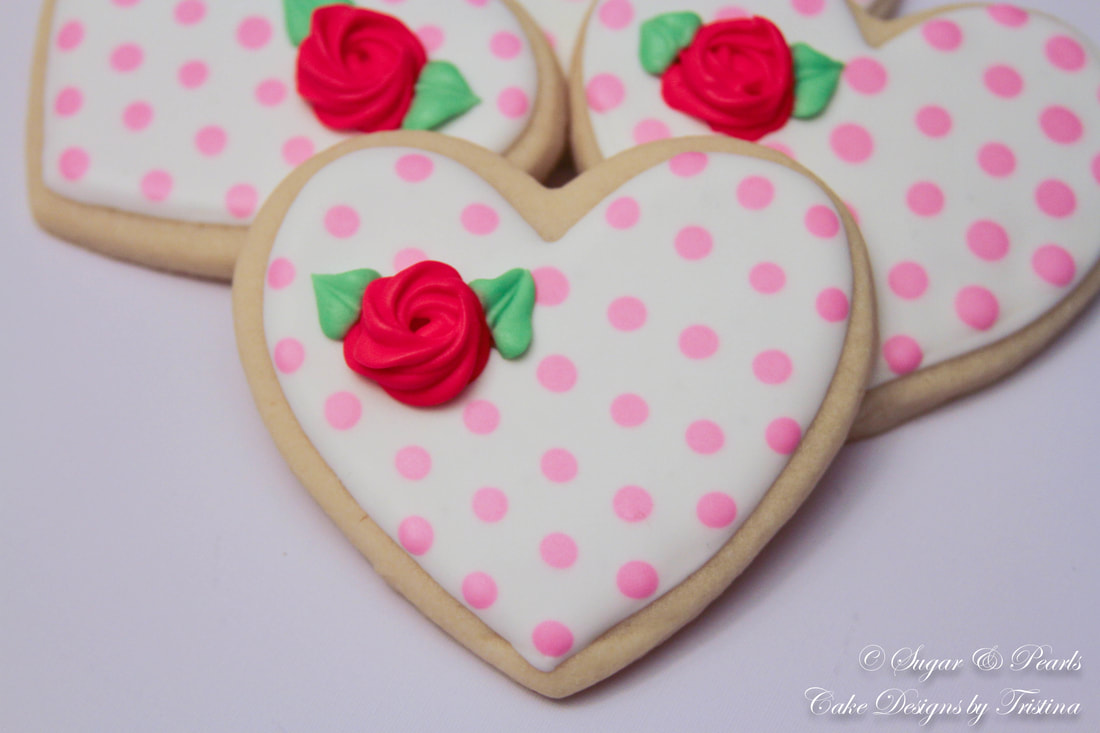 My daughter was hoovering over these sugar cookies when they were fresh out of the oven. She had to ask for a piece every day for 3 days straight until I said no more. I don't like sugar cookies that much. I don't ever crave for them. I learned how to bake them so I can decorate them! But I find these sugar cookies tastier and way better than those you find a the grocery stores. Of course, they are not as sweet, but that's how we like our sugar cookies at my house. I package the cookies in a food safe bag along with a Valentine's Day card with the kids' name. The kids were super excited to pass these out to their classmates on Valentine's Day. 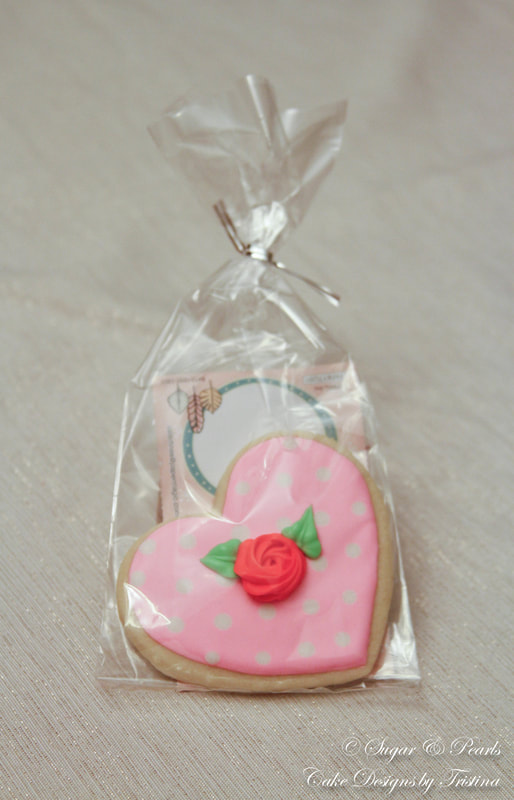 After these sugars, I realized I need a whole lot more PRACTICE in piping royal icing! It is obvious that my cookies are not perfect. And I am not trying to make them perfect. But if I can get some extra 20 hours in the day, I will definitely try to master this technique. xoxo, Tristina Sugar Cookies Recipe  Make: 36 medium heart-shaped cookies Total time: 2 hours (or more depending on your decorations) Ingredients Sugar Cookies
Royal Icing
Instructions Sugar Cookies
Royal Icing
***Sugar Cookies Recipe is adapted by Make Bake Celebrate. ***Royal Icing Recipe is adapted by Wilton. COPYRIGHT © 2018 - SUGAR & PEARLS ~ CAKE DESIGNS BY TRISTINA
0 Comments
Your comment will be posted after it is approved.
Leave a Reply. |

AboutTristina TiepNhu Nguyen is a pharmacist by weekday and a baker by weekend. She is also a wife and a mother of two children. Free Cake Tutorials!Sign up for my newsletter and you will be the first to know about my new recipes and cake tutorials!
Recent Posts
August 2020
RecipesTutorials |
|
|
sugar & pearls |