Summer Beach Cake
August 20, 2017
This is the cake what I was hoping to "WOW" you as I celebrate my sister's 38th birthday and the blog one-year anniversary. But I am disappointed to say that this cake is a biggest disaster in my entire baking years! I got mixed responses from this cake. Some said they are different and fancy; some did not care about it; my little ones think it is the most "beautiful shoes" cake they have seen. But they are kids right? What do they know about the standard of cake decorating?
I spent three days decorating this shoes, and my fondant has never given out on me this bad until today. The original design for this shoes does not look anything like this. It should really has a few ankle straps, 3 to be exact, but they were all falling apart the day of the event! This is the best that I can do to salvage what was left from the shoes. Another option was to throw it away, but I did not have a heart to do so because I put HARD WORK into making this shoes. Plus, it is not comforting to hear my husband commenting that, "you need a mold for this type of cake." What he really meant was the cake isn't presentable...
Maybe this is going to be the first and last shoe cake that I am going to make. I am not sure when will I be making another one, I don't know, maybe in 20 years?! I also debated for a week straight to execute this cake tutorial or not, as you can already see, I was a complete failure at this cake. But hey, this is part of my baking process and this unsuccessful cake may serve as a motivation for me to be better (or maybe to take one to two decorating classes).
DECORATIONS PREPARATION
The shoes is the main decoration for this cake, and I failed miserably at making it. Originally, I wanted to make a high heal with ankle straps and everything. Let just say it totally did not turn out the way I imagined it to be. And there was no turning back as I needed the cake today, and my original shoes was falling apart!
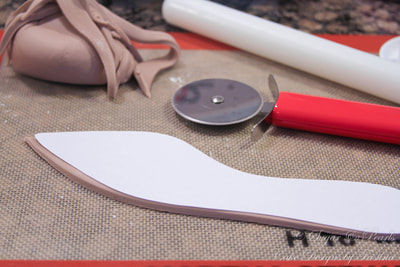
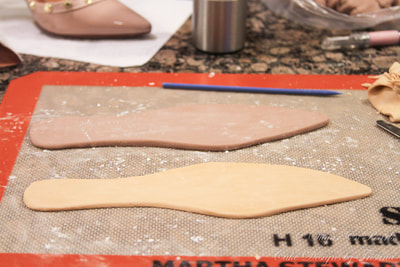
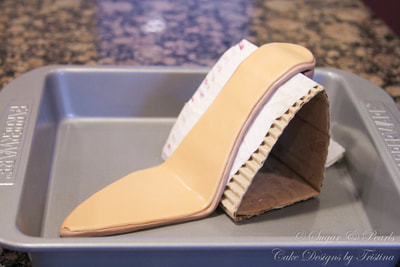
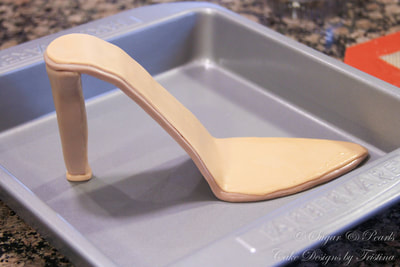
I decided to mimic my favorite shoe color, which is poudre. I achieved this by mixing light brown and a few drop of purple. There are shoes molds for this type of thing, but I did not have any on hands. So, I used a hard cardstock and cut out the outsole of the shoes first. For the insole of the shoes, I used a tan color and cut a smaller version of the shoes outsole and placed it on top of each other. I also created my own "shoes rest" board for the shoes to dry. I made this 4 days before the event to allow enough drying time. If you skip this step, your shoes will not hold its shape.
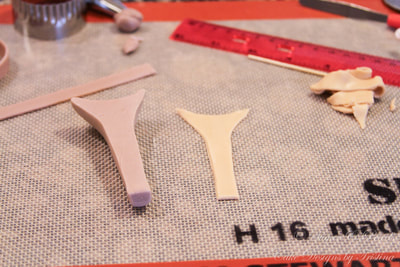
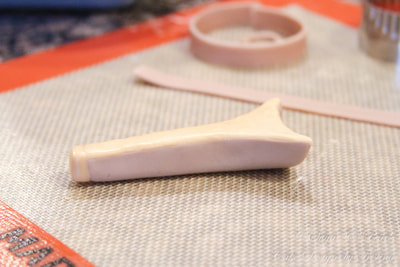
Then, I made the shoes heel using an oblong shape of fondant and rolled into the heel breast. Make sure the height of the heel would fill the shoes rest so they can dry up appropriately. I also made a thin layer for the back of the heel in a similar shape. I also added top piece at the end of the heal using the tan fondant color. I leave these over 4-5 days to dry.
The shoes is the main decoration for this cake, and I failed miserably at making it. Originally, I wanted to make a high heal with ankle straps and everything. Let just say it totally did not turn out the way I imagined it to be. And there was no turning back as I needed the cake today, and my original shoes was falling apart!
I decided to mimic my favorite shoe color, which is poudre. I achieved this by mixing light brown and a few drop of purple. There are shoes molds for this type of thing, but I did not have any on hands. So, I used a hard cardstock and cut out the outsole of the shoes first. For the insole of the shoes, I used a tan color and cut a smaller version of the shoes outsole and placed it on top of each other. I also created my own "shoes rest" board for the shoes to dry. I made this 4 days before the event to allow enough drying time. If you skip this step, your shoes will not hold its shape.
Then, I made the shoes heel using an oblong shape of fondant and rolled into the heel breast. Make sure the height of the heel would fill the shoes rest so they can dry up appropriately. I also made a thin layer for the back of the heel in a similar shape. I also added top piece at the end of the heal using the tan fondant color. I leave these over 4-5 days to dry.
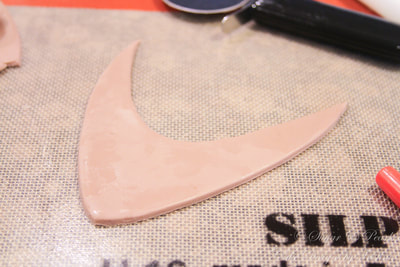
Next, I made the vamp of the shoes using a card stock to cut the desired shape. I glued this around the top of the shoes insole and stuffed it with paper and cotton to hold its shape for about 2-3 days.
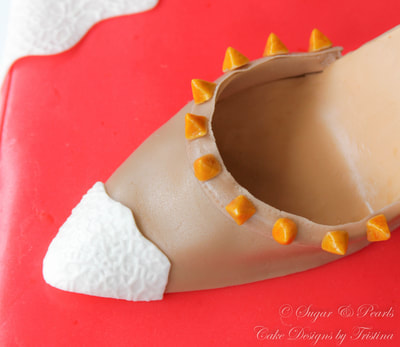
The studs were made using a small round fondant and trimmed into a pyramid shape individually and placed around the top-line of the shoes. I also painted these studs with lemon golden food coloring.
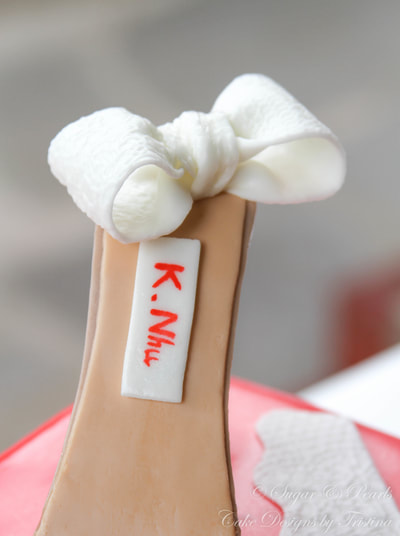
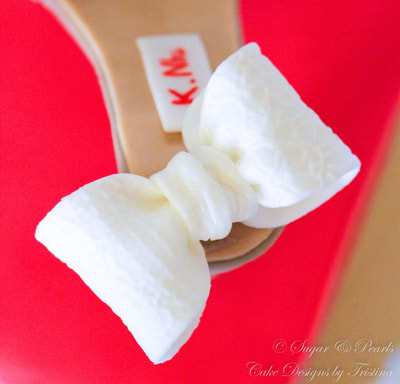
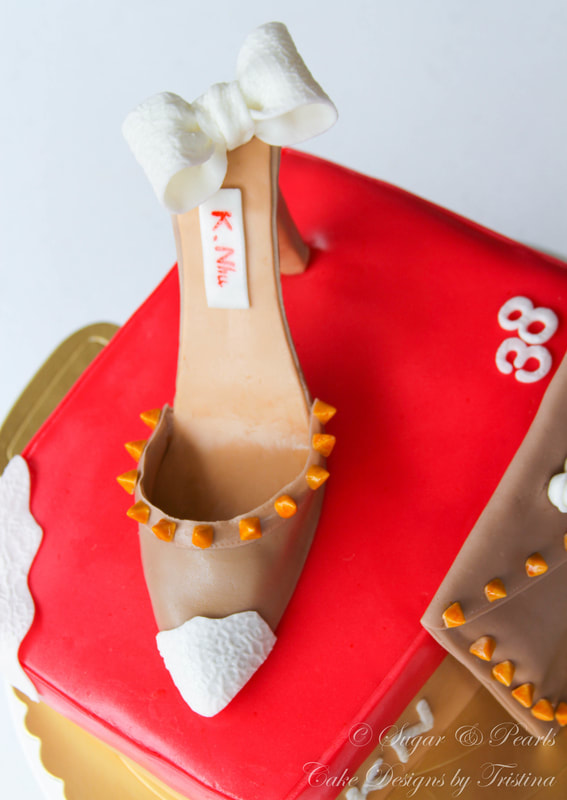
To give an elegant look to the shoes, I also added a white, lace on the tip of the shoes and a bow on the heal seat of the shoes. This were where the straps should have been, but I removed them as they were fallen apart. I wanted to try the new lace mold that I got a few months ago. So I rolled a thin, white fondant on this mat to get the laced imprint. Then I cut two 3-inch rectangle white fondant strips of the same size. I gathered the two ends of the fondant together to make a cease and folded them in half. I leave "the half-bow" in my fondant roller to dry overnight. The bow “ends” were made using two 2-inch fondant strips, and were trimmed diagonally for a more natural look. A leftover white fondant was also cut unevenly and placed on the tip of the shoes to match with the bow.
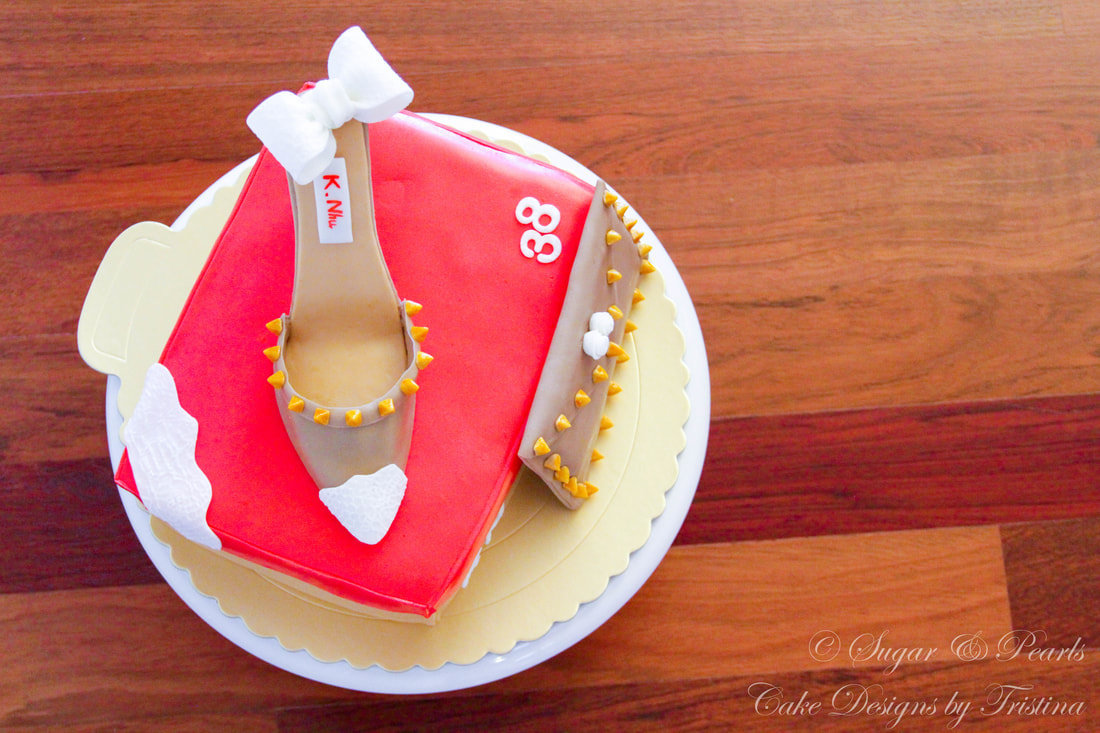
The last touch to finish the shoes was to add the "brand label” to the shoes insole. I cut a small piece of white, rectangular fondant and wrote the birthday's girl name on it using red food coloring. The reason this was written in red because I wanted it to match the shoes box.
The studs were made using a small round fondant and trimmed into a pyramid shape individually and placed around the top-line of the shoes. I also painted these studs with lemon golden food coloring.
To give an elegant look to the shoes, I also added a white, lace on the tip of the shoes and a bow on the heal seat of the shoes. This were where the straps should have been, but I removed them as they were fallen apart. I wanted to try the new lace mold that I got a few months ago. So I rolled a thin, white fondant on this mat to get the laced imprint. Then I cut two 3-inch rectangle white fondant strips of the same size. I gathered the two ends of the fondant together to make a cease and folded them in half. I leave "the half-bow" in my fondant roller to dry overnight. The bow “ends” were made using two 2-inch fondant strips, and were trimmed diagonally for a more natural look. A leftover white fondant was also cut unevenly and placed on the tip of the shoes to match with the bow.
The last touch to finish the shoes was to add the "brand label” to the shoes insole. I cut a small piece of white, rectangular fondant and wrote the birthday's girl name on it using red food coloring. The reason this was written in red because I wanted it to match the shoes box.
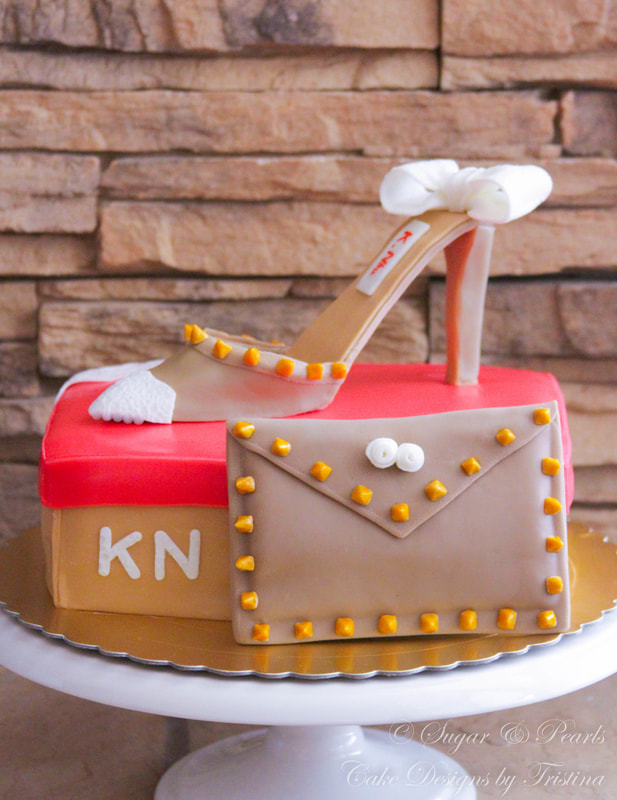
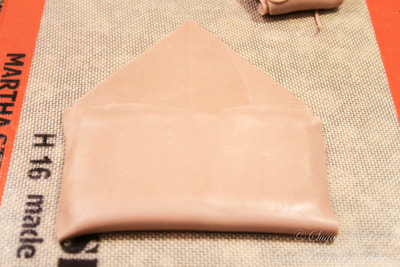
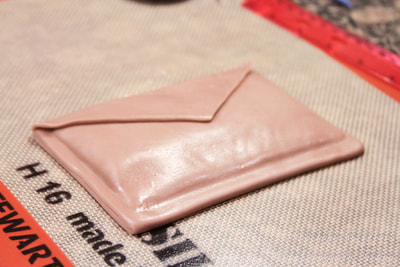
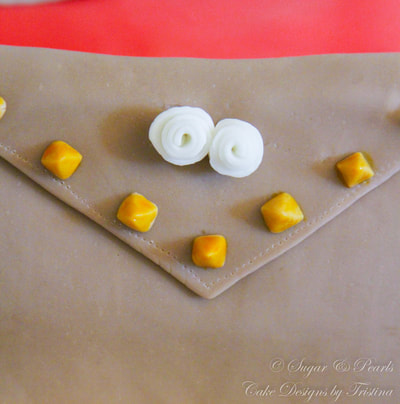
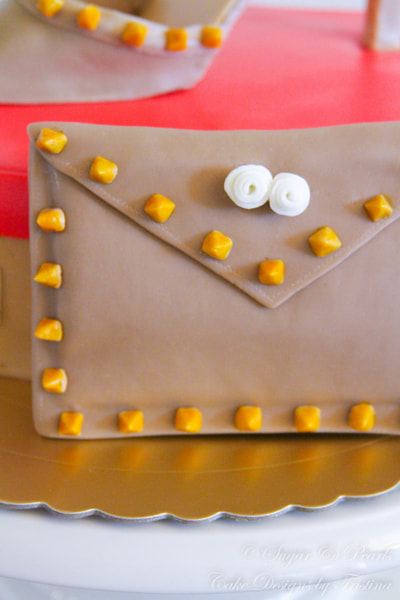
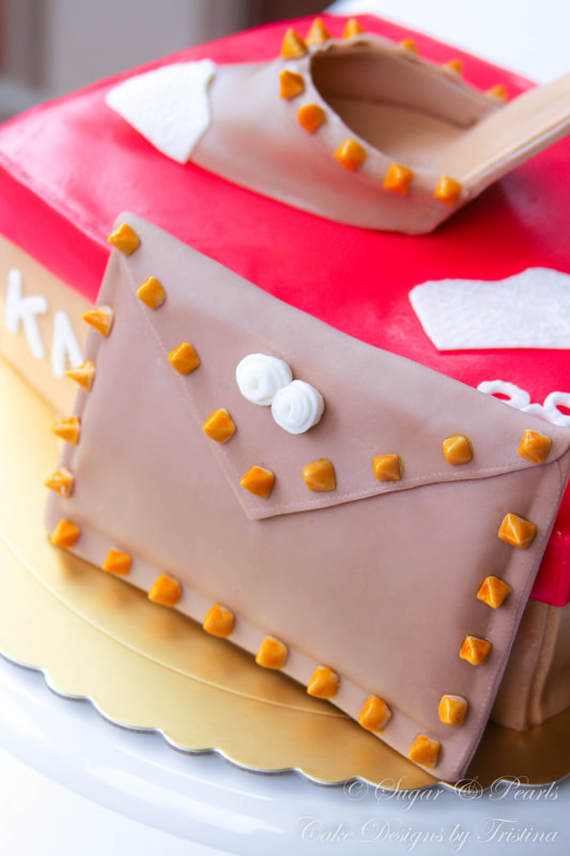
After 4 days spending on making and air-drying the shoes, I moved on to make a simple hand clutch as I did not have time for a handbag. I will save this project for another time, I promise. The clutch was made using a long, rectangular fondant with the same color of the shoes. I stuffed this clutch with paper towels and bonded around the edges. The triangle flap was then cut and folded onto the clutch. I placed the same pyramid studs used on the shoes around the edges of the clutch. I also added the two white mini roses on the center of the flap to keep the similar tie to the shoes.
Noted that the color of the fondant is darken over time, and thus the above two images of the clutch were from the newly colored fondant, whereas the bottom of the final clutch was a few shades darker after one night.
Noted that the color of the fondant is darken over time, and thus the above two images of the clutch were from the newly colored fondant, whereas the bottom of the final clutch was a few shades darker after one night.
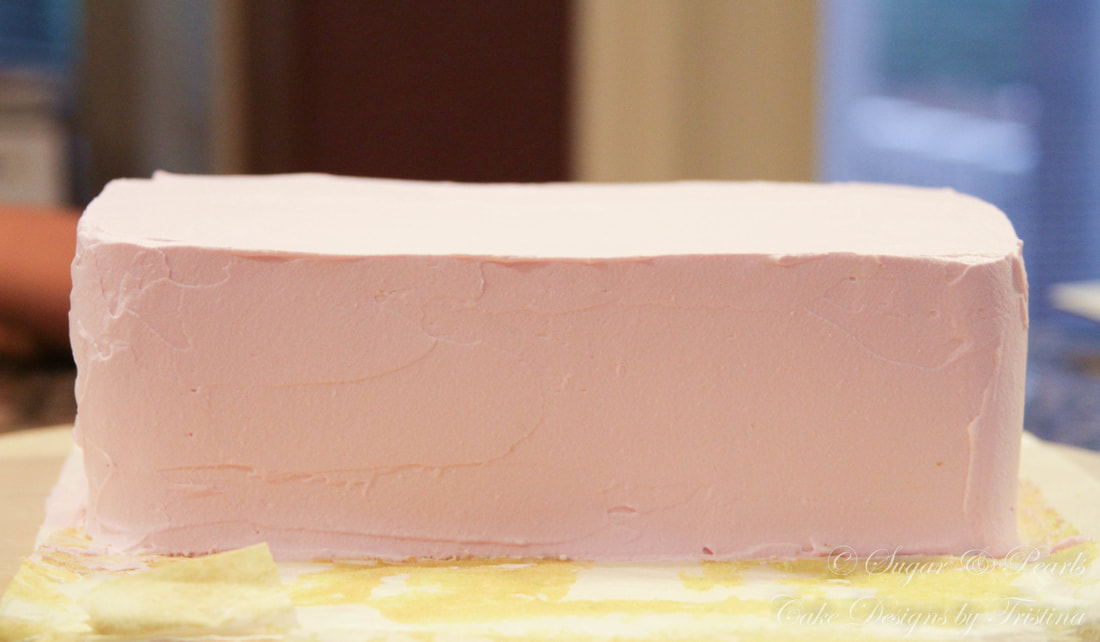
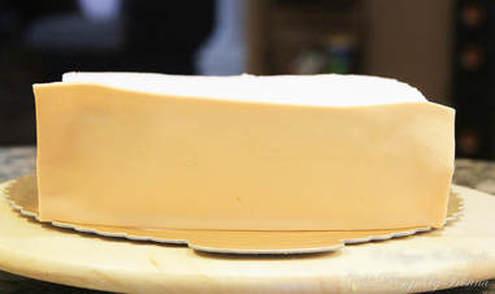
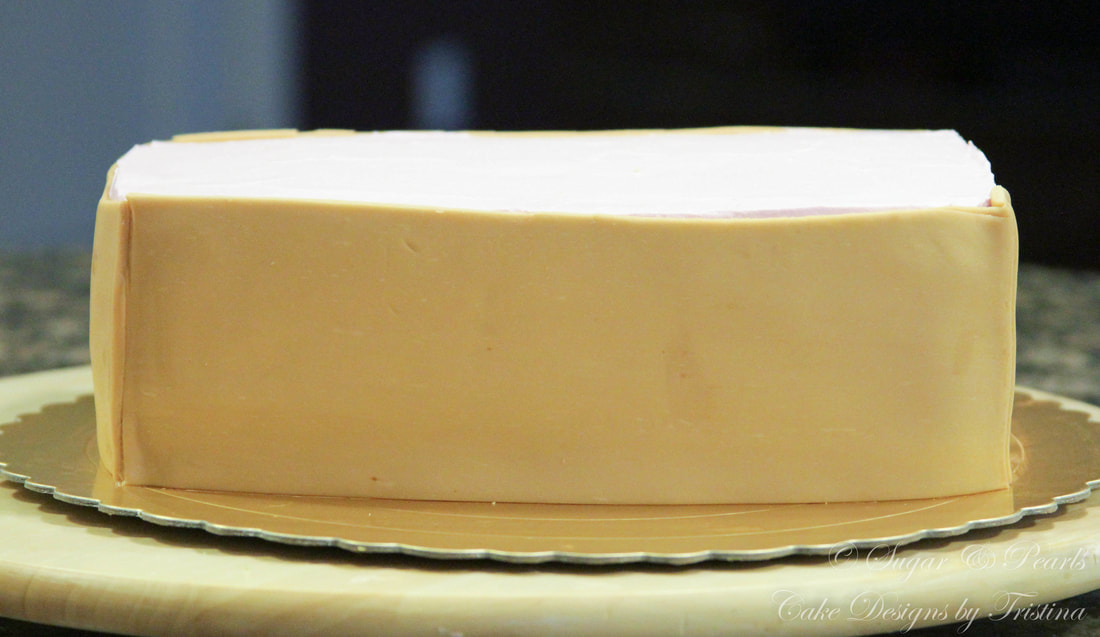
CAKE ASSEMBLING
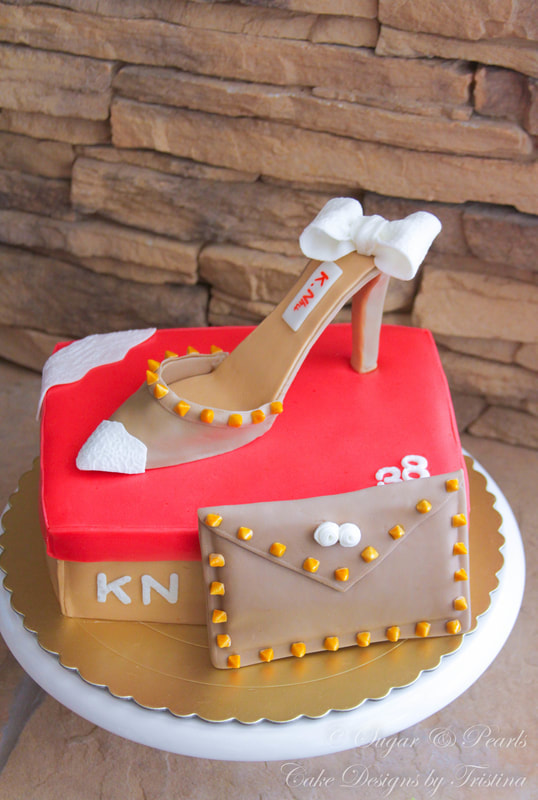
This is a 12 x 9 inch rectangular cake which was cut in halves to make a two-layer 6 x 4.5 inch cake. I used my Pandan Sponge Cake Recipe with coconut and durian whipping cream fillings. After frosting the cake, I added the light brown fondant around the cake for a natural look of a cardboard shoes box. I trimmed around the edges to make sure they aligned well and then using the same steps, I added the red fondant on the top of the cake to create a closed "box lid." I stored this shoes box in the fridge to chill for about one hour before I placed the shoes and hand clutch on to the cake.
This is a 12 x 9 inch rectangular cake which was cut in halves to make a two-layer 6 x 4.5 inch cake. I used my Pandan Sponge Cake Recipe with coconut and durian whipping cream fillings. After frosting the cake, I added the light brown fondant around the cake for a natural look of a cardboard shoes box. I trimmed around the edges to make sure they aligned well and then using the same steps, I added the red fondant on the top of the cake to create a closed "box lid." I stored this shoes box in the fridge to chill for about one hour before I placed the shoes and hand clutch on to the cake.
|
|
|

|
This shoes box cake was finished with a white, lace trim around one corner of the box and the number "38" on the opposite corner of the box. As you probably have already figured out that the number indicates my sister's age. I also wanted to give a shout out to her name, but without making it to wordy. Hence, I added her initials on the side of the shoes box. This makes sense as most of the shoes brand oftentimes are labeled in initials. And, finally, I placed on complete shoes on top of the box, and the hand clutch on the side of the box.
There were just so many errors in making this cake that I almost gave up. I was about to just bring a "shoes-box" cake to my sister without the shoes. A few things I wish I could have done differently were: to make a simpler shoes or to create the whole shoes in 2 days so the straps are elastic enough to maintain its shape without breaking. Another option is to start searching for the shoes holder and shoes mold.
Shoes cakes starting to intimidate me now. The process of creating this shoes is painful without having all the right tools on hands! I was up for a challenge to make this cake, thinking that I could get away without using a mold. And if there is a mini pyramid stud molds that would have been extremely helpful.
Shoes cakes starting to intimidate me now. The process of creating this shoes is painful without having all the right tools on hands! I was up for a challenge to make this cake, thinking that I could get away without using a mold. And if there is a mini pyramid stud molds that would have been extremely helpful.
You already know my thoughts about this cake. I am disappointed at the entire process of making the shoes, that's for sure. Now, I will just let you be the judge to decide if this a presentable (or ugly) cake.
xoxo,
Tristina
xoxo,
Tristina
COPYRIGHT © 2017 - SUGAR & PEARLS ~ CAKE DESIGNS BY TRISTINA
