Basket Weaved Cupcakes
April 16, 2017
Happy Easter! This is the perfect occasion to make some edible baskets of eggs and flowers...and to enjoy (eat) them over your afternoon tea. My kids are super thrilled for this holiday because they get to do their "egg-coloring experiment" both at school and at home. This year, I'd learned a few new things about Easter through my son. Since this is the kids' first year at a Catholic Montessori School, they are taught a great deal of things about the Jesus, Catholics and everything from good angels to heaven. It is amazing how much information the kids have absorbed during the past 6 months at this school. Bad or good, I'm not quite sure as our family practice Buddhism. But, I think the grandparents are more intimidated with this than I am. As long as the kids are learning how to be kind and how to treat people with respect, I am a happy Mom!
Well, I just realize that this is going to be my very FIRST cupcake topper tutorial! Yet, it is not exactly a cupcake topper as the entire cupcake would be decorated. However, I am sure you will enjoy it as much as I did. Do not be daunted by the way these cupcakes look. For just a few simple steps, you could have these exact same basket weaved cupcakes in your own kitchen. Are you ready to start?
Well, I just realize that this is going to be my very FIRST cupcake topper tutorial! Yet, it is not exactly a cupcake topper as the entire cupcake would be decorated. However, I am sure you will enjoy it as much as I did. Do not be daunted by the way these cupcakes look. For just a few simple steps, you could have these exact same basket weaved cupcakes in your own kitchen. Are you ready to start?
Step 1: Make the Basket Handle
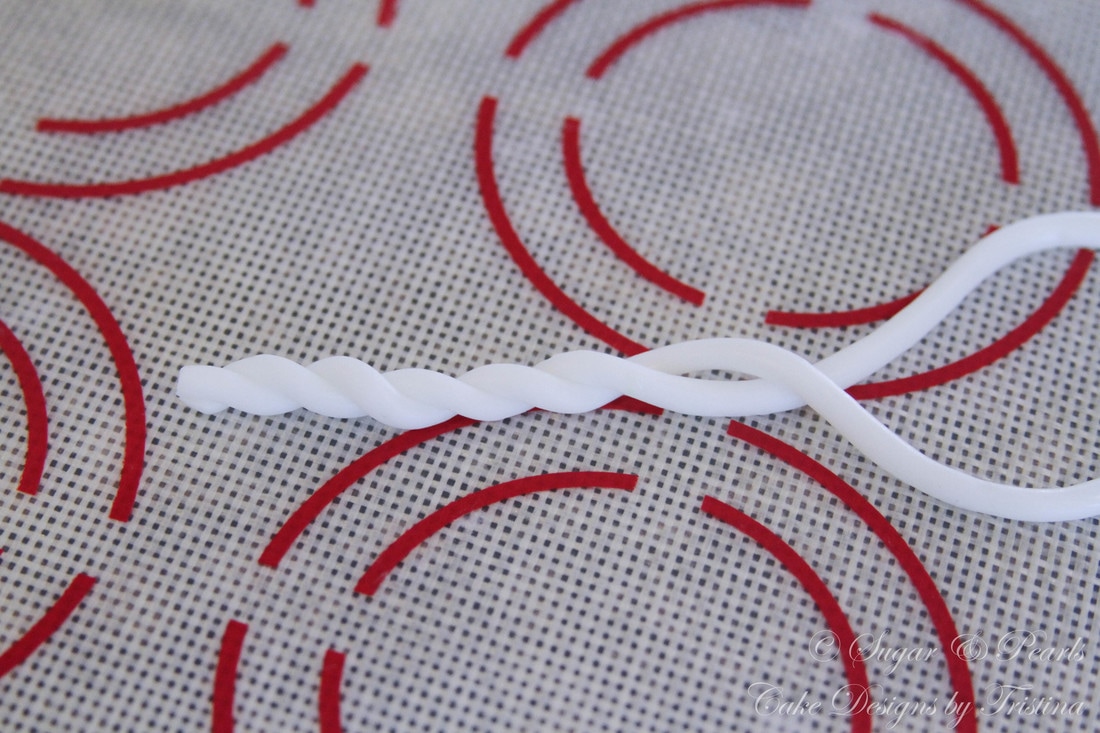
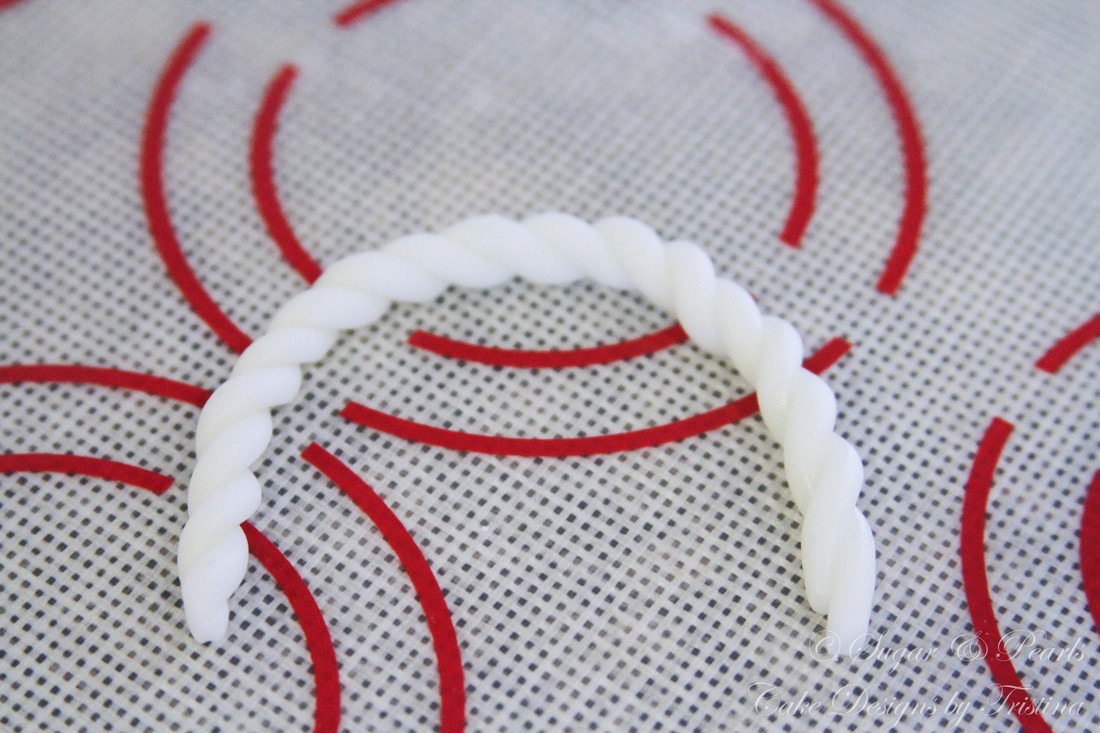
I start out by making the basket handle first, as it would take 2-3 days for it to dry and to hold its shape. You do want this to be firm. I use two same-size string-like white fondant and braid them together to create a "rope-like" appearance. I bend it into a half-circle shape and left it over 2 days to dry.
Step 2: Make the Basket Weave
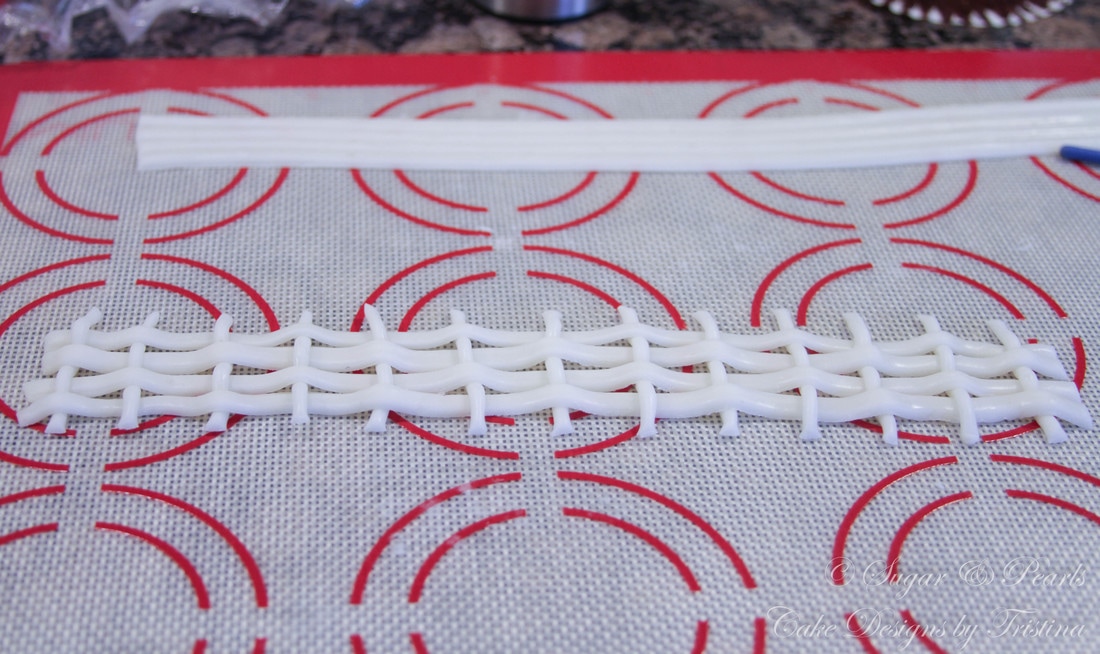
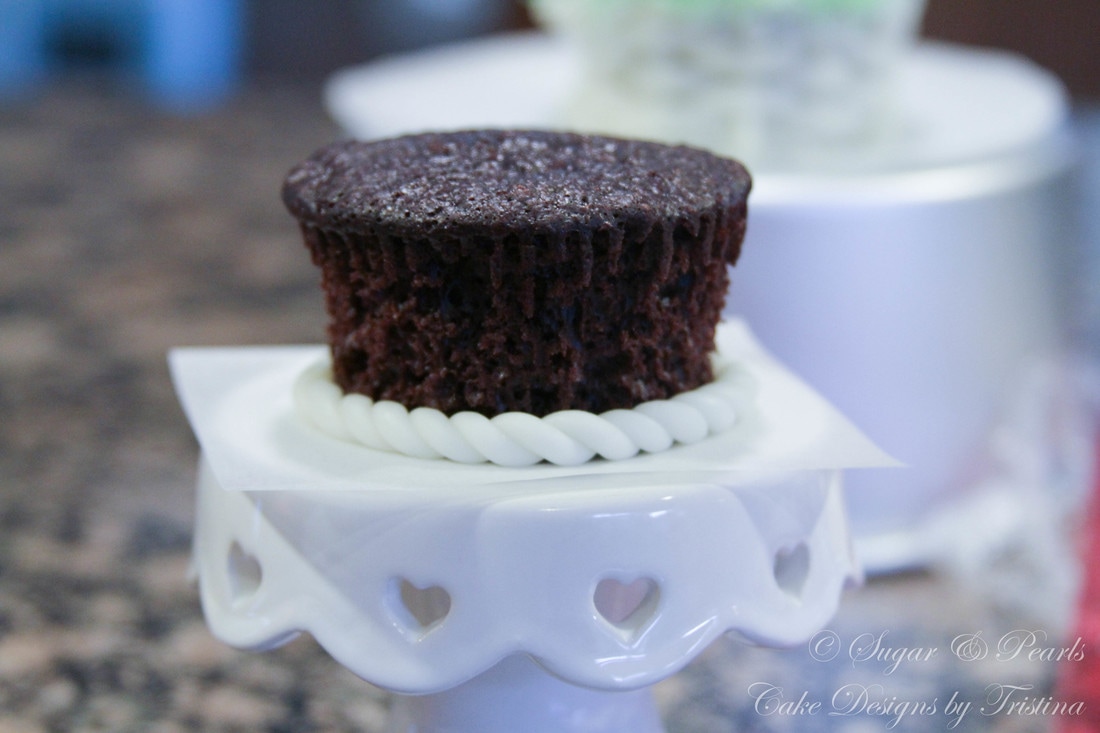
This is the longest step in the entire tutorial. I measure the outside diameter of the cupcake so I know how long and tall to make the panel of the basket weave. First, I create the "bottom rim" of the basket using the same technique as the basket handle. This will be used to wrap around the bottom of the cupcake.
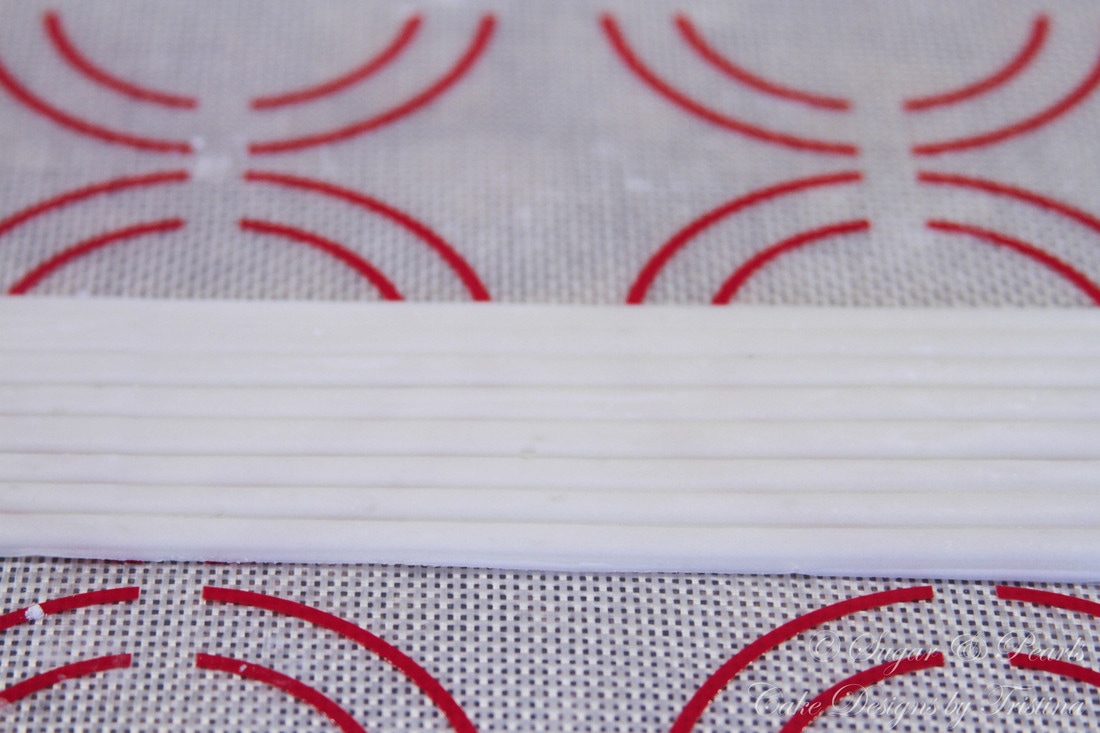
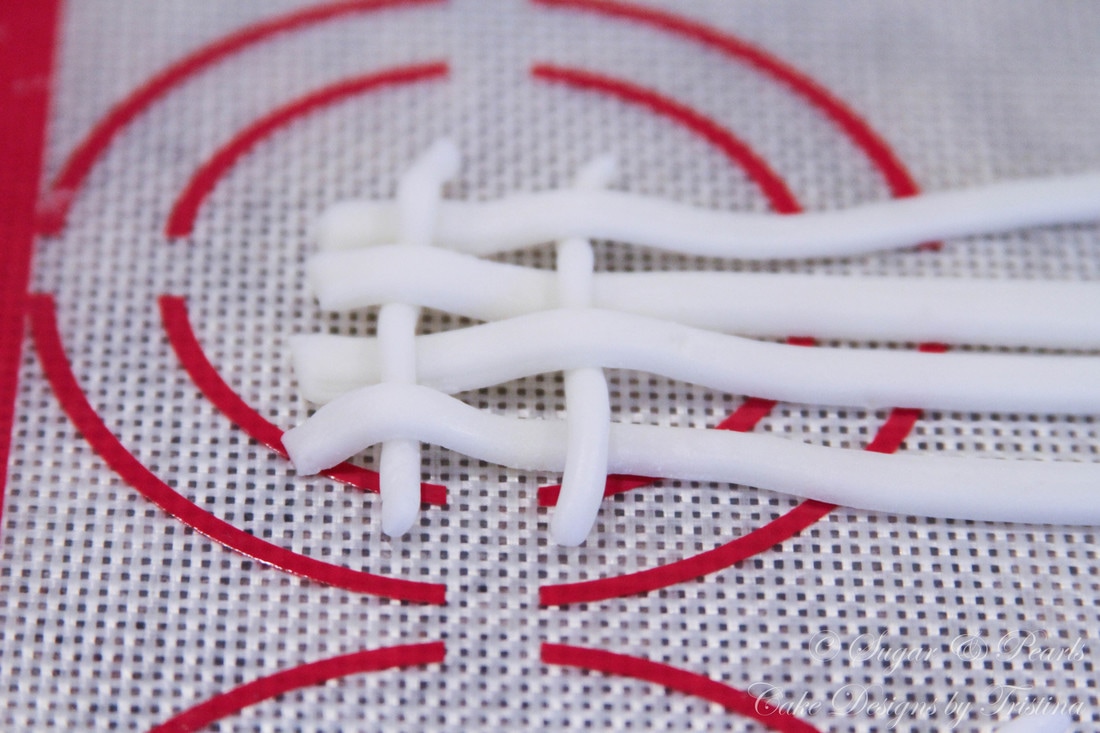
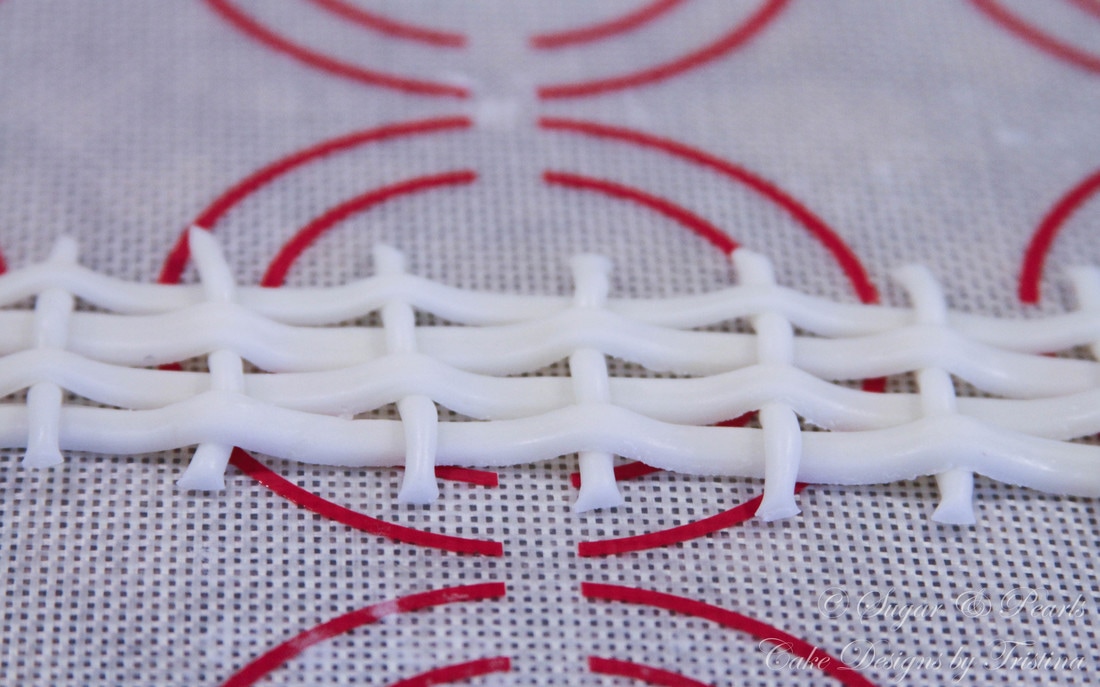
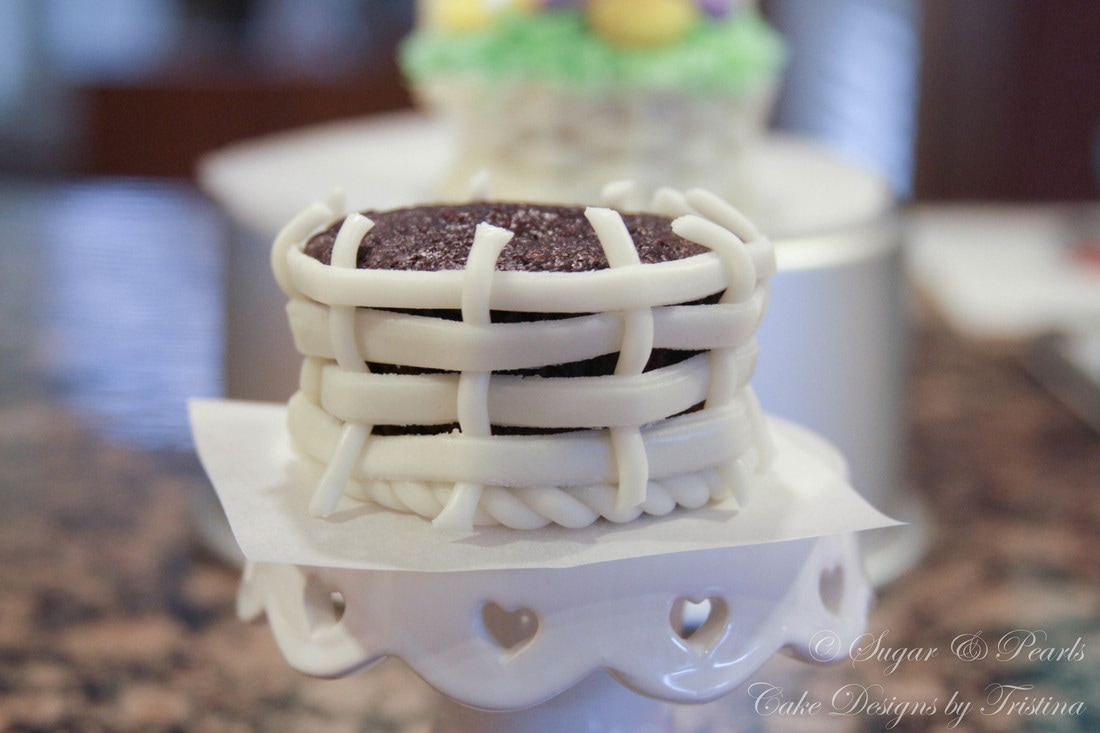
Second, I roll the white fondant out in a long rectangular strip. These strips should be slightly thick as you will be manipulating this piece quite a bit and does not want it to tear. I cut out 4 long strips of white fondants and line them horizontally next to each other. Then, I roll shorter strips to make the vertical lines that go down along the basket weave. These strips do not have to be perfect. Starting at one end, I weave the pattern together, alternating long strips underneath with short pieces. I repeat these steps until I have reached the end. I also trim the excess from both the top and bottom to create a smooth finish.
This is the longest step in the entire tutorial. I measure the outside diameter of the cupcake so I know how long and tall to make the panel of the basket weave. First, I create the "bottom rim" of the basket using the same technique as the basket handle. This will be used to wrap around the bottom of the cupcake.
Second, I roll the white fondant out in a long rectangular strip. These strips should be slightly thick as you will be manipulating this piece quite a bit and does not want it to tear. I cut out 4 long strips of white fondants and line them horizontally next to each other. Then, I roll shorter strips to make the vertical lines that go down along the basket weave. These strips do not have to be perfect. Starting at one end, I weave the pattern together, alternating long strips underneath with short pieces. I repeat these steps until I have reached the end. I also trim the excess from both the top and bottom to create a smooth finish.
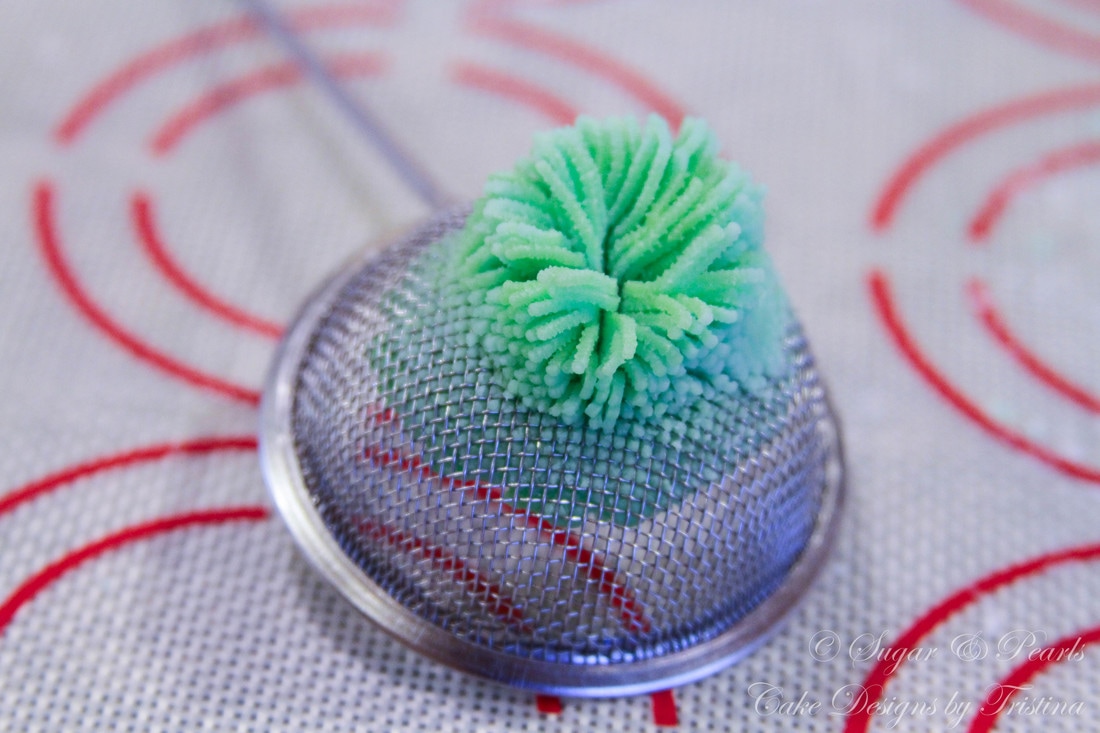
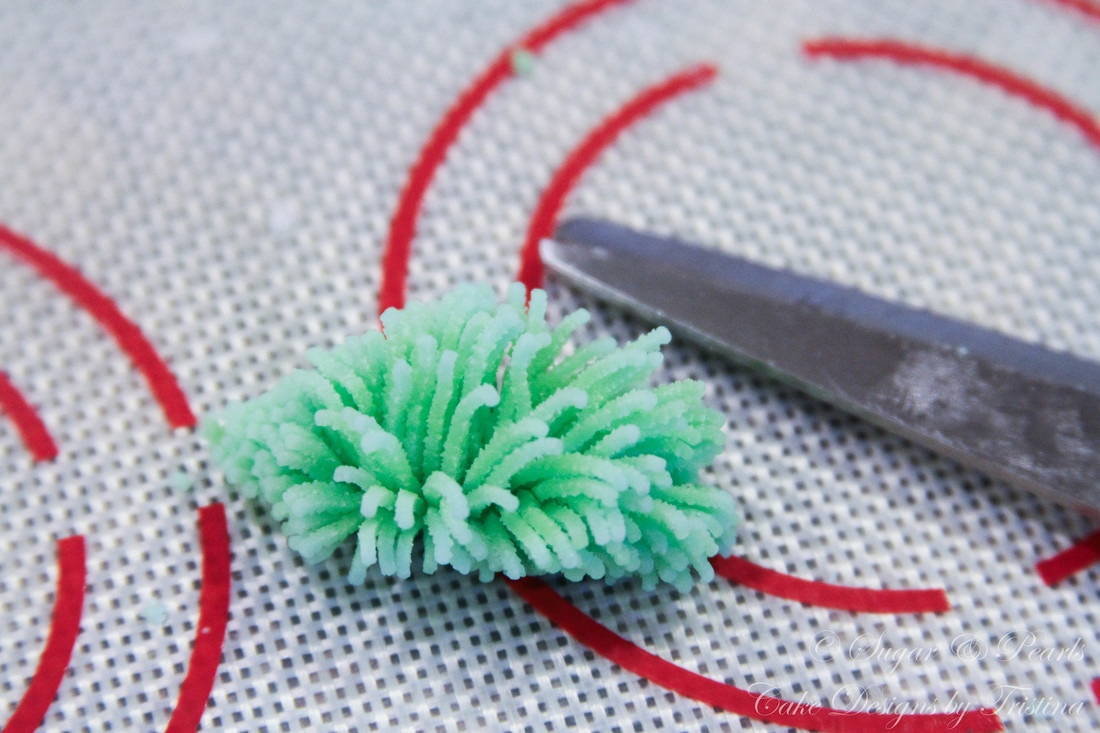
Step 3: Make the Grass
To make the green grass to top around the basket, I mix light and dark green fondant together and press it through a sieve. It does require some force, however, the grass looks so real and pretty that it is worth the effort. Once I have obtained the desired length, I cut the grass off of the sieve using a scissor. This way, the grass would stay in bunches and do not fall apart.
To make the green grass to top around the basket, I mix light and dark green fondant together and press it through a sieve. It does require some force, however, the grass looks so real and pretty that it is worth the effort. Once I have obtained the desired length, I cut the grass off of the sieve using a scissor. This way, the grass would stay in bunches and do not fall apart.
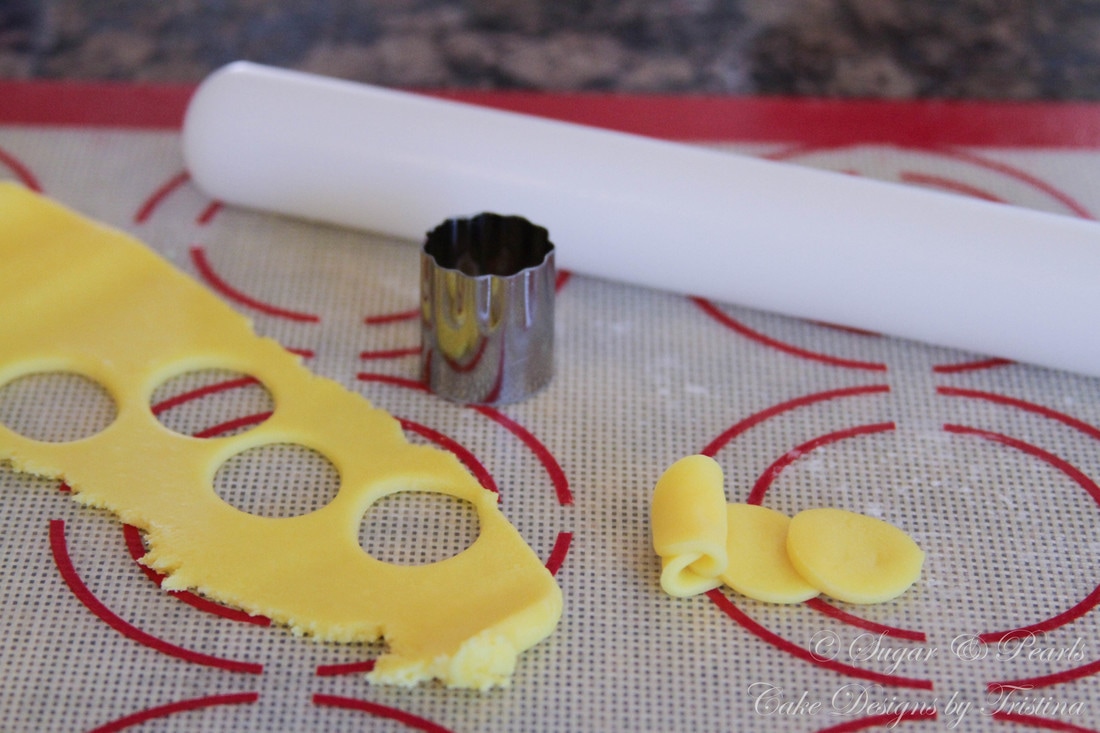
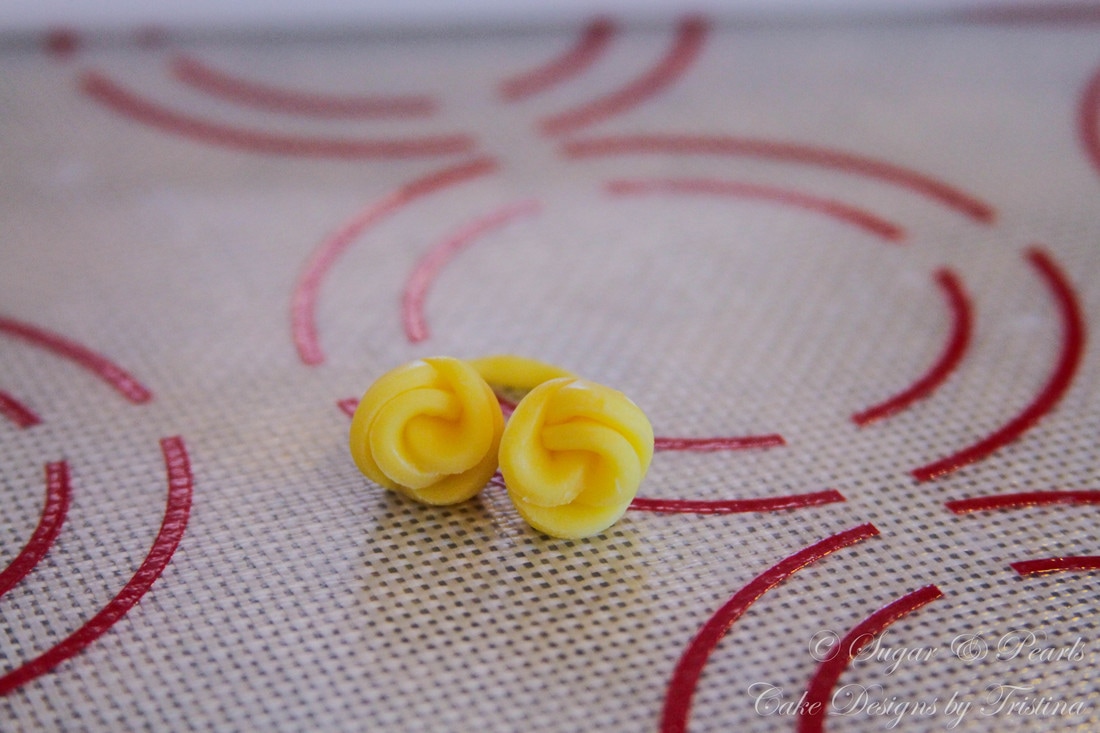
Step 4: Make Mini Roses
I use the simplest way to create the mini roses to decorate the basket. Using yellow fondant, I punch out 4-6 circles using a round cookie-cutter. I line these circles slightly on top of each other and roll them from left to right to create the roses. Using my index finger, I roll the middle part into a thin piece of fondant and eventually split it into two roses. I trim the bottom of each rose so it can stand on its own and leave them overnight to dry. I repeat this step to make a total of 4 mini roses for each basket. I leave them overnight to dry.
I use the simplest way to create the mini roses to decorate the basket. Using yellow fondant, I punch out 4-6 circles using a round cookie-cutter. I line these circles slightly on top of each other and roll them from left to right to create the roses. Using my index finger, I roll the middle part into a thin piece of fondant and eventually split it into two roses. I trim the bottom of each rose so it can stand on its own and leave them overnight to dry. I repeat this step to make a total of 4 mini roses for each basket. I leave them overnight to dry.
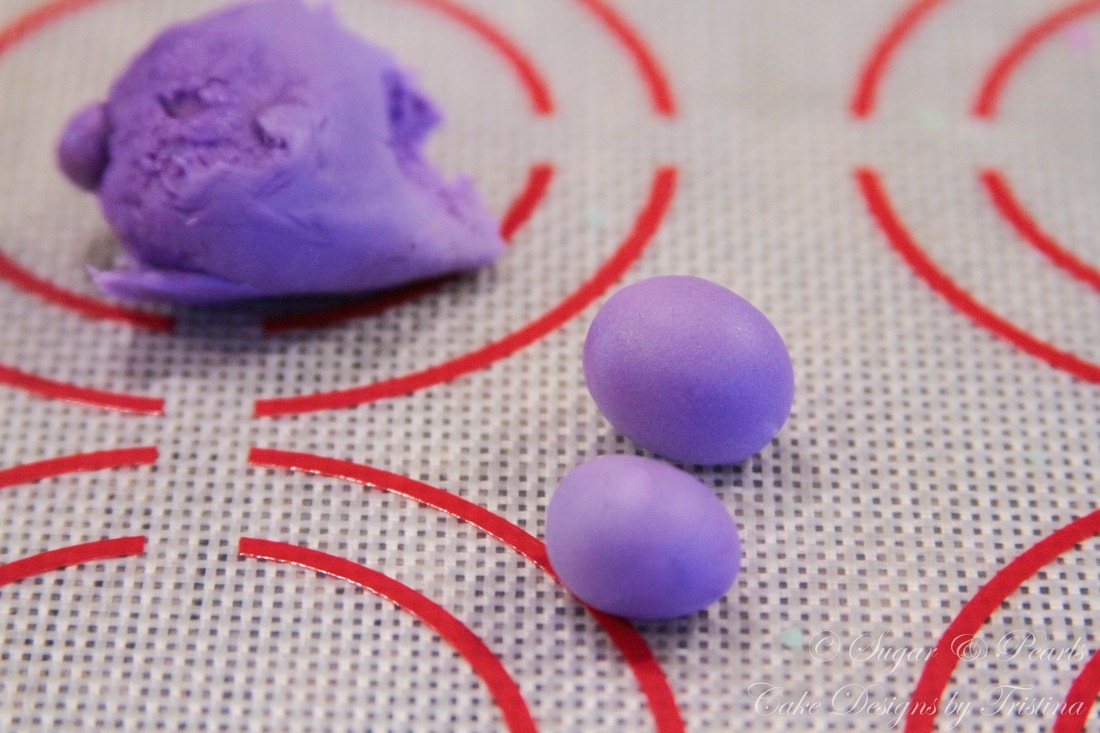
Step 5: Make the Eggs
Since the flowers and grass are already take up two spring colors, I decide to make the eggs in pink, purple and blue. To make the eggs, I simply roll the fondant into a ball and slightly shape it into a balloon-like shape. I make a total of six eggs per basket and leave them to dry overnight.
Since the flowers and grass are already take up two spring colors, I decide to make the eggs in pink, purple and blue. To make the eggs, I simply roll the fondant into a ball and slightly shape it into a balloon-like shape. I make a total of six eggs per basket and leave them to dry overnight.
Step 6: Putting Together the Easter Eggs Basket
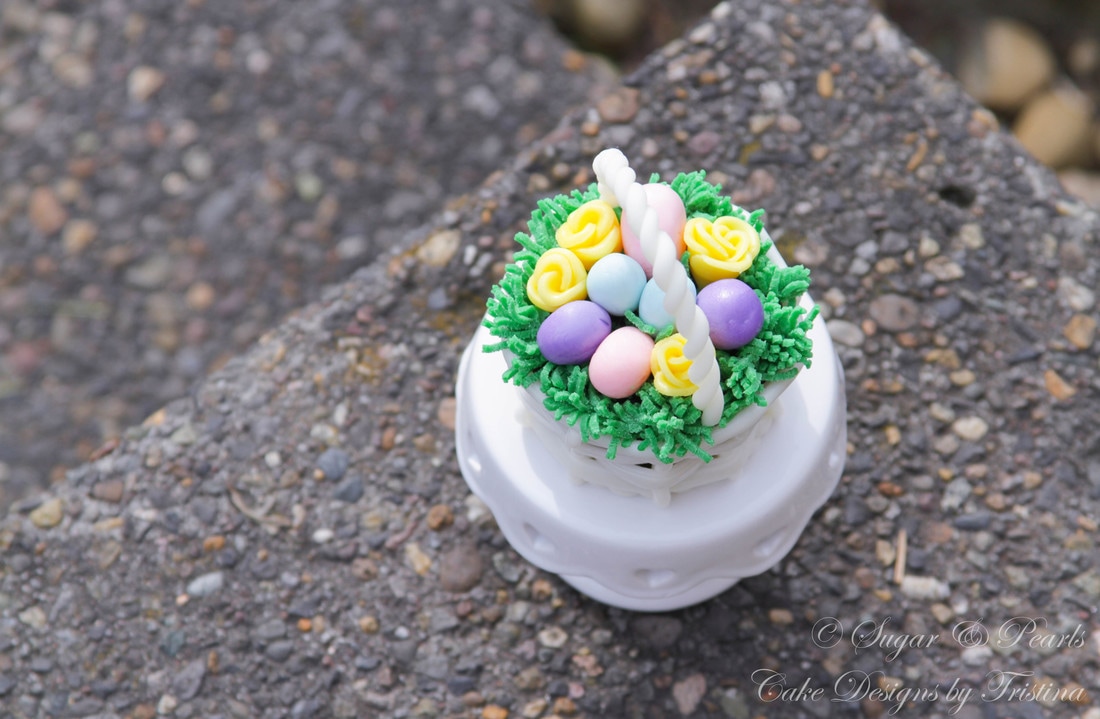
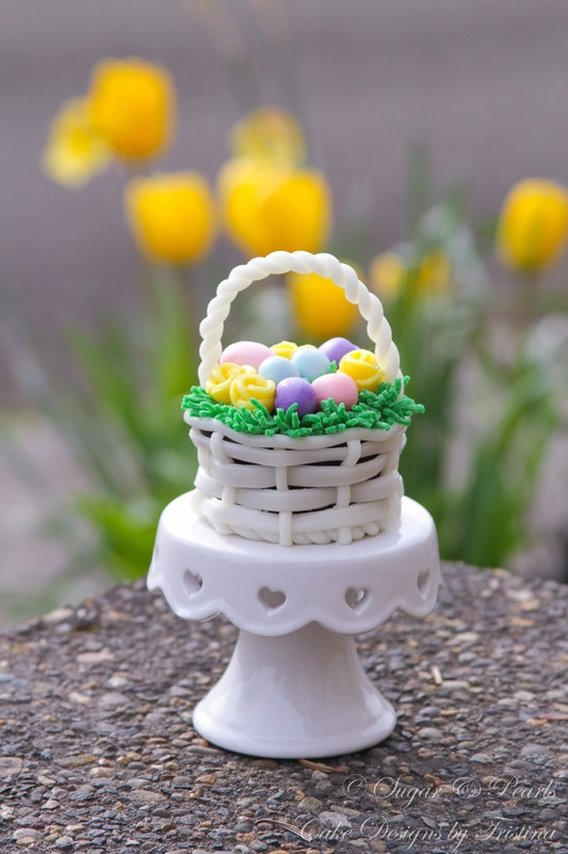
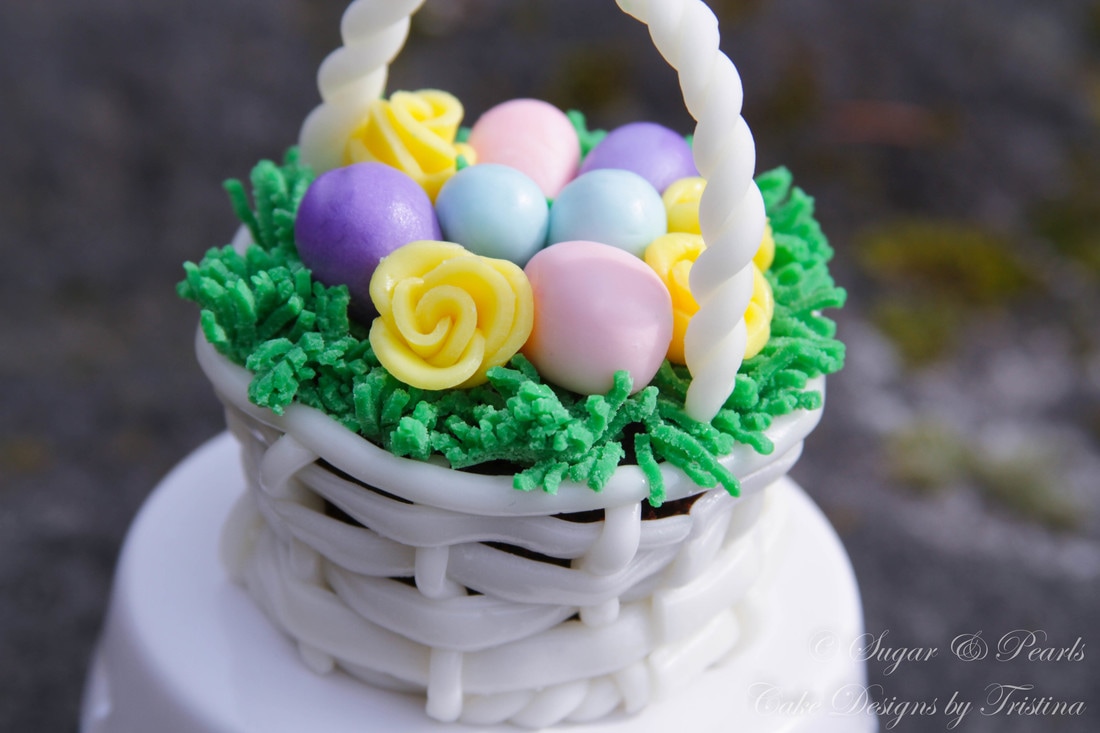
The most exciting part is to put the cupcake together. First, I put the bottom trim around the bottom and then then roll the entire panel of basket weave around the cupcake. I add the grass mostly around the edges of the basket, following by the mini roses and the eggs. Finally, I finish the cupcake by adding the basket handle on top.
The most exciting part is to put the cupcake together. First, I put the bottom trim around the bottom and then then roll the entire panel of basket weave around the cupcake. I add the grass mostly around the edges of the basket, following by the mini roses and the eggs. Finally, I finish the cupcake by adding the basket handle on top.

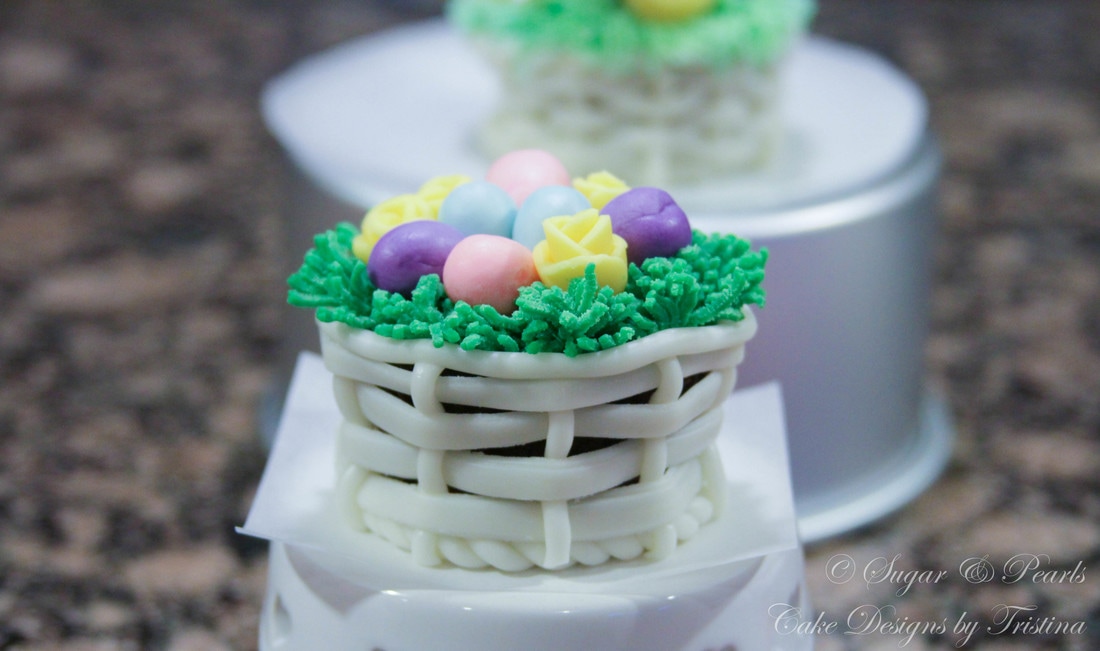

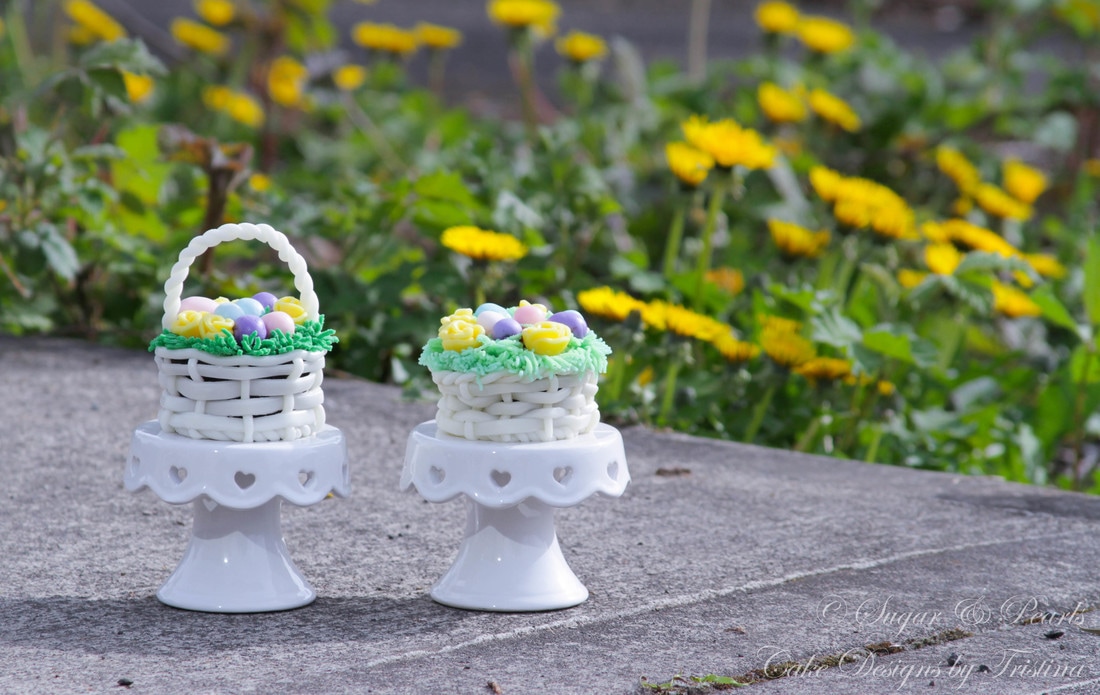
These baskets can be made a few days before your event so they could hold up their shape. Thankfully, the sun finally comes out so I get to capture some beautiful pictures of these adorable cuties in my own front yard. Enjoy!
xoxo,
Tristina
COPYRIGHT © 2016 - SUGAR & PEARLS ~ CAKE DESIGNS BY TRISTINA
