Unicorn and Rainbow Cupcakes
November 3, 2017
It has been a while since I wrote the first cupcake topper posting. Using this opportunity from my recent Unicorn Party, I want to share with you two different unicorn toppers I made for the party, along with a simple rainbow and clouds topper as well. I really did try my best to capture most of the steps while I was molding these, but I find that it is so difficult to stop every few minutes. Well, at least I think you can get the idea of how I put these cute designs together.
This posting will include three different style of cupcake toppers for my daughter's recent Magical Unicorn Art Party, as that was what I made for the party: sleeping unicorn, unicorn butt and rainbow with clouds.
This posting will include three different style of cupcake toppers for my daughter's recent Magical Unicorn Art Party, as that was what I made for the party: sleeping unicorn, unicorn butt and rainbow with clouds.

SLEEPING UNICORN
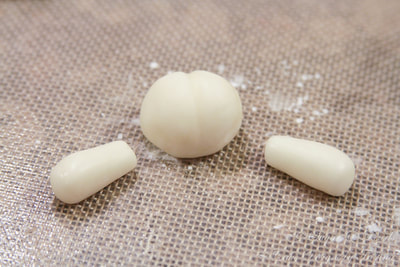
Step 1: Roll the body parts
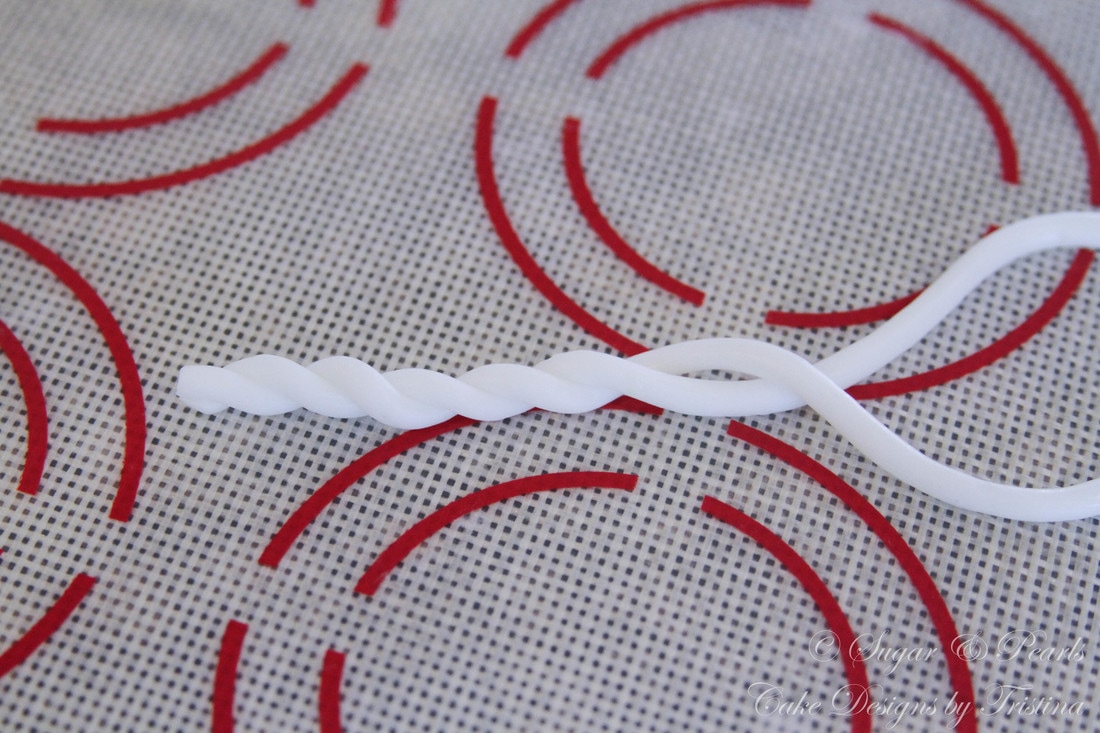
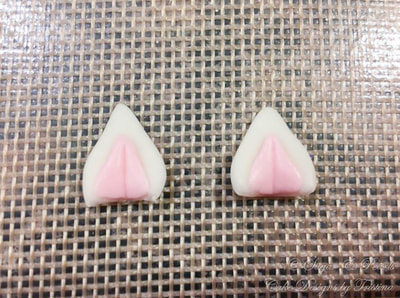
First, I rolled two round balls and shaped them into a slightly oblong to make a head and a body. I made the head slightly bigger than the body here. I also rolled a small oblong shape for one of the arms that the unicorn would be putting its head on. For the horn, I rolled out 2 thin strings and twisted them together, and molded the top slightly smaller to make it pointy. I used a flower petal cutter to make 2 ears from white fondant, then I added a layer of pink fondants using the same shape and trimmed them in half.
Step 2: Make the hair and the tail
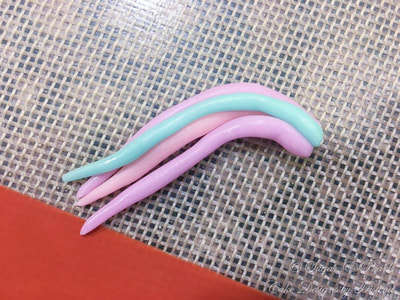
Using any colorful fondant you want to make the hair and tail. Here, I used light purple, light pink and turquoise which are the theme colors for my party. I rolled the fondant into thin long strips, making the ends slightly smaller than the top to symbolize "hair strands." I made 4-5 strands of hair and gathered the top into a bunch. I repeated this step for the tails as well.

Step 3: Assemble the unicorn topper
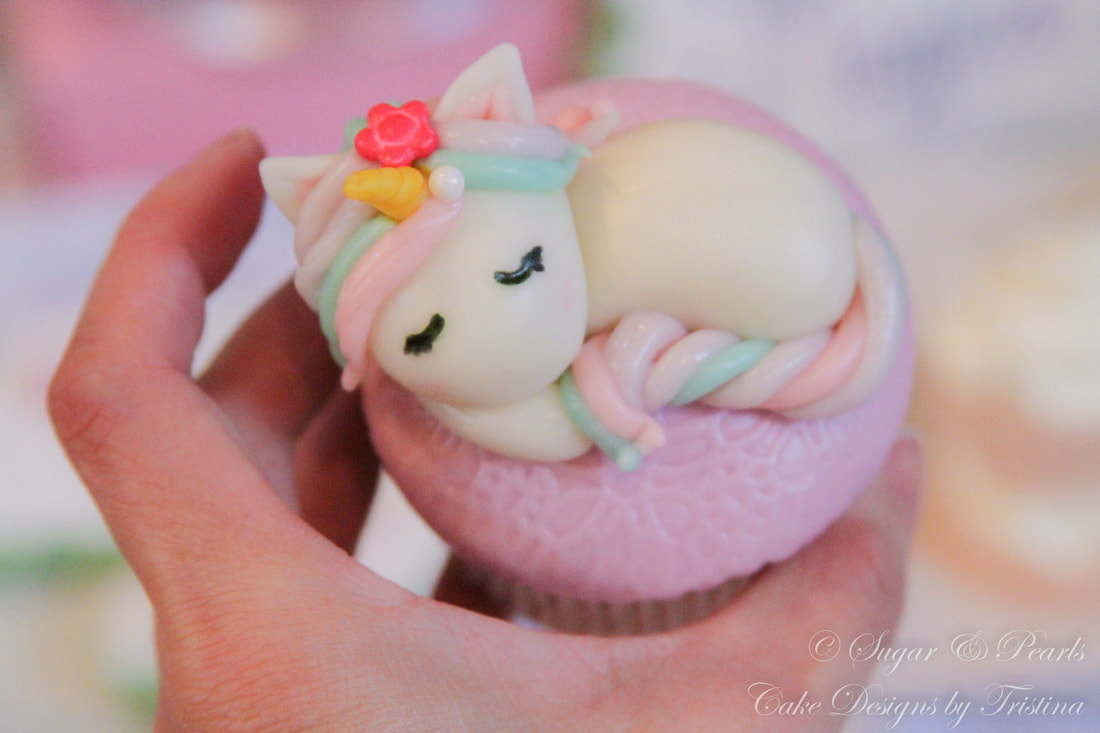
This is the best step to do. Using water, I glued the head and the body together, followed by the arm. Don't worry if it does not look exactly like a unicorn at this time, it will soon once you add the tail and the hair. Then, I glued the the ears and the horn on the head, and added the hair, one strand at a time. The tail then was placed on last with a slight twist and curved around the body in the front. I added a flower and a pearl on top of the hair for a final touch. if desired. I used a Wilton black pen to draw the unicorn's closed eyes and eyelashes, and dusted the cheeks with pink blushes. Does it look so peaceful in its sleep on this cupcake?
This is the best step to do. Using water, I glued the head and the body together, followed by the arm. Don't worry if it does not look exactly like a unicorn at this time, it will soon once you add the tail and the hair. Then, I glued the the ears and the horn on the head, and added the hair, one strand at a time. The tail then was placed on last with a slight twist and curved around the body in the front. I added a flower and a pearl on top of the hair for a final touch. if desired. I used a Wilton black pen to draw the unicorn's closed eyes and eyelashes, and dusted the cheeks with pink blushes. Does it look so peaceful in its sleep on this cupcake?

UNICORN BUTT
Step 1: Make the butt and legs
First, I roll a round ball and two short oblong "legs." The legs are made slightly bigger at the end to resemble the heal of the unicorn. I also draw a line in between the round ball to make the "butt curve."
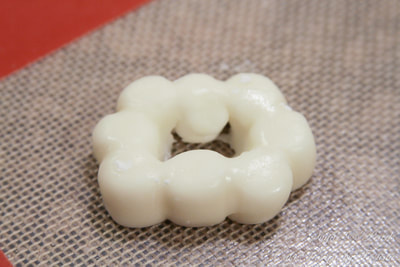
Step 2: Make a round cloud puff
Using mini marshmallows, I glue them together into a circle and cover it with white fondant. I also cut the center part where I will place the unicorn butt into.
Step 1: Make the butt and legs
First, I roll a round ball and two short oblong "legs." The legs are made slightly bigger at the end to resemble the heal of the unicorn. I also draw a line in between the round ball to make the "butt curve."
Step 2: Make a round cloud puff
Using mini marshmallows, I glue them together into a circle and cover it with white fondant. I also cut the center part where I will place the unicorn butt into.
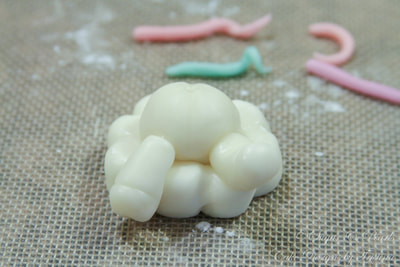
Step 3: Assemble the butt and tail
I glue the legs together first before attaching the butt in the center of the round cloud puff. I also adjust so one of the unicorn's legs is kicked up. Then I added the tails in the middle of the butt and curve eac strain of hair slightly.
I glue the legs together first before attaching the butt in the center of the round cloud puff. I also adjust so one of the unicorn's legs is kicked up. Then I added the tails in the middle of the butt and curve eac strain of hair slightly.
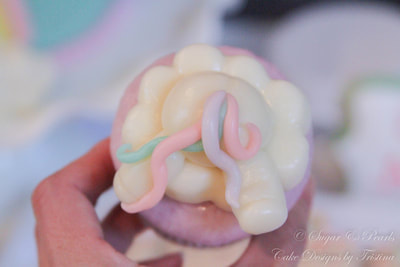
And there you have it, a unicorn's butt sticking out of the clouds!

RAINBOW AND CLOUDS
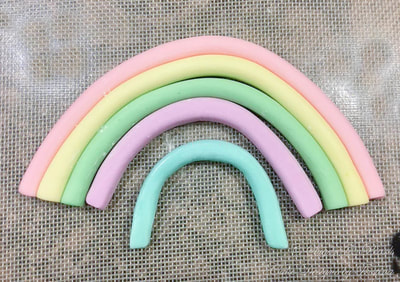
Step 1: Make the rainbow
I first rolled out a string of about 1/10 inch thick of fondant in five different colors. I lined them horizontally along each other and bent them down in a slight curve until I have a desired shape. I trimmed the bottom to even them out. Using water, I glued the strings together and set over 5 days to dry. This is essential if you want your rainbow to stand on its own.
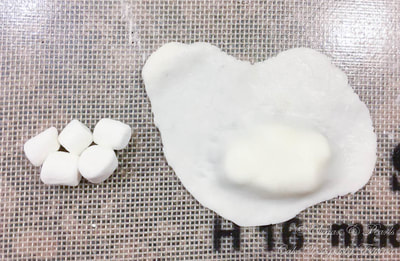
Step 2: Make cloud puffs
Again, I used mini marshmallows and shaped them into a small cloud shape. Then, I rolled out a thin white fondant sheet and draped it over the puffs. I trimmed the excess fondant and folded them along the edges of the clouds. I gave the clouds finish touch by adding some indents around the top to make the puffs more round. I made two small clouds to go below the rainbow.
Again, I used mini marshmallows and shaped them into a small cloud shape. Then, I rolled out a thin white fondant sheet and draped it over the puffs. I trimmed the excess fondant and folded them along the edges of the clouds. I gave the clouds finish touch by adding some indents around the top to make the puffs more round. I made two small clouds to go below the rainbow.
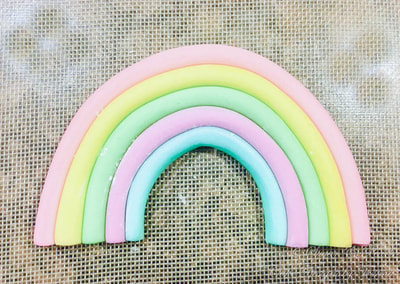
Noted the final cupcake rainbow only had four colors. This is because I removed the top color as the rainbow was too big to fit on to a standard size cupcake.

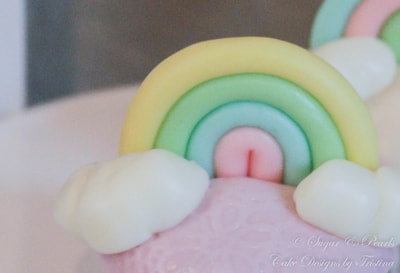
The rainbows and clouds are probably the easiest cupcake toppers to do. However, it does require you to make them ahead of time to ensure your rainbow could stay up and hold its shape.
I have also made some easel and canvas cupcake toppers that I will be sharing with you in the next few weeks. So be sure to check back in a few weeks to learn how to make them!
xoxo,
Tristina
I have also made some easel and canvas cupcake toppers that I will be sharing with you in the next few weeks. So be sure to check back in a few weeks to learn how to make them!
xoxo,
Tristina
COPYRIGHT © 2017 - SUGAR & PEARLS ~ CAKE DESIGNS BY TRISTINA
