Teenage Boy Bed Cake
February 5, 2017
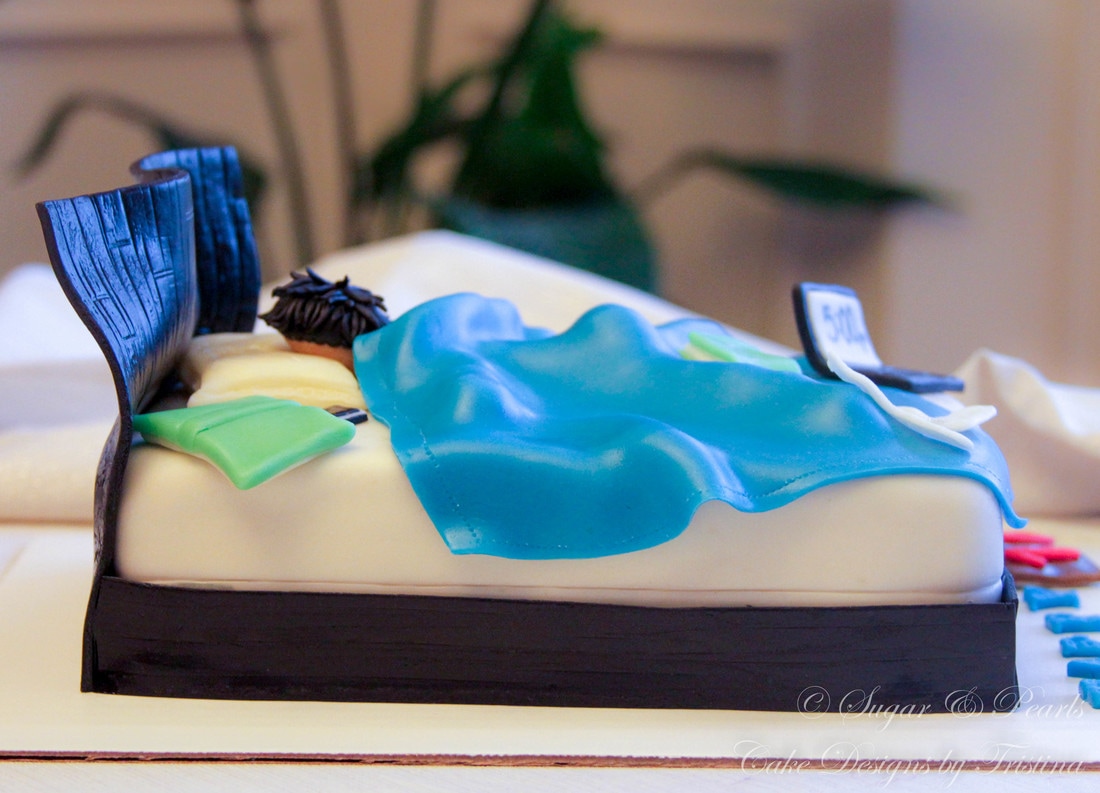
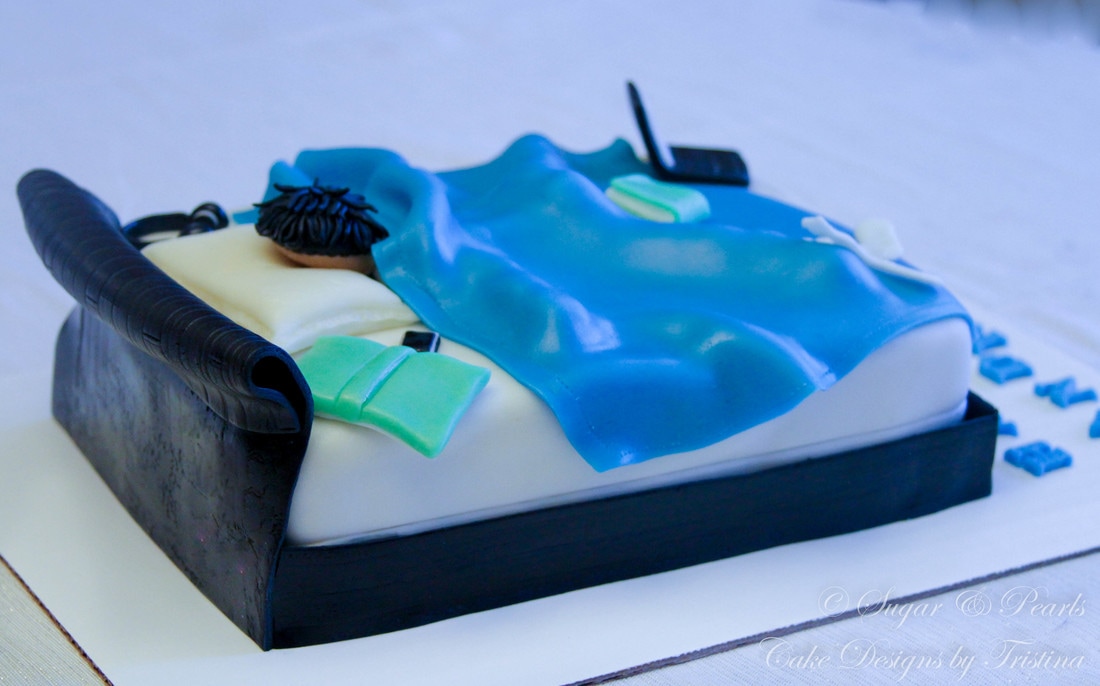
Sleeping-in is definitely one of the perks of being a teenager—the days where you just have too much time on your hands with too little things to do. This cake represents a teenage boy who sleeps in until 5:00 pm. Most of us can probably relate to sleeping-in at some points in our lives during our teenage years. The sarcasm behind the cake simply indicates that teenagers will never know this is a given luxury they had until they enter adulthood, where sleeping-in is almost nonexistent. For me, making this cake also brings back a lot of memories. One of many good things about my childhood was sleeping in until noon and stayed in bed just to read a few non-fictional love books. I remembered staying in bed as long as I could until my mom had to wake me up for breakfast. I miss these days so much now that I have two little ones and sleeping past 8 :00 am is considered a "sleep-in" morning for us.
A high school friend has recently asked me to make this cake for her stepson's birthday. She believes this is a perfect cake for a teenage boy—or at least for him. I have yet made a bed cake, and thought this is an opportunity to make something different (again!). As always, I like to be able to create my own design that is beyond what is presented to me. I enjoy exploring different cake styles and constantly looking forward to better my "cake arts.”
DECORATIONS PREPARATION
I approach this cake by making the electronics items and leave them to over 3-4 days to dry. I use a square back fondant and hold it into half to create a laptop shape (Photo 1). I stack a rectangular white fondant on the top to make the screen and write the time "5:00 pm" on it, per my friend's request. I use a knife the make the indents of the buttons on the keyboard. I also mimic my Apple laptop to create the touch pad and touch pad buttons as well.
For the wireless headphone, I use two thick round black fondant to create the earpieces (Photo 2). I also make the extra cushion between the housing and the pads using white fondant to make ear pieces stand out. I bridge these earpieces together with a headband that is made using a long strip of black fondant. A slider is also created for both side of the headphone.
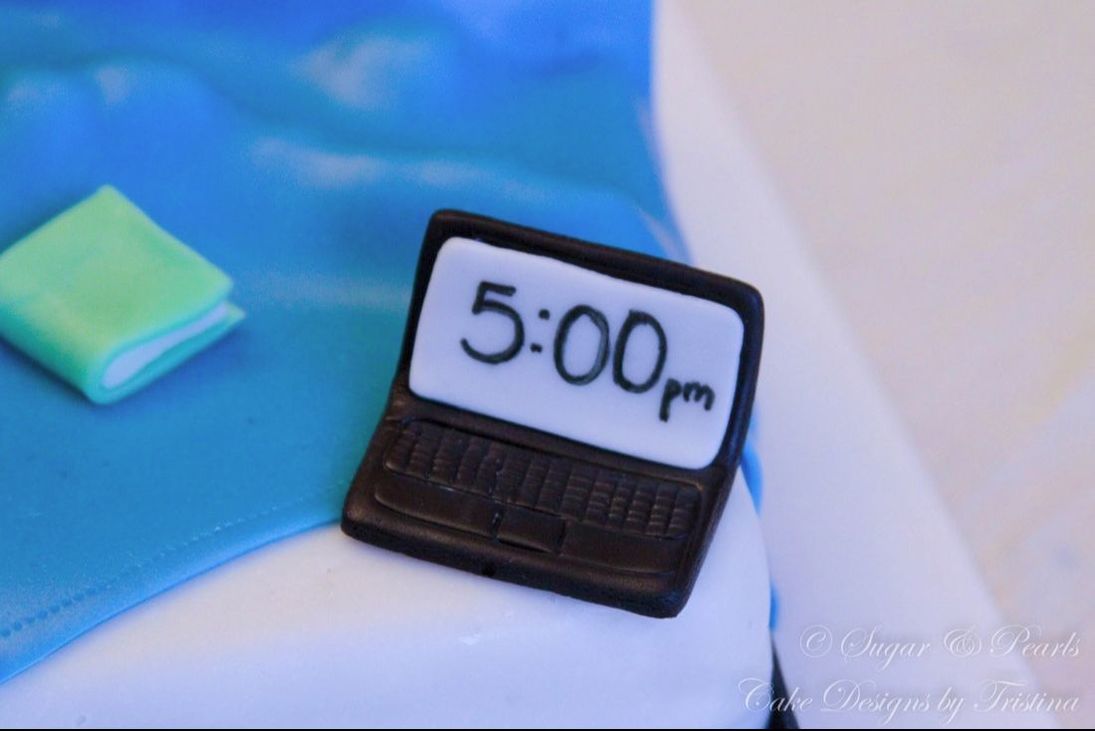
Photo 1: Laptop.
|

Photo 2: Wireless headphone.
|
The iPhone is the easiest one to make (Photo 3). I cut out a small rectangular black fondant, which is then topped with a similar shape of white fondant. I then cut a smaller rectangular black fondant to make the phone screen. I also create a small receiver and camera "holes" on the top of the screen and a home button on the bottom.
Then I make the boy's head and hair using black and tan fondant (Photo 2 and 3). I roll a round ball with tan fondant to make the head, and using tiny black fondant to make hair strands and attach them to the head. This must be the most consuming process out of all the decorations because I have to create enough hair strands for the entire head. I start sticking the hair strands around the head and then work my way toward the middle hairline. This is to resemble the boy's pressing his head down into the pillow while sleeping. I leave this to dry air over 4 days.
Next, I make the pillow, using a thick rectangular creamy fondant (Photo 3). Pinching around the rectangular shape to make the pillow case ruffles. Once down, I slightly press down the center of the pillow, where the boy's head would lay on. I leave this to air dry for 3-4 days.
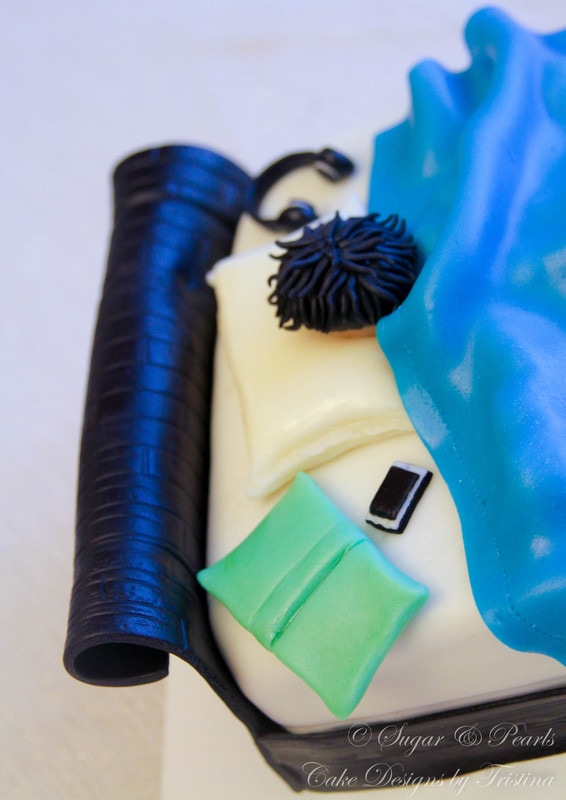
Photo 3: Iphone, boy's head and pillow.
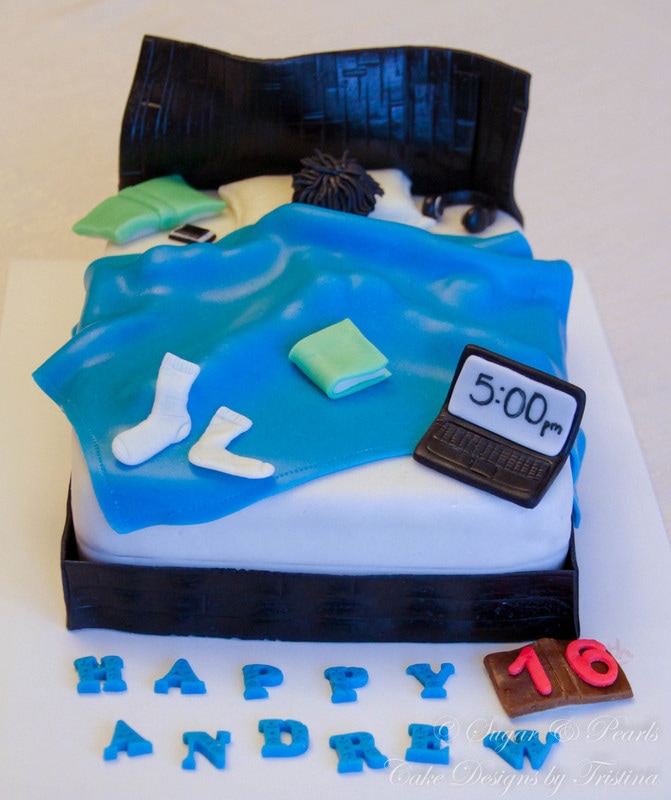
Following the electronic items and the boy's head, I make a pair of socks (Photo 4). Using two white strips of white fondant, I cut the shape of the socks and draw the lines on to mirror the socks my husband normally wears. Then, I also make a few books, using two rectangular green and brown fondant strips as the cover and white rectangular strips as the pages. I also add the "number 16" on the book cover to represent the boy's birthday age (Photo 5).
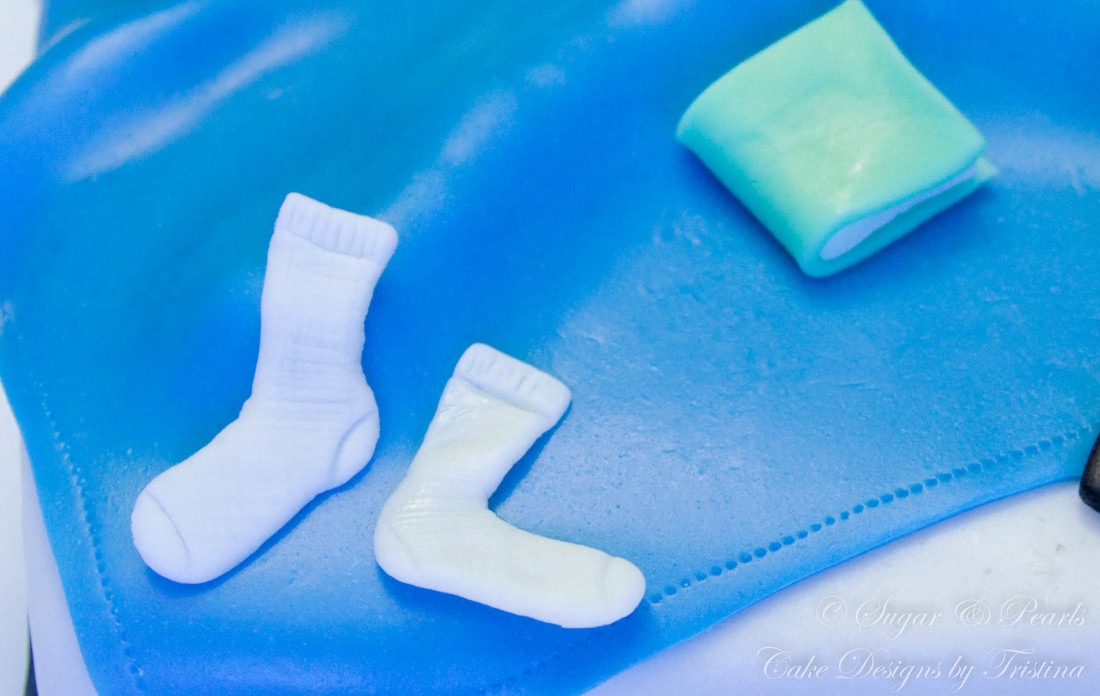
Photo 4: White socks.
|
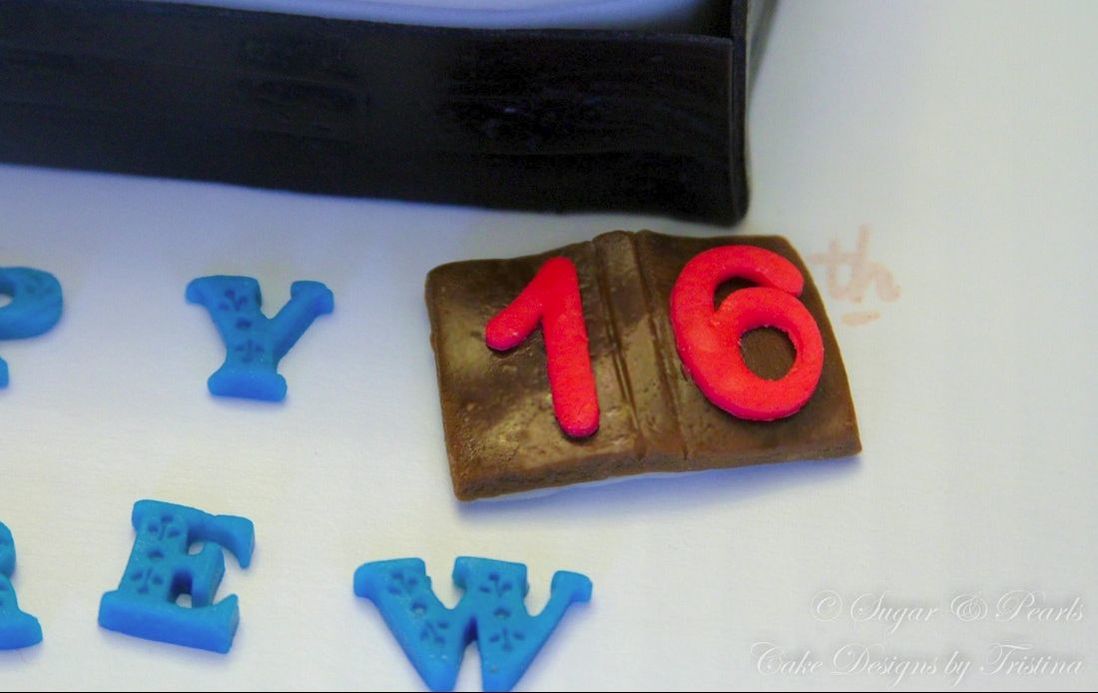
Photo 5: Brown book with birthday boy's age.
|
ASSEMBLE THE CAKE
Using a 1/4 sheet cake, I cut them in half and stack them together as a two-layer cake. This is made using a chocolate chiffon cake, with an airy texture and filled with whipped chocolate buttercream. I cover the cake with white fondant to minic the white bed sheet. I make the indent around the top part to create the "fitted sheet."
First, I glue the pillow on the bed first, following by the boy's head. To make a body, I decide to use marshmallows to line the two arms and leg boys along with the "puffy butt" to create a body structure (Photo 6).
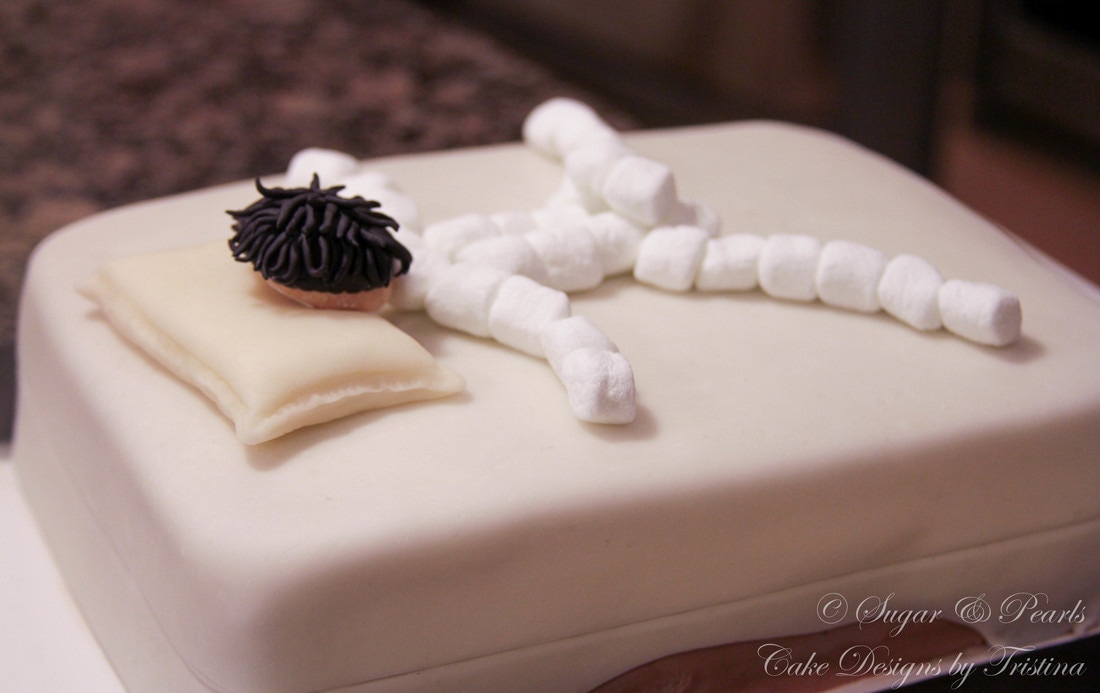
Photo 6: Setting the boy's body lying on the bed.
Then, I decide to make the bed in a black. I cut two same-side and one slightly shorter rectangular strips for the sides of the bed. For the headboard, I use a large rectangular black fondant, etching the front with a wood mold. I leave this over 2 days to dry, which is not enough to uphold the board. It is too late for me to change the design so I bend the headboard back and curve it slightly for a better stability (Photo 7). Thus, this is the reason why you see some pictures with the straight headboard and some are slightly curved. This is another reason why I like to manipulate my designs and am very fluid in changing my designs around as I decorate my cakes. I find that being rigid on a design would only allow disaster when things don't turn out the way you expect them to be.
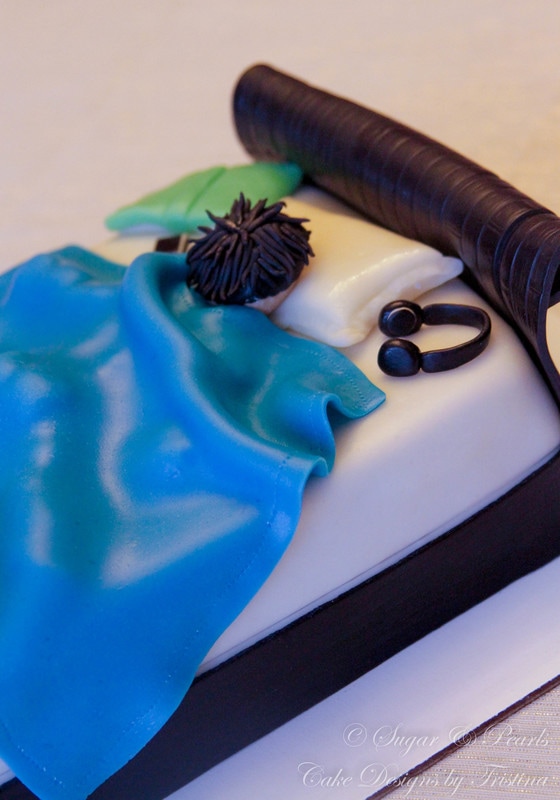
I finish the cake by draping the blue blanket over the boy's marshmallow body. I use a large square blue fondant and run my Wilton fondant tool to make the dotted lines around the ends of the blanket. Do NOT make the blanket ahead of time as you do not want it to dry out. I make the blanket immediately before assembling the cake so it is elastic enough to hug the body perfectly. Finally, I scatter the electronic items, books and socks on top to create a messy look of the bed (Photo 8).
This is such a fun cake to make. And I also learned more about the parts of some of the electronic items that I use on a day to day basis without knowing their proper names.
So, what about you? What were your “sleeping-in” time during your teenage years? What was your most favorite memories? I would love to hear all about them!
xoxo,
Tristina
COPYRIGHT © 2016 - SUGAR & PEARLS ~ CAKE DESIGNS BY TRISTINA
