Penguin Cake
September 24, 2018
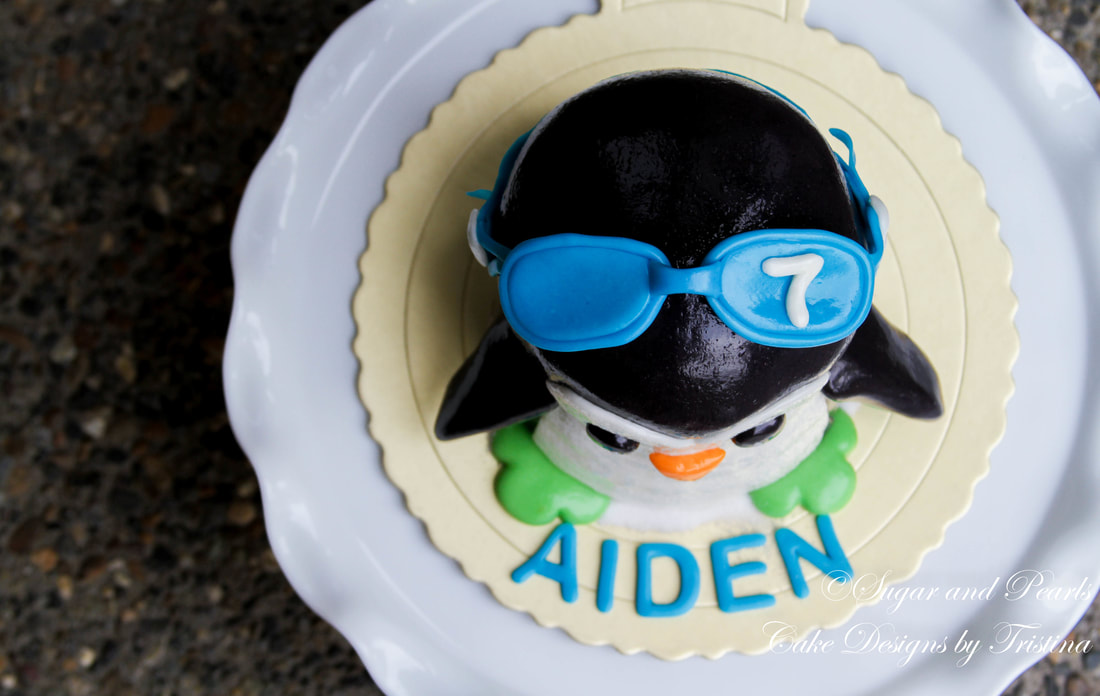
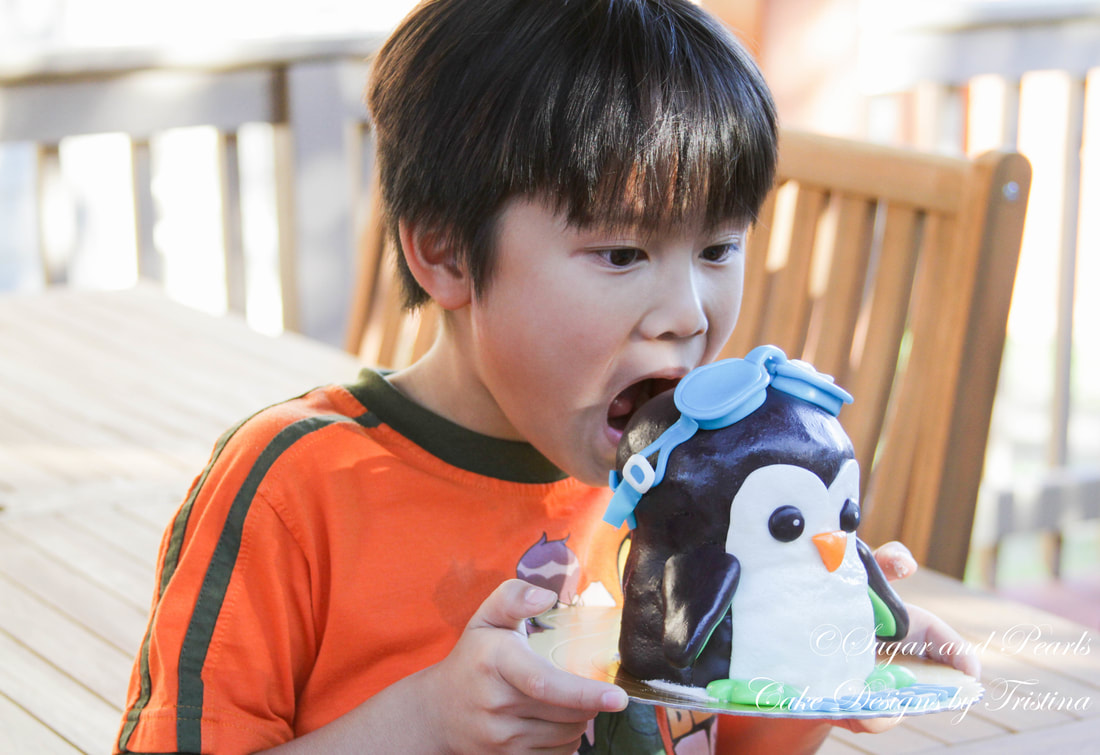
I made this cake for DinhPhong 7th birthday party. This year, we decided to stay away from the usual big party and geared toward a simple gathering with a handful of friends and cousins instead. We had the party at the local community pool and a penguin birthday cake, per the birthday boy's request. Just like every kid, my son has his favorite stuffed animal that he plays and sleeps with. The green "Penguiny" was named after it was given to him about four years ago by his best cousin, Ivy. He confides his daily problems, and seeks comforts from this Penguin ever since. He is never without this stuffed animal unless he’s at school. So, when he asked for a penguin cake, I know that I need to try to mirror his birthday cake to his all-time favorite toy.
Honestly, I did not know how to approach this cake from the beginning. It was a last minute decision to create a cake on top of the penguin cupcakes. I had to warn him that I might not be able to finish the cake in time for the party, and I had his permission to forgo the cake if I did not have time. There is no way I could let my baby boy down. I made this cake within one day, on a Friday after work, and I guess it turned out just fine.
Honestly, I did not know how to approach this cake from the beginning. It was a last minute decision to create a cake on top of the penguin cupcakes. I had to warn him that I might not be able to finish the cake in time for the party, and I had his permission to forgo the cake if I did not have time. There is no way I could let my baby boy down. I made this cake within one day, on a Friday after work, and I guess it turned out just fine.

PREPARING FOR THE DECORATIONS
I did not have time to create any of the parts ahead of time as I completed this cake within the same day. But if I had to plan this cake ahead of time, I would create the wings, the feet and the swimming goggle at least one day in advance.
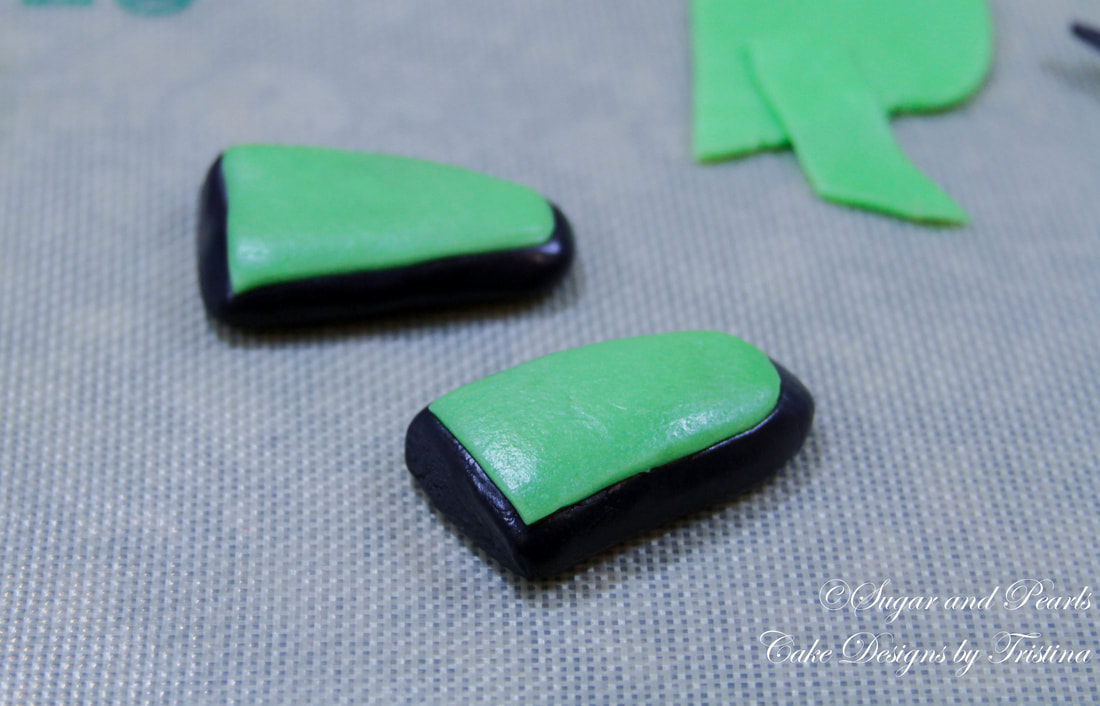
I created the wings with two small rounds of black fondant. I shaped the ends just smaller and flatten the fondant just slightly. I cut the same shape of green fondant to add on top of these black wings. Technically, the green layer is the "penguin's skin" underneath his black fur. Using two toothpicks, I inserted them in the middle of the wings, from the thicker and larger ends. This is so the wings could hold up when they are being inserted in to the side of the animal body.
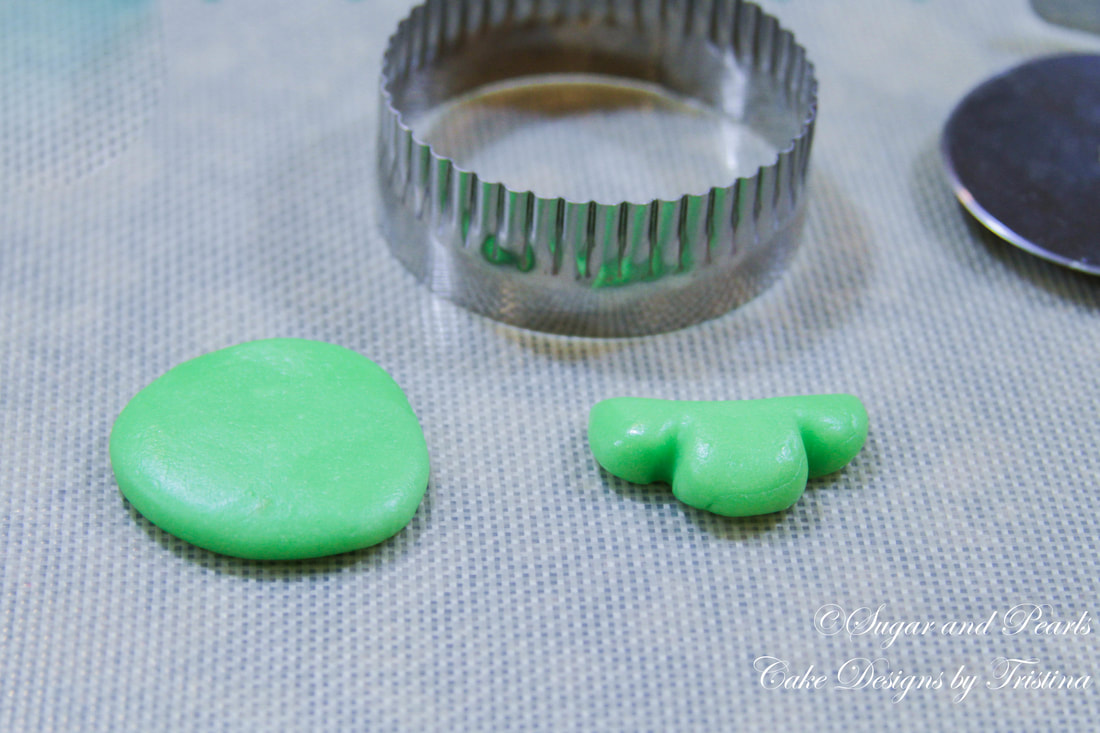
For the feet, I rolled a slightly thick round green fondant and used a round cookie cutter to cut out about 3/4 of the fondant. I used the pointy fondant tool to create two indents for the toes I leave these on the aside to dry for about 30-45 minutes.
I did not have time to create any of the parts ahead of time as I completed this cake within the same day. But if I had to plan this cake ahead of time, I would create the wings, the feet and the swimming goggle at least one day in advance.
I created the wings with two small rounds of black fondant. I shaped the ends just smaller and flatten the fondant just slightly. I cut the same shape of green fondant to add on top of these black wings. Technically, the green layer is the "penguin's skin" underneath his black fur. Using two toothpicks, I inserted them in the middle of the wings, from the thicker and larger ends. This is so the wings could hold up when they are being inserted in to the side of the animal body.
For the feet, I rolled a slightly thick round green fondant and used a round cookie cutter to cut out about 3/4 of the fondant. I used the pointy fondant tool to create two indents for the toes I leave these on the aside to dry for about 30-45 minutes.
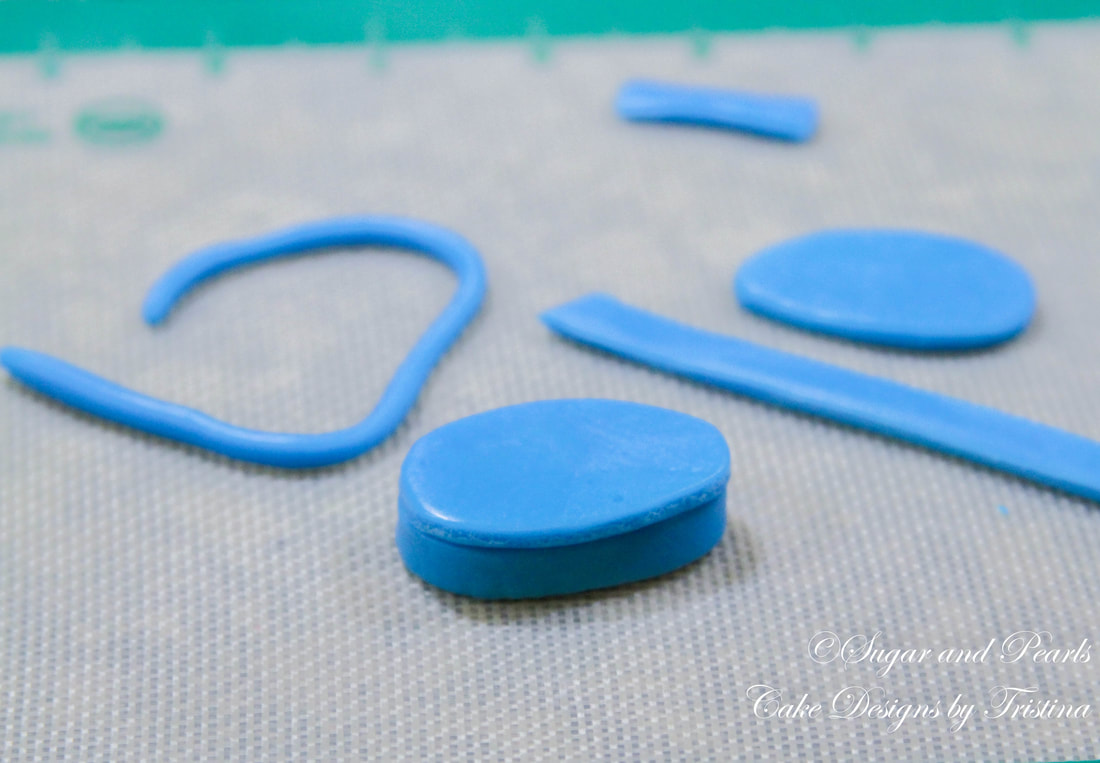
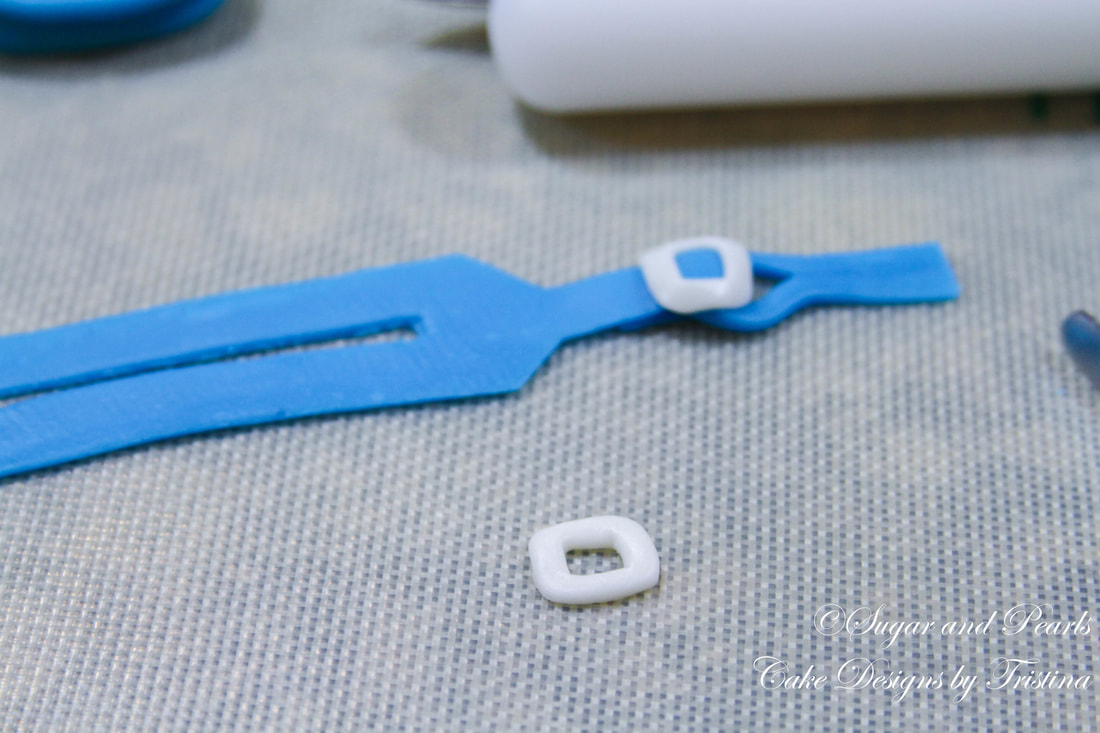
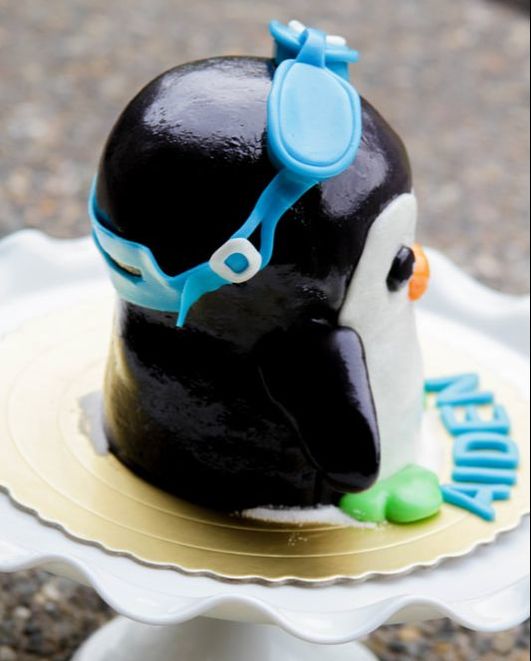
My son and I agreed on having the Penguin wears a headphone on his head. However, when creating the cake, I figured I should add a blue swimming goggle, which my son owns, to tie to our swimming party theme. (I'm always about the consistency of my party themes). I'm glad I decided to do this, because I love how this goggle turned out to be. I actually made these on the fly, using my son's goggle as a "model."
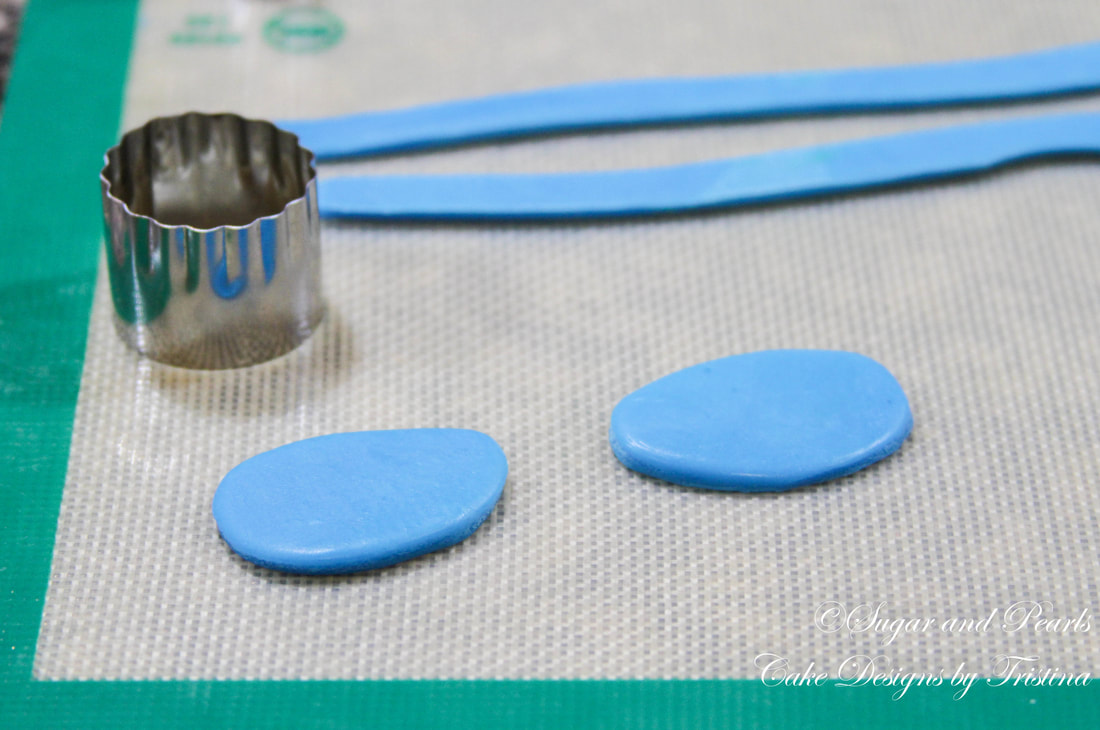
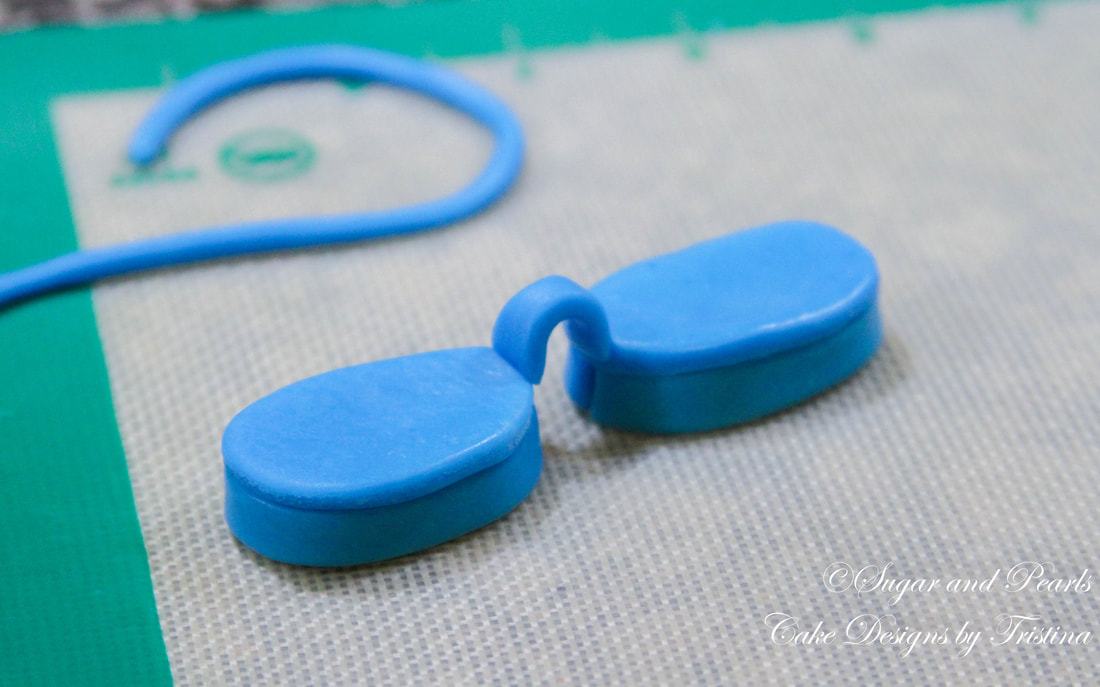
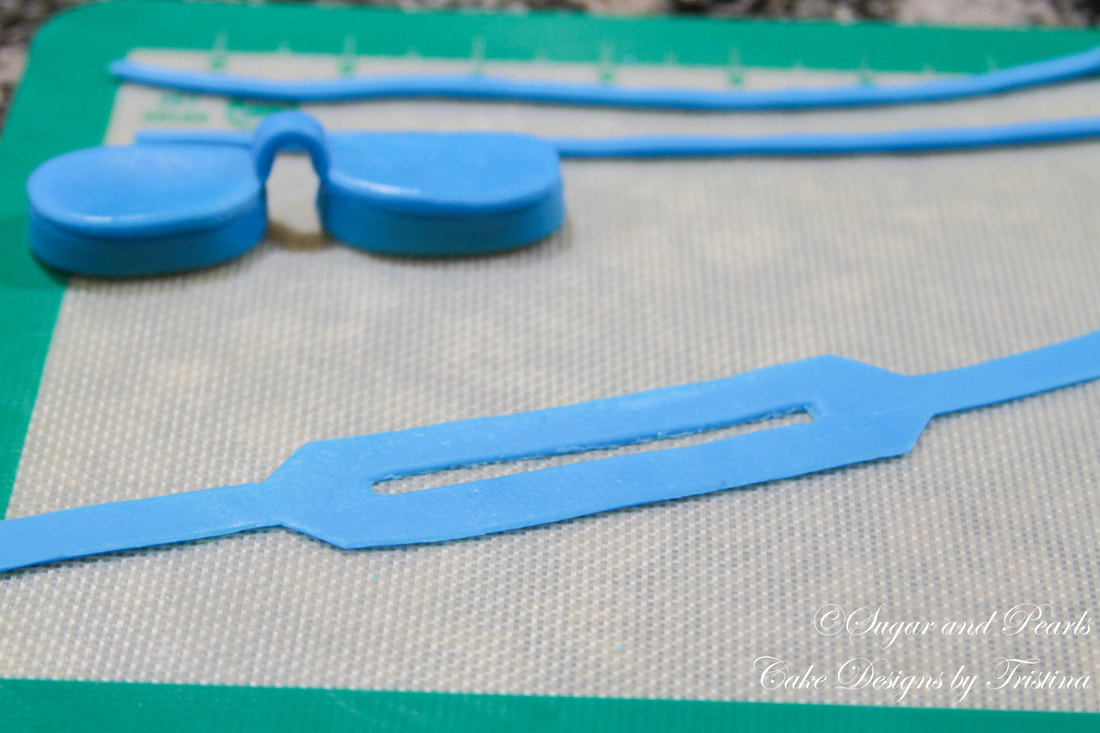
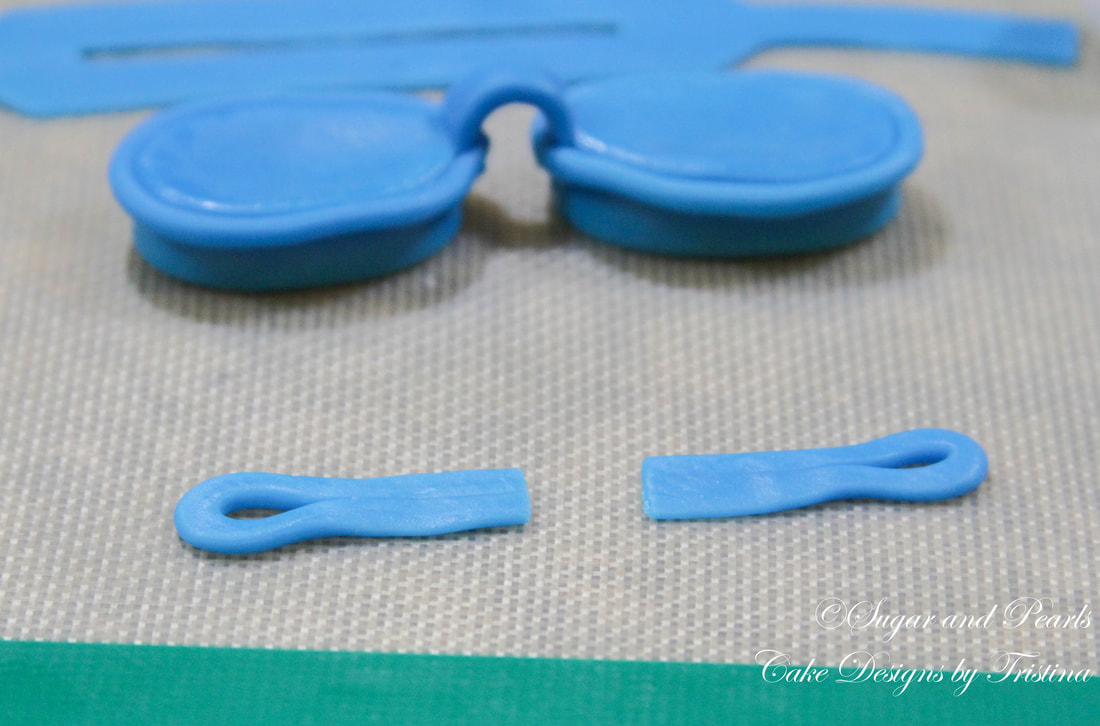
I started out with two small rounds of blue fondant, then shaped them into tear-drops to make the "lens." Using a thin 1/4-inch rectangular fondant strips, I placed them underneath these lens to create the "gaskets." I cut a short 1/6 inch bow-shaped fondant strip and glued the lens together to create the nose-piece. Next, I cut out a thin rectangle fondant with two small ends to create the straps. I also made the adjustment piece on the google straps, which I created by rolling a fondant strip and folded the two ends up to create a loop. Finally, I made the goggle frame by lining a rolled-strip of fondant around each lens. I thought adding a cut out square white fondant to place on top of the straps are the easiest step, but was indeed a necessary step to bring all the pieces together
I started out with two small rounds of blue fondant, then shaped them into tear-drops to make the "lens." Using a thin 1/4-inch rectangular fondant strips, I placed them underneath these lens to create the "gaskets." I cut a short 1/6 inch bow-shaped fondant strip and glued the lens together to create the nose-piece. Next, I cut out a thin rectangle fondant with two small ends to create the straps. I also made the adjustment piece on the google straps, which I created by rolling a fondant strip and folded the two ends up to create a loop. Finally, I made the goggle frame by lining a rolled-strip of fondant around each lens. I thought adding a cut out square white fondant to place on top of the straps are the easiest step, but was indeed a necessary step to bring all the pieces together
A few last things I created using fondant were the number seven, which is my son's age. I placed this on the right lens after gluing the goggle onto the penguin's head. I also wanted to shout out to the birthday's boy by adding his name on the cake board, between the penguin's green webbed feet.
ASSEMBLING THE CAKE
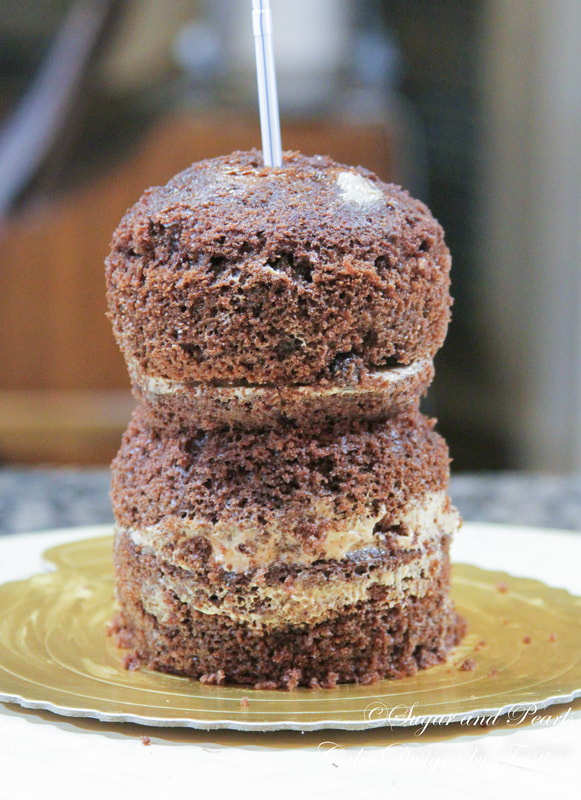
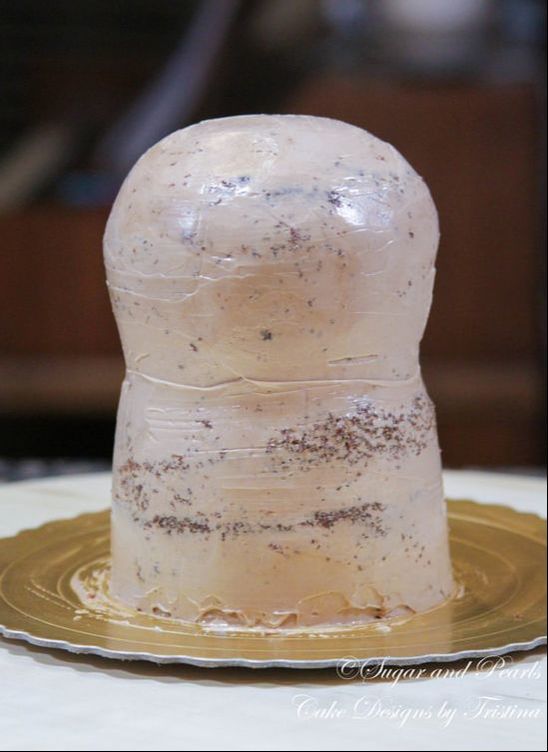
This is a 4-inch, four-layer chocolate cake that was filled and frosted with chocolate buttercream. I find that it is important to have a slightly denser cake to sculpt the penguin's body. Once I got done filling the cake, I leave it in the refrigerator to chill for about 20 minutes before trimming the edges to shape it into a "penguin's body." I wanted a chunky-looking penguin, thus I focused more on trimming the neck and the round head. Before I frost the cake, I inserted a straw in the middle of the cake, all the way down, to hold all the pieces together. Then, I frosted the cake slightly and chilled it in the refrigerator for another 20 minutes or so.
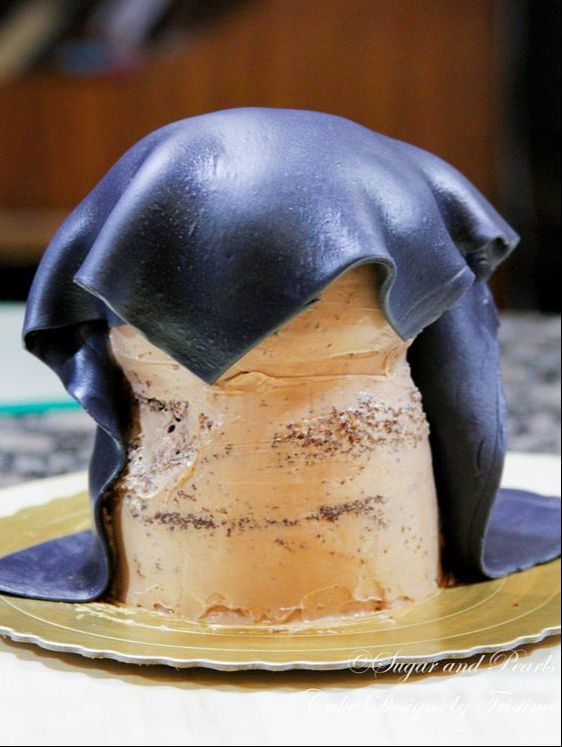
Next, I rolled out the black fondant to cover the back of the penguin, leaving just enough space in the font for the "white belly." To create the shape of the penguin's face, I used the top part of the heart cookie-cutter and then smoothed out the lines of the fondant with my palm.
This is a 4-inch, four-layer chocolate cake that was filled and frosted with chocolate buttercream. I find that it is important to have a slightly denser cake to sculpt the penguin's body. Once I got done filling the cake, I leave it in the refrigerator to chill for about 20 minutes before trimming the edges to shape it into a "penguin's body." I wanted a chunky-looking penguin, thus I focused more on trimming the neck and the round head. Before I frost the cake, I inserted a straw in the middle of the cake, all the way down, to hold all the pieces together. Then, I frosted the cake slightly and chilled it in the refrigerator for another 20 minutes or so.
Next, I rolled out the black fondant to cover the back of the penguin, leaving just enough space in the font for the "white belly." To create the shape of the penguin's face, I used the top part of the heart cookie-cutter and then smoothed out the lines of the fondant with my palm.
|
|
|

|
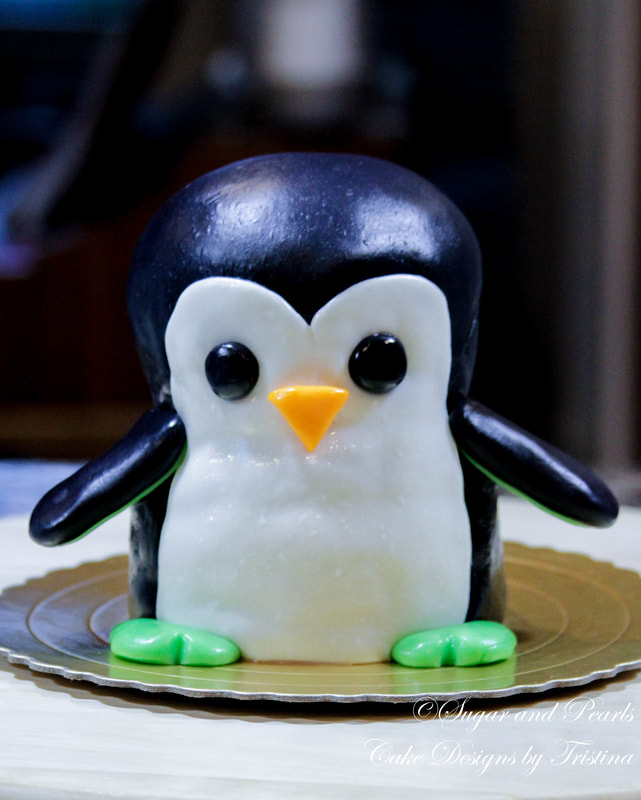
I started to add all the details onto the penguin, including the black eyes, which were rolled out using black fondant. I used orange fondant to trim a triangle nose. I wanted to make a 3-D nose but my son wanted his penguin to have a flat nose, just like his stuffed animal. Then, I placed the wings on both sides using the toothpicks to hold their shapes. I secured the feet on the bottom and smooth out any of the wrinkles along the way.
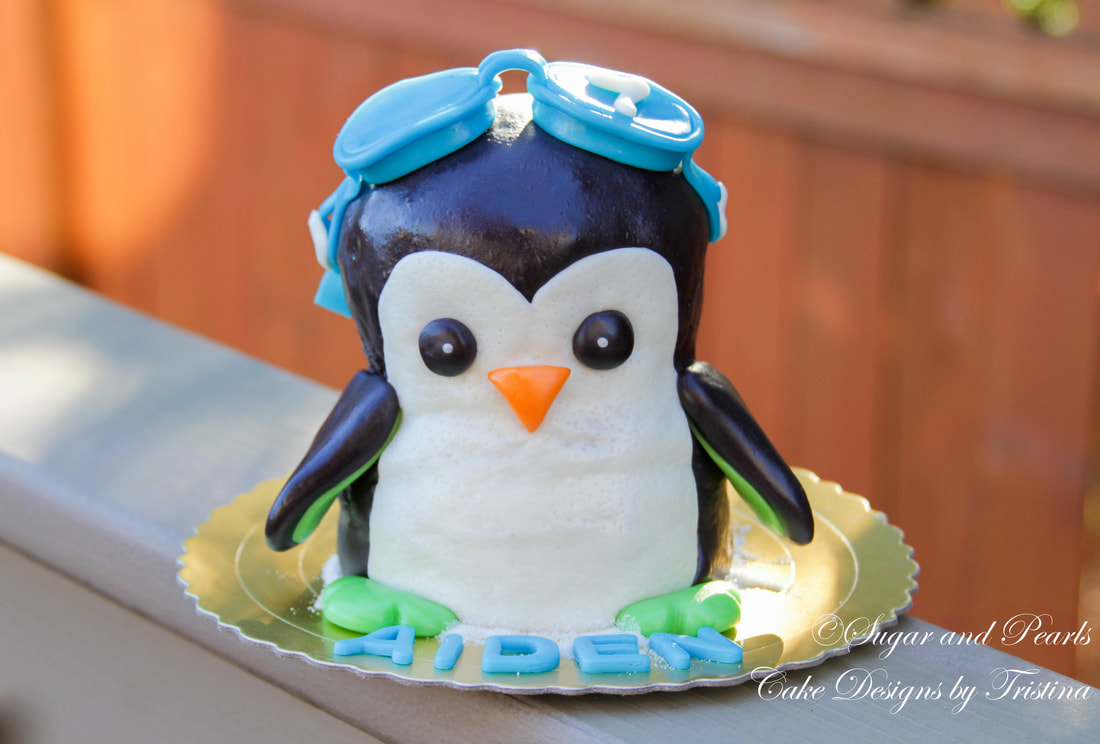
The last and most exciting step is to add the swimming goggle onto the penguin's head. I placed the straps on from the back first, to ensure I have enough space, and then attached the lens on. I thought the goggle is TOO cute!
The last and most exciting step is to add the swimming goggle onto the penguin's head. I placed the straps on from the back first, to ensure I have enough space, and then attached the lens on. I thought the goggle is TOO cute!
|
|
I then added the final touch by placing the birthday's boy age and name on the cake. It may be difficult to see, but I have also sprinkled some granulated sugar around the penguin as if he just got out of the snow.
I brushed on the penguin's body a tiny amount of water to make it looks like he's wet from the "swimming in the pool." This is why those shiny skin you see on his black fur. I also slightly poked tiny holes on the entire white fur belly with a toothpick to create a different texture, but it may not be obvious through these pictures.
I brushed on the penguin's body a tiny amount of water to make it looks like he's wet from the "swimming in the pool." This is why those shiny skin you see on his black fur. I also slightly poked tiny holes on the entire white fur belly with a toothpick to create a different texture, but it may not be obvious through these pictures.
I really still need to learn how to create the fur texture on these fondant animal cakes. I have seen very real-looking fur from some very amazing cake bakers, and will try to explore this more in the near future. In the meantime, we will just have to settle for this mediocre animal cake.
xoxo,
Tristina
xoxo,
Tristina
COPYRIGHT © 2018 - SUGAR & PEARLS ~ CAKE DESIGNS BY TRISTINA
