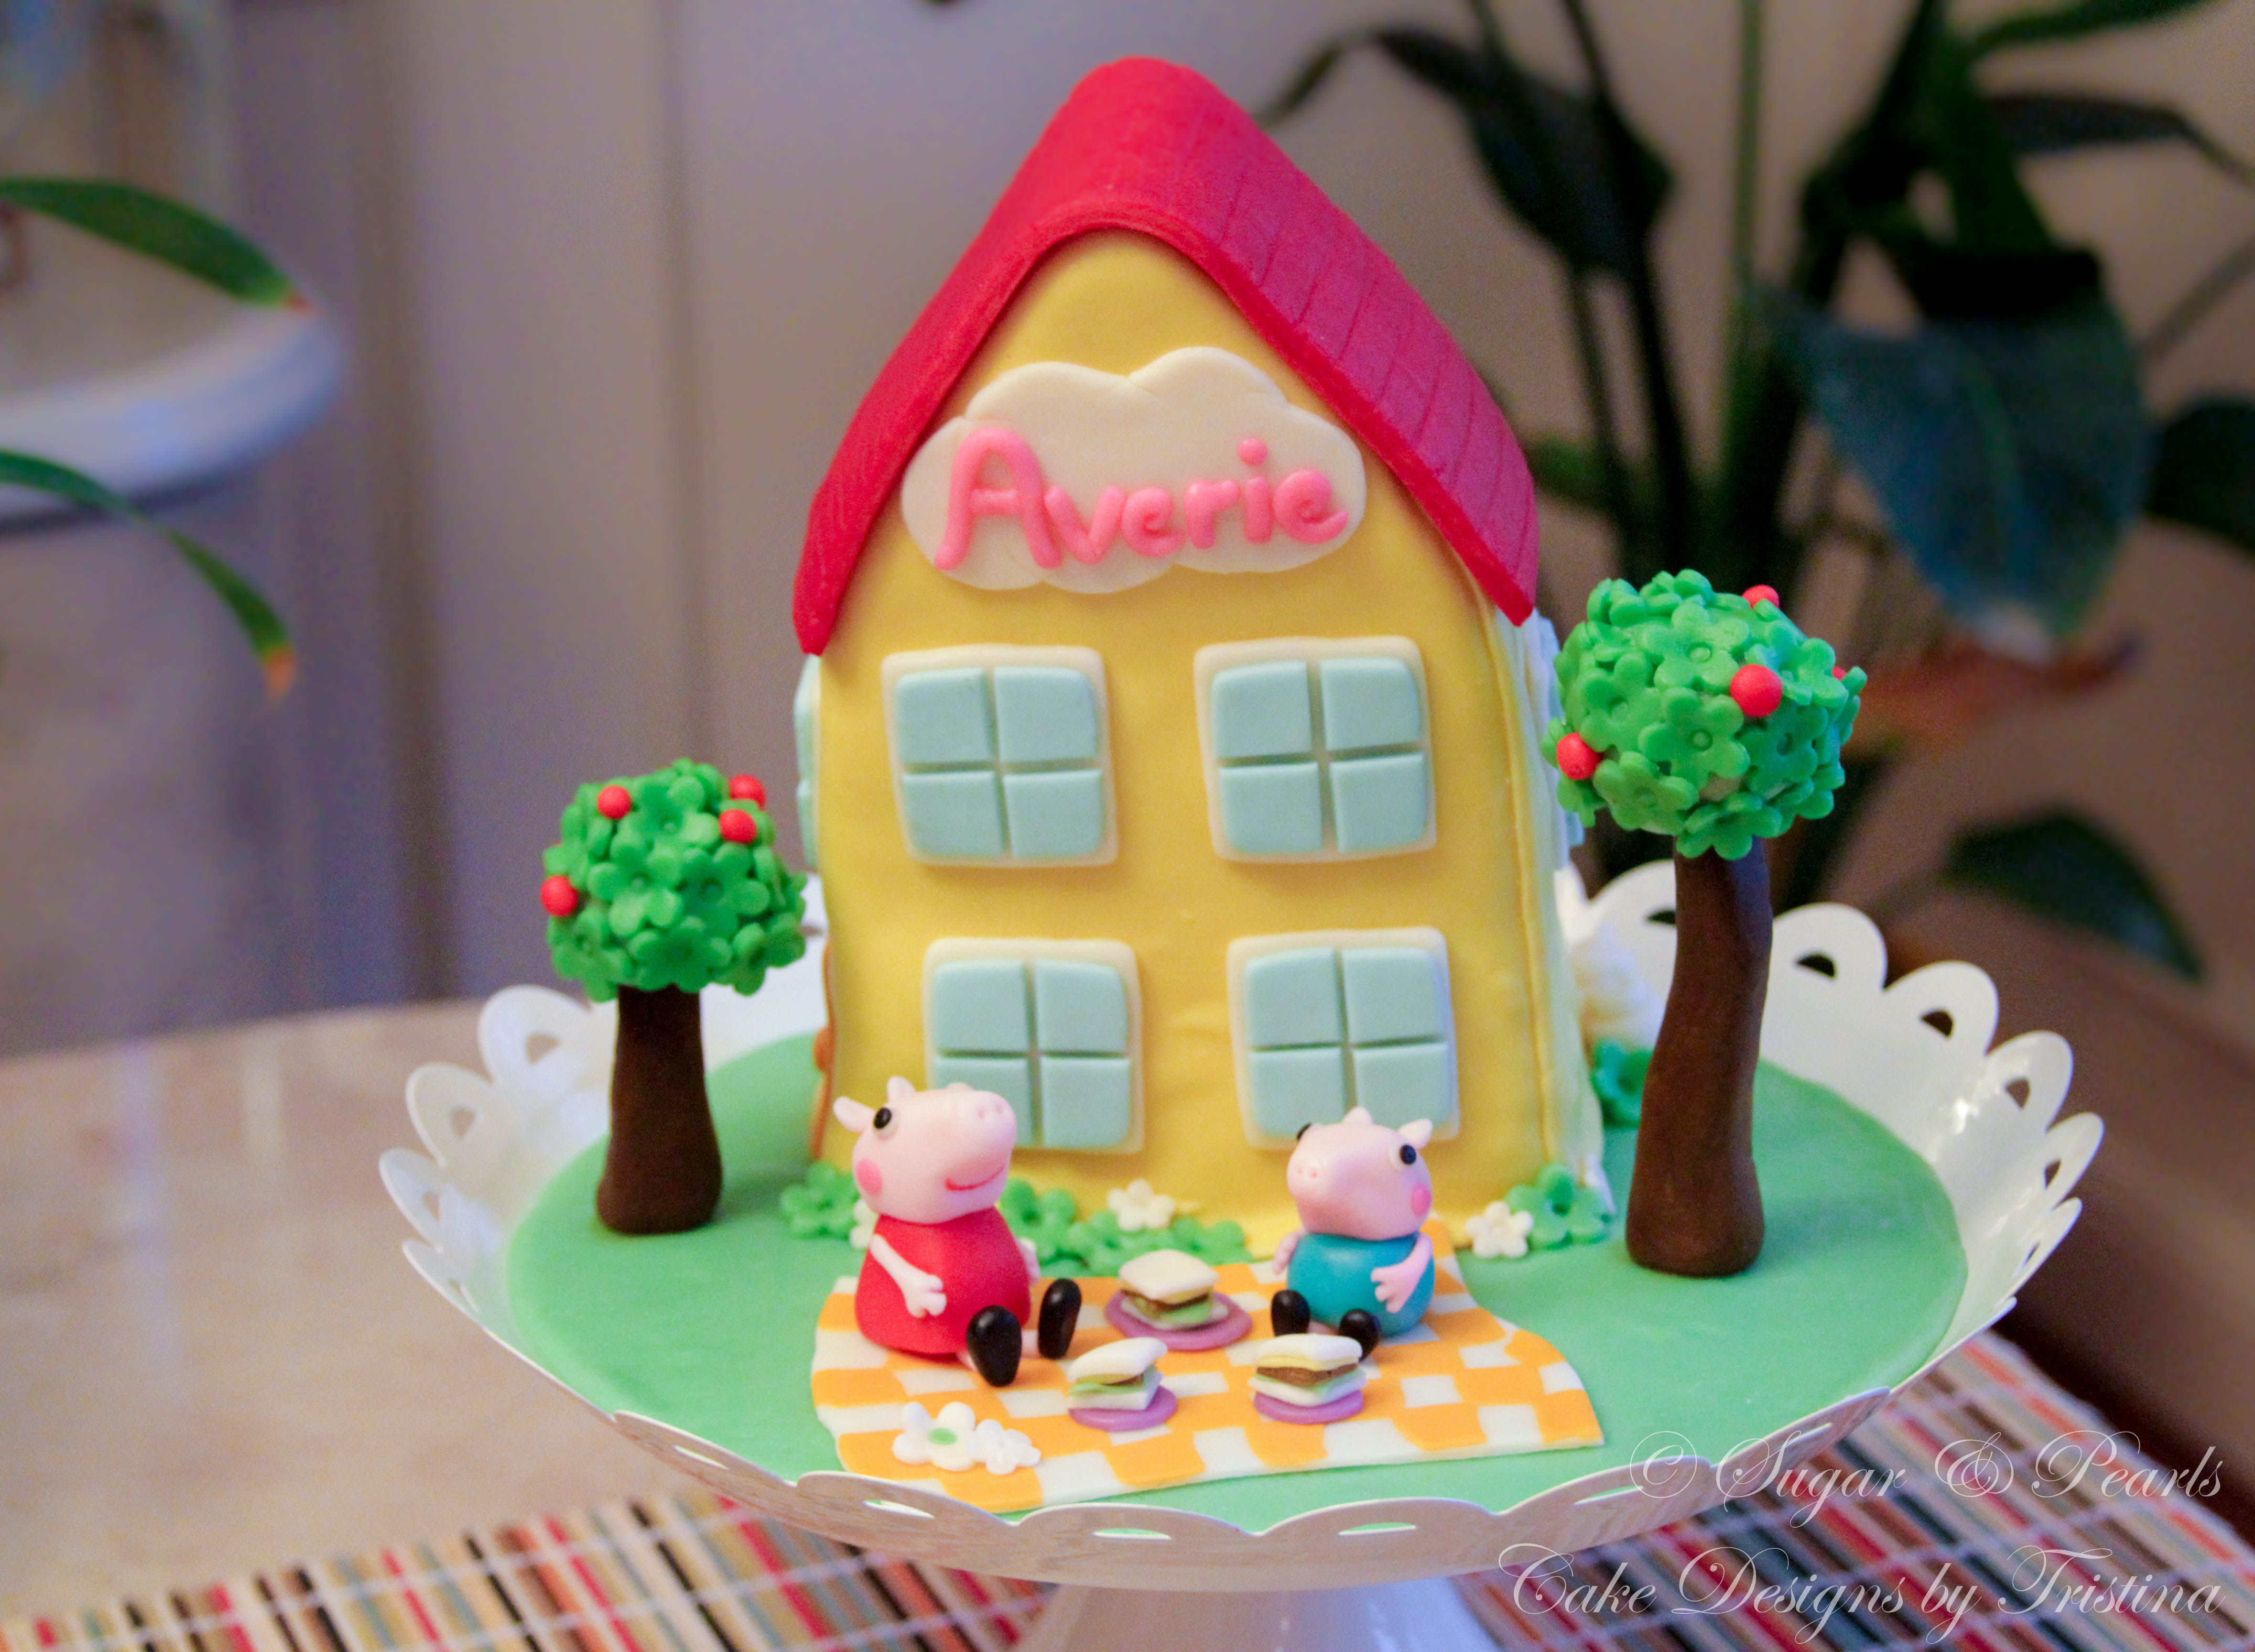
Peppa Pig's House Cake
November 13, 2016
It was a bittersweet moment for me this past weekend. I still cannot believe (nor accept) that my baby girl, Averie NhaUyen, has just turned FOUR! It was just like yesterday when we had to rush to the hospital at approximately 7 o'clock as she decided to arrive two days early on a sunny November morning. Being a "lazy baby," I could still hear her crying uncontrollably for her milk bottle although she'd just thrown up 5 minutes ago from having too much milk. And of course, I would never forget those late nights when she refused to fall asleep until 3 o'clock in the morning. Her "colickiness" also reminded me of how lucky I am to marry the best husband in the world, who stayed up with Averie for almost 3 months while having to work at 8 AM every day, just so I could sleep through the night. And like a blink of an eye, that stubborn baby girl is now four... Can someone please slow time down for me somehow?
Originally, I was planning on making a pink castle cake, but Averie picked Peppa Pig theme for her birthday. How could I not see this request coming? She watches Peppa Pig every chance she gets at home. I did a few searches and thought a house cake would be fun to make. To be honest, I was up for something other than those traditional round cakes anyway. And that's how this HOUSE cake comes to live.
Originally, I was planning on making a pink castle cake, but Averie picked Peppa Pig theme for her birthday. How could I not see this request coming? She watches Peppa Pig every chance she gets at home. I did a few searches and thought a house cake would be fun to make. To be honest, I was up for something other than those traditional round cakes anyway. And that's how this HOUSE cake comes to live.
DECORATIONS PREPARATION
I start out making the two apple trees one week before the event. I know that I need the trunks to hold their shape as they would be standing solo. I roll two brown logs of fondant, 2.5-inch and 4-inch long, and shape them with a slight curve so they could stand (Photo 1a and 1b). I leave these to completely dry over a few days. The treetops are made using mini cupcakes wrapped with light green fondant. I punch out about 28 mini flowers in green fondant to cover the treetops. The "apples" are made using red round fondant and glued sporadically over the tops.
The windows are made using two different sizes of square at about 1.5 x 1.5-inch and 1.75 x 1.75-inch measurements (Photo 2). For the blue squares, I cut them into quarters and stack them on top of the white fondant. I make eight windows for the entire house. For the front side door, I use orange fondant and cut it into a 2 x 2-inch rectangular, and add a small round fondant midway to the right to make a doorknob (Photo 3). I leave all of these pieces to dry overnight.
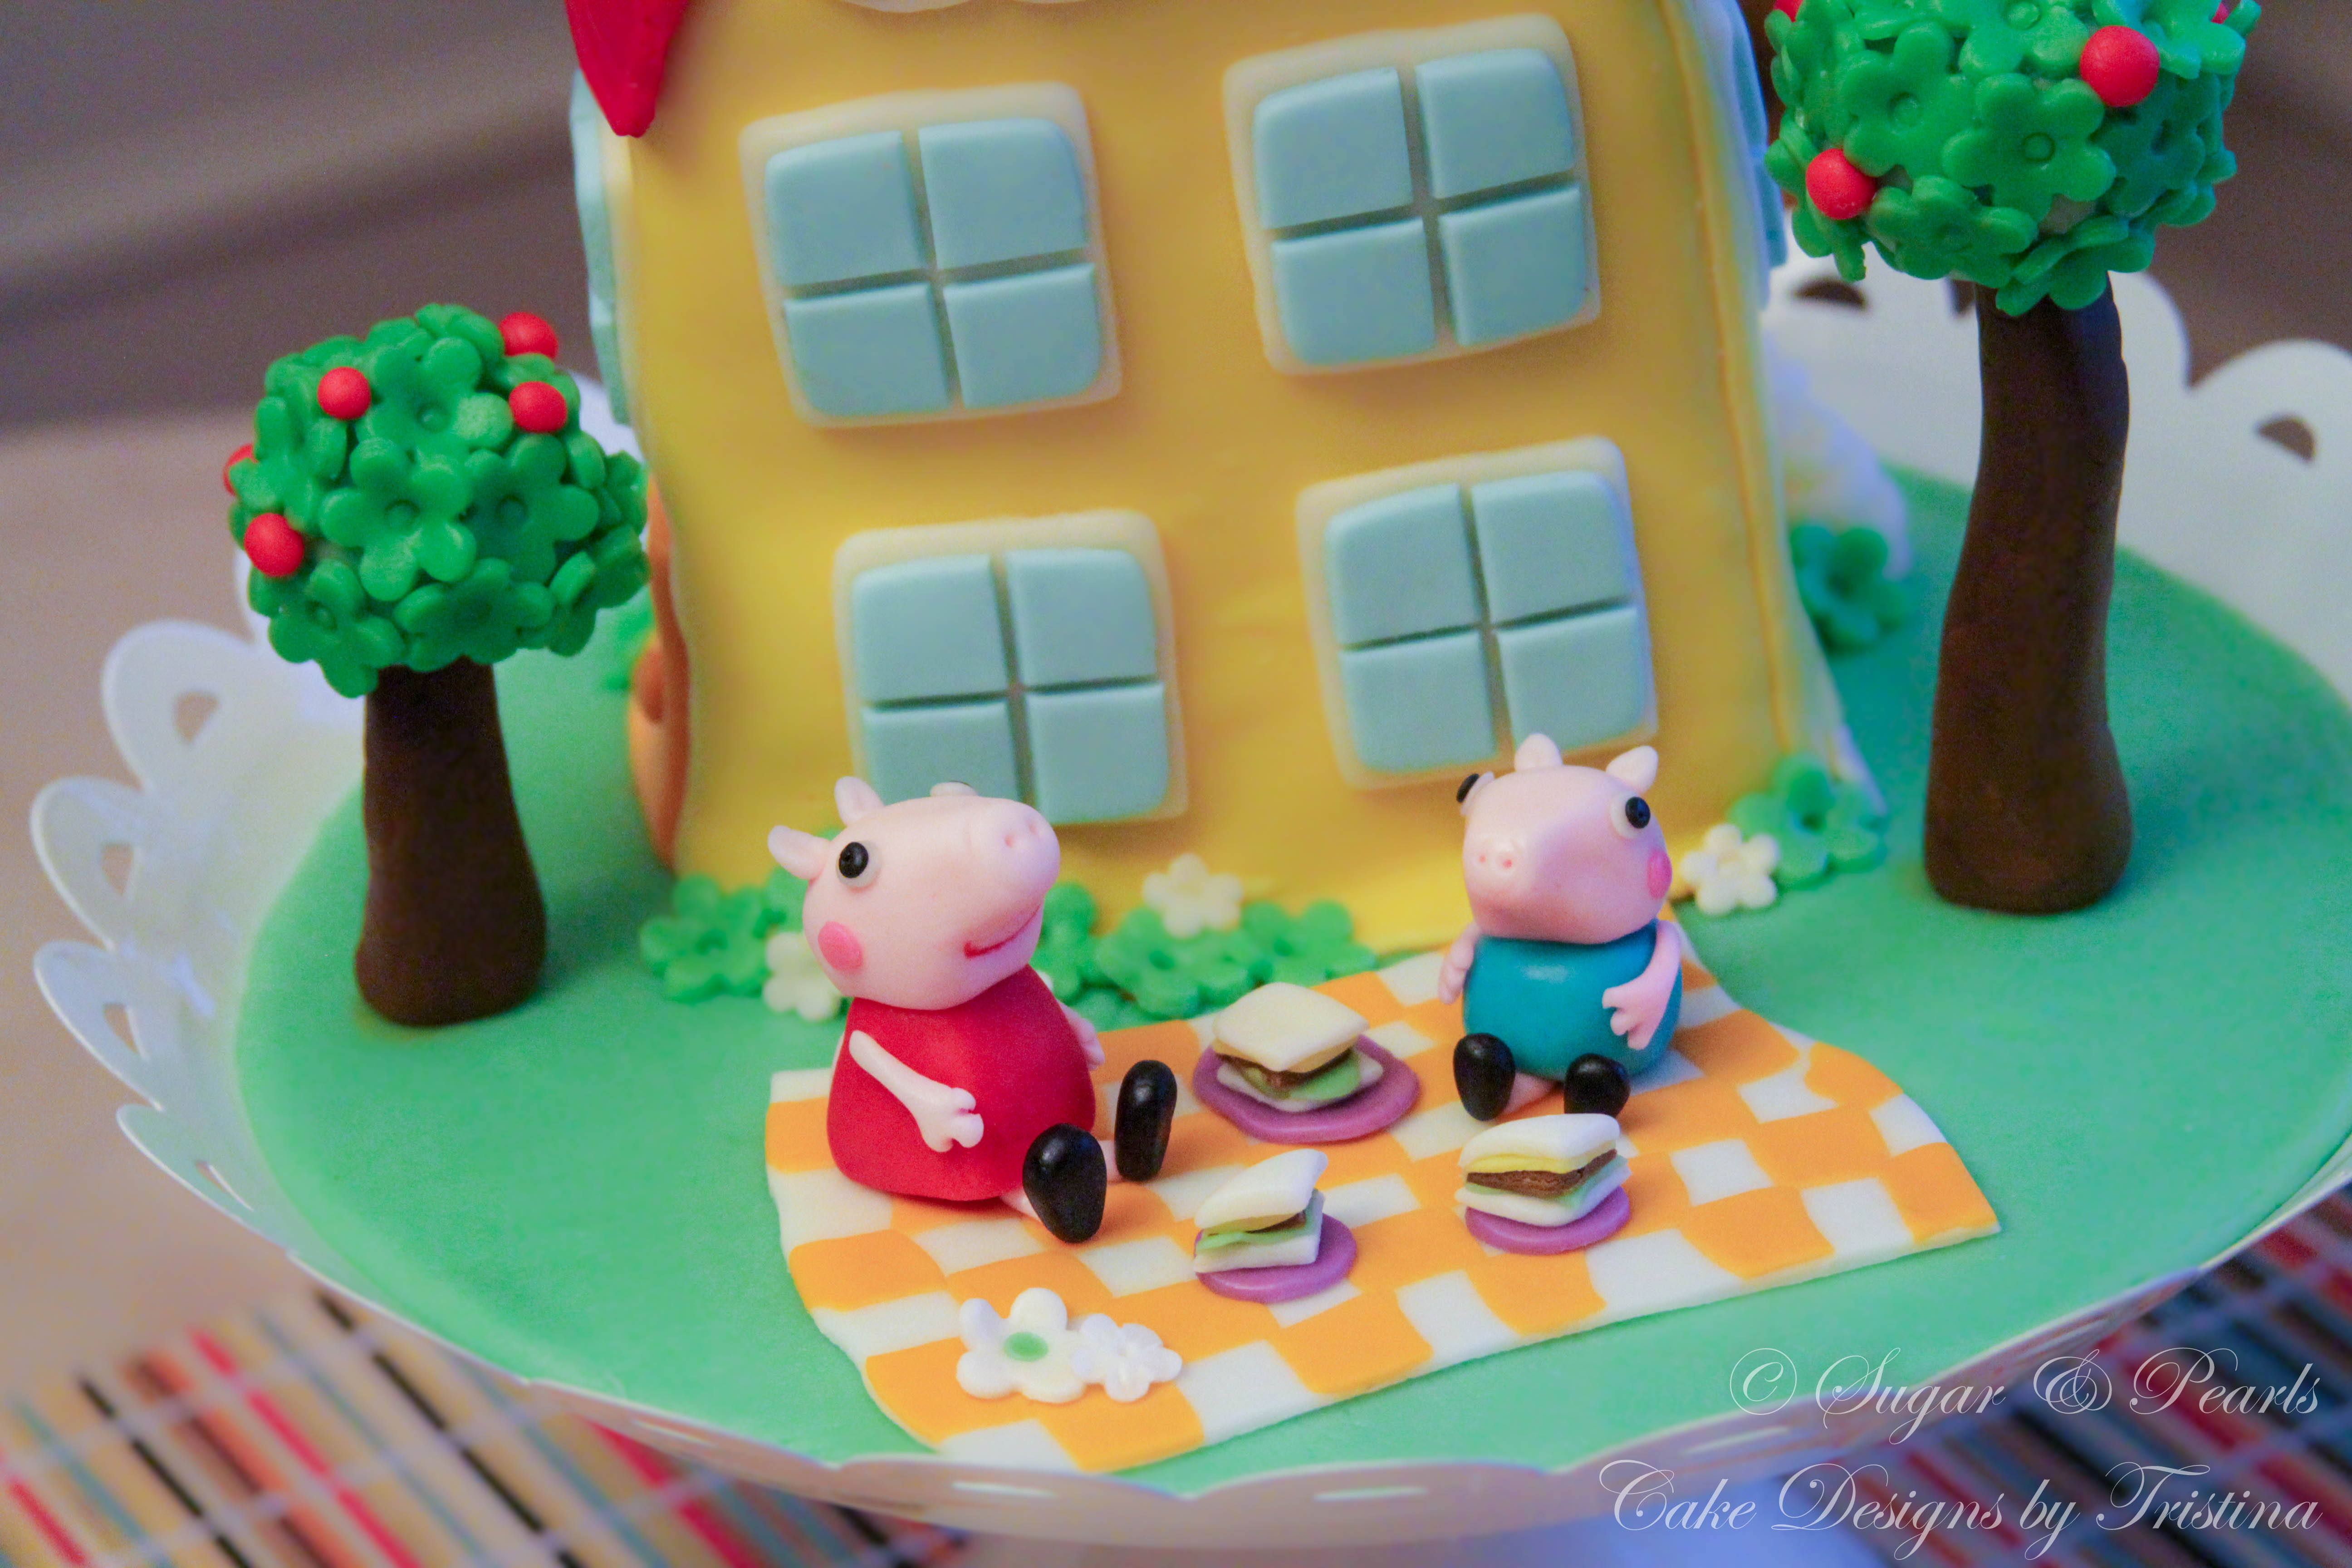
The easiest thing to make was the picnic blanket (Photo 4). I roll out a very thin white 3 x 5 inch rectangular fondant. I cut about 30 small squares of orange fondant and line them up in every other square order on the white fondant sheet, and slightly roll the sheet again to blend them together. The sandwiches are the cutest thing to make. I punch out a square and cut them in to 4 smaller squares. I use white squares to make toasts, brown squares to make beef patties, green squares to use as lettuces, and yellow squares to make cheese slices. The sandwiches are served on round purple fondant plates (Photo 5).
I make the "pigs" last. I begin making Peppa Pig first, using my niece's toy as the model (Photo 6a and 6b). I start with a round pink fondant ball for the pig's head and mold one side into an oblong nose-shaped. I make two mini ovals for her ears, and punch two circles of black fondant which are stacked on a slightly bitter rounds of white fondant to make her eyes. I finish the nose by poking 2 holes and draw on her smiley mouth using edible red ink. I add the final touch to her face with two circles of hot pink fondant to create the "blush-look." I roll a slightly bigger round red fondant ball and shape it into a semi-triangle to make Peppa's dress. I attach the head and the dress together using water. Next, I cut two thin strips of pink fondant to make her hands. I create the slits on the hands that I mold into three fingers and attach the arms on the sides of her dress. For her legs, I use two shorter strips of pink fondant and attach them to her black shoes, which are made using two rounds fondant and mold into tear-drop shapes. The same technique is used to create George Pig (Photo 7a and 7b).
DECORATIONS PREPARATION
I start out making the two apple trees one week before the event. I know that I need the trunks to hold their shape as they would be standing solo. I roll two brown logs of fondant, 2.5-inch and 4-inch long, and shape them with a slight curve so they could stand (Photo 1a and 1b). I leave these to completely dry over a few days. The treetops are made using mini cupcakes wrapped with light green fondant. I punch out about 28 mini flowers in green fondant to cover the treetops. The "apples" are made using red round fondant and glued sporadically over the tops.
The windows are made using two different sizes of square at about 1.5 x 1.5-inch and 1.75 x 1.75-inch measurements (Photo 2). For the blue squares, I cut them into quarters and stack them on top of the white fondant. I make eight windows for the entire house. For the front side door, I use orange fondant and cut it into a 2 x 2-inch rectangular, and add a small round fondant midway to the right to make a doorknob (Photo 3). I leave all of these pieces to dry overnight.
The easiest thing to make was the picnic blanket (Photo 4). I roll out a very thin white 3 x 5 inch rectangular fondant. I cut about 30 small squares of orange fondant and line them up in every other square order on the white fondant sheet, and slightly roll the sheet again to blend them together. The sandwiches are the cutest thing to make. I punch out a square and cut them in to 4 smaller squares. I use white squares to make toasts, brown squares to make beef patties, green squares to use as lettuces, and yellow squares to make cheese slices. The sandwiches are served on round purple fondant plates (Photo 5).
I make the "pigs" last. I begin making Peppa Pig first, using my niece's toy as the model (Photo 6a and 6b). I start with a round pink fondant ball for the pig's head and mold one side into an oblong nose-shaped. I make two mini ovals for her ears, and punch two circles of black fondant which are stacked on a slightly bitter rounds of white fondant to make her eyes. I finish the nose by poking 2 holes and draw on her smiley mouth using edible red ink. I add the final touch to her face with two circles of hot pink fondant to create the "blush-look." I roll a slightly bigger round red fondant ball and shape it into a semi-triangle to make Peppa's dress. I attach the head and the dress together using water. Next, I cut two thin strips of pink fondant to make her hands. I create the slits on the hands that I mold into three fingers and attach the arms on the sides of her dress. For her legs, I use two shorter strips of pink fondant and attach them to her black shoes, which are made using two rounds fondant and mold into tear-drop shapes. The same technique is used to create George Pig (Photo 7a and 7b).
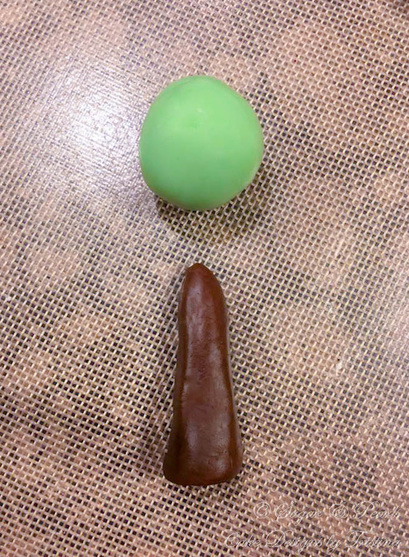
Photo 1a: Mold the apple tree.
|
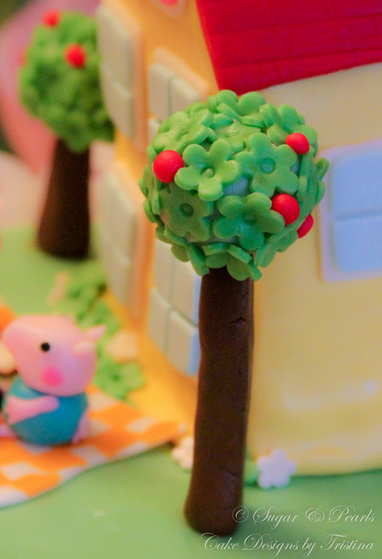
Photo 1b: Add flowers and apples to the tree top.
|
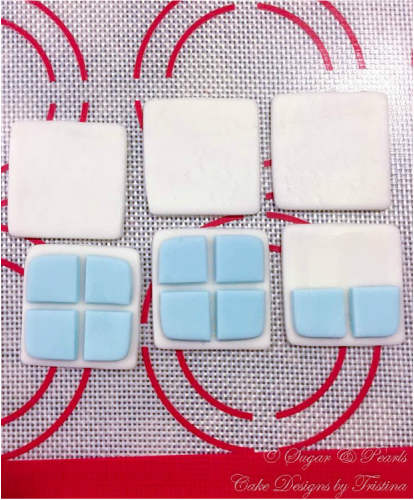
Photo 2: The windows.
|
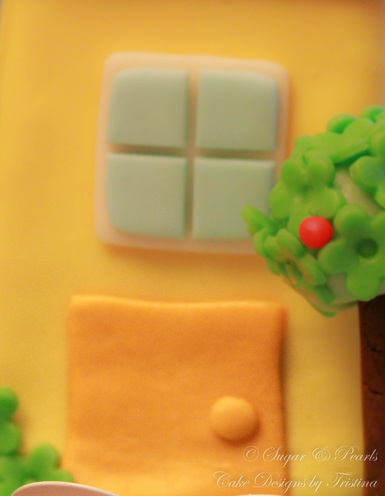
Photo 3: The front door.
|
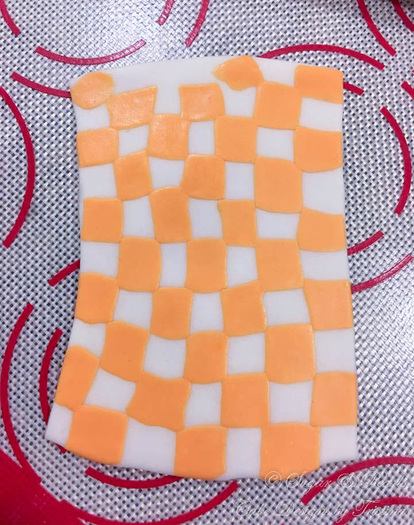
Photo 4: The picnic blanket.
|
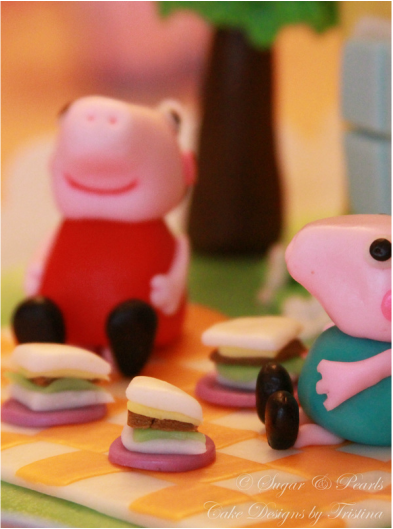
Photo 5: The sandwiches.
|
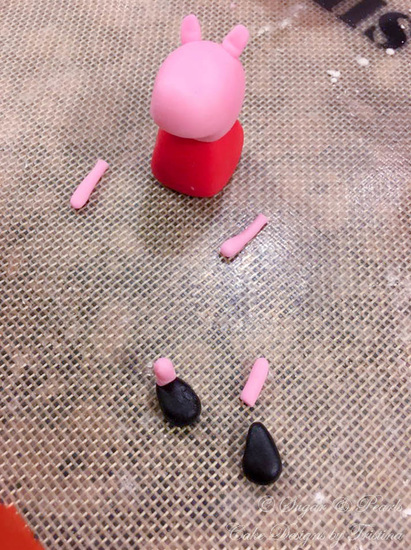
Photo 6a: Putting Peppa Pig together.
|
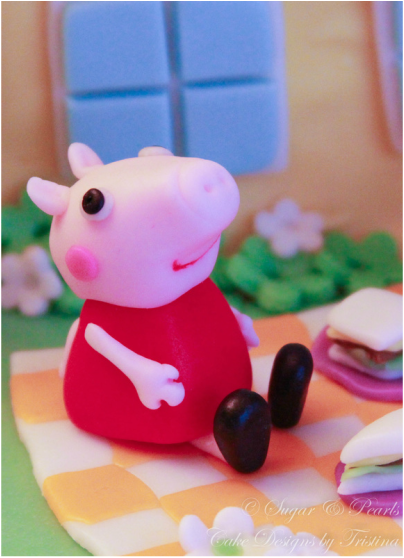
Photo 6b: Sitting Peppa on the blanket.
|

Photo 7a: Putting George Pig together.
|
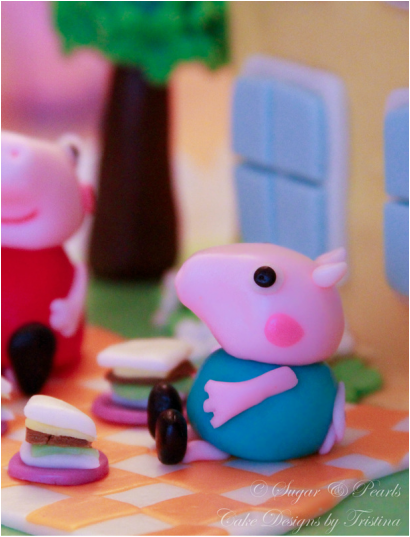
Photo 7b: Sitting George on the blanket.
|
ASSEMBLE THE CAKE
Averie's favorite treat is chocolate so I use my most famous chocolate recipe for this cake. I bake a 9 x 13-inch cake for the house and still had plenty leftover cakes to sample. I have to brag about my first attempt in making chocolate buttercream at a later post as it was extremely buttery and delicious that the entire cake is all eaten up before the end of the night.
I have to admit that putting the house cake together is more difficult than I expected. I generally do not use dowels to hold up my cake structures as I do not like to remove them during the cutting process. I approach the house cake without using the dowels, thus it takes longer to shape the cake. If I have to redo this cake, I would definitely use the dowels to hold the cake together to speed up the process. I start out freezing the cake first before cutting it into the house shape and I use buttercream to "glue" the layers together. It takes almost two hours (including waiting time) to put the entire cake together.
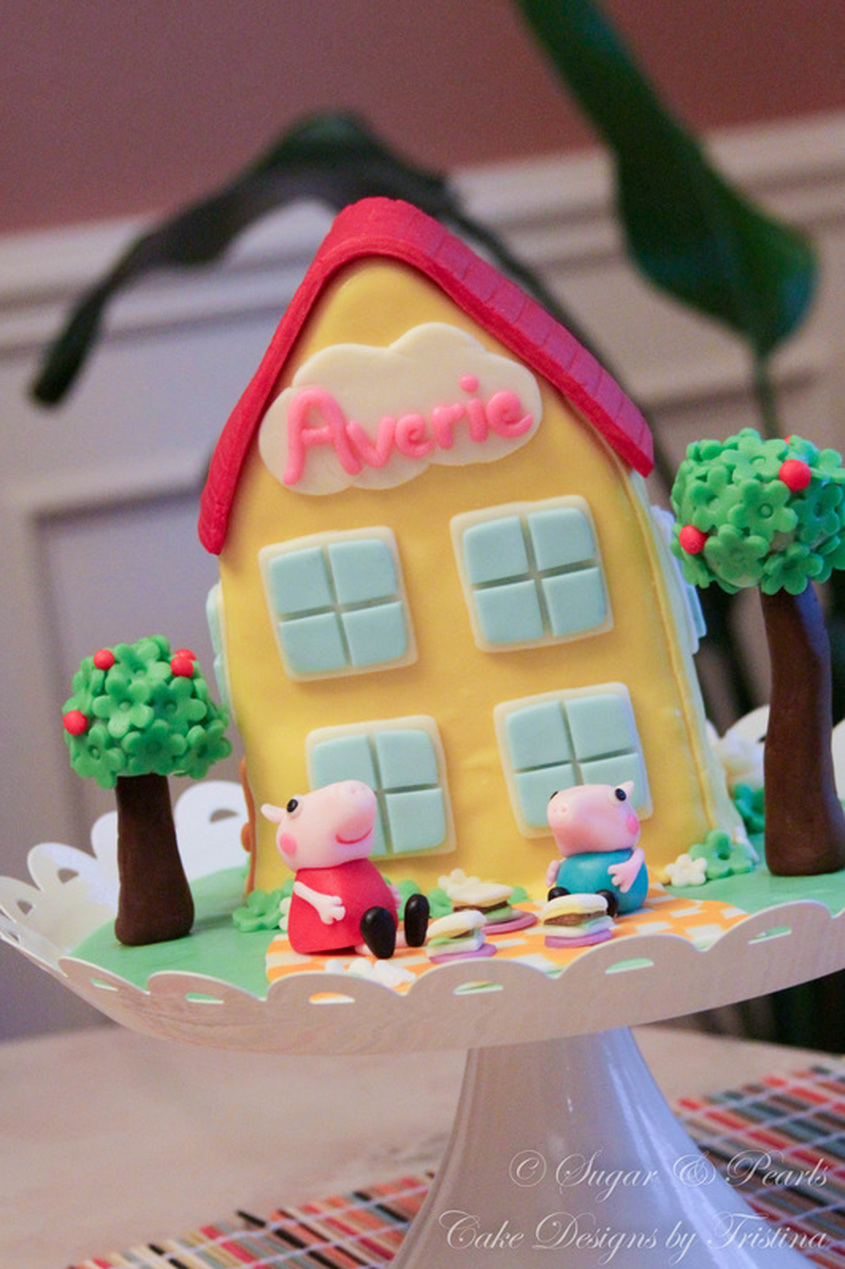
I begin covering almost the entire house with yellow fondant (Photo 8). To make the red roof, I cut a rectangular sheet of red modeling chocolate and roll it on my "brick" mold to give the imprint effect as seen below (Photo 9). Then, I add the red roof on the top of the house, making sure it is aligned in the center. The following steps are easy: add the front side door and all of the windows throughout the house. I add a total of 8 windows, with 4 of them locate on the main side of the house (Photo 10). I finish the last touch by adding a pre-cut cloud-shaped white fondant with Averie's name on it on the top of the house (Photo 11).
Averie's favorite treat is chocolate so I use my most famous chocolate recipe for this cake. I bake a 9 x 13-inch cake for the house and still had plenty leftover cakes to sample. I have to brag about my first attempt in making chocolate buttercream at a later post as it was extremely buttery and delicious that the entire cake is all eaten up before the end of the night.
I have to admit that putting the house cake together is more difficult than I expected. I generally do not use dowels to hold up my cake structures as I do not like to remove them during the cutting process. I approach the house cake without using the dowels, thus it takes longer to shape the cake. If I have to redo this cake, I would definitely use the dowels to hold the cake together to speed up the process. I start out freezing the cake first before cutting it into the house shape and I use buttercream to "glue" the layers together. It takes almost two hours (including waiting time) to put the entire cake together.
I begin covering almost the entire house with yellow fondant (Photo 8). To make the red roof, I cut a rectangular sheet of red modeling chocolate and roll it on my "brick" mold to give the imprint effect as seen below (Photo 9). Then, I add the red roof on the top of the house, making sure it is aligned in the center. The following steps are easy: add the front side door and all of the windows throughout the house. I add a total of 8 windows, with 4 of them locate on the main side of the house (Photo 10). I finish the last touch by adding a pre-cut cloud-shaped white fondant with Averie's name on it on the top of the house (Photo 11).

Photo 8: Cover the house with yellow fondant.
|
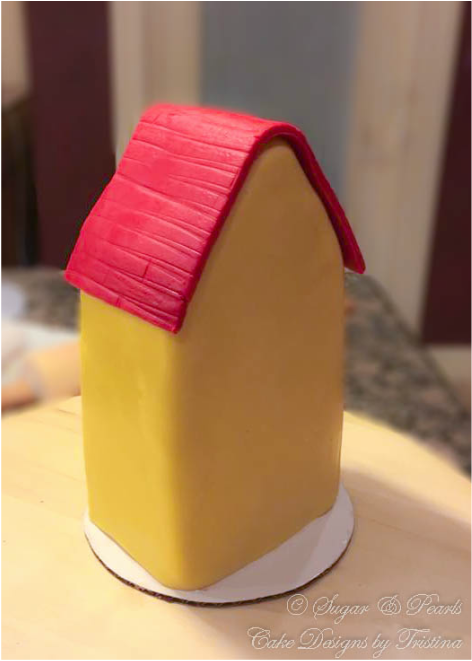
Photo 9: Adding the red roof.
|
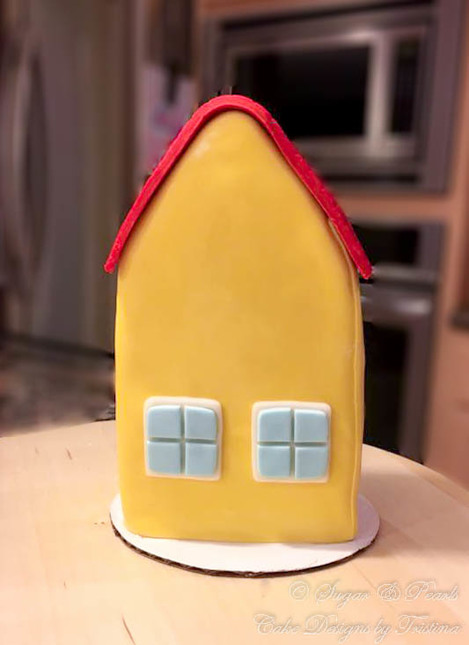
Photo 10: Adding the windows and doors to the house.
|

Photo 11: Adding the cloud name tag to the house.
|
Then I add the ancillary decorations around the house to bring the cake to live. I add some green and white mini flowers around the house to create that greenery look. To transform a plain backyard, I add three white "swirl" bushes on the back of the house. Next, I place the apple trees on both side of the house. The small tree is easy to glue on the using plain water. The taller tree takes a bit longer, and I have use a small toothpick to uphold the treetop, preventing it from falling. Surprisingly, they hold up pretty well after staying in the fridge overnight. I finish the cake by adding the picnic blanket on the front yard of the house, sitting both Peppa and George along with the sandwiches plates on to the blanket.
The most compliment I receive from this cake is the pig figurines. My mom thought they were the "toys" from my niece until I told her that the pigs are edible. I enjoyed making the Peppa and George as well, although I have to say the head is the toughest part to mold. I think I had to mold Peppa's head for at least 4-5 times until I achieved the above version. However, the best part of all is when Averie thanked me, making two nights of staying up to finish the cake are all worth it after hearing these words, "Thank you so much Mommy, I love you."
I encourage you to consider making a Peppa Pig cake at your next child's birthday party! Your kid may thank you just like mine did.
xoxo,
Tristina
I encourage you to consider making a Peppa Pig cake at your next child's birthday party! Your kid may thank you just like mine did.
xoxo,
Tristina
COPYRIGHT © 2016 - SUGAR & PEARLS ~ CAKE DESIGNS BY TRISTINA
