Back-to-School Book Cake
September 24, 2016
September is especially busy for me not only with baking, but also because the kids are transferring to a new Montessori School this year. Preparing for back-to-school along with planning the three important birthdays for the men (or boys) in my life ate up all of my personal time . On top of all this, we just got back from our end-of-summer vacation at Disneyland in Anaheim, where we celebrated our son's birthday early over the Labor Day weekend. Thus, I am running a little behind this month, but I promise that there are many more delicious cake recipes as well as cute cake tutorials coming over the next few months.
This year is extraordinary for us as my baby boy, DinhPhong Aiden is turning FIVE (what happened to the last five years?)! He has long requested for a surprise birthday party this year. His exact words were..."I want to come into the room and everyone shouts...'Happy Birthday!'." And just like every year, besides for his first birthday, I asked what would he like his birthday cake to be. After rambling about various cartoon characters, he finally settled for the "magic school bus." After giving some thoughts into this theme, I decided to incorporate the "school bus" into a Back-to-School Birthday Party theme.
DECORATIONS PREPARATION
First, I start out making the entire school bus out of yellow fondant. I want a "chubby" look of the school bus so I'd soften my fondant with less sugar (and also added 1/2 stick of butter for better taste). I first cut out one 1.5 x 2-inch rectangular, one 1.5 x 3-inch rectangular, and four 1.5 x 3.5-inch of rectangular yellow fondant (Photo 1). Next, I make two 1 x 3-inch rectangular of black fondant to use as the "side windows" of the bus, and one 1/2 x 1- inch rectangular strip as the front windshield window (Photo 2). Using thin yellow fondant strips, I line in the middle of these black rectangular fondant to create the "windows" look. To make the wheels, I use four round circles of black fondant, stacking on top of the larger circles of yellow fondant, and add a white fondant dot in the middle (Photo 3). I also make two small circles of white fondant to create the front headlights, and four small circles of red fondant as the back headlights. I leave all of these fondant creations overnight to dry.
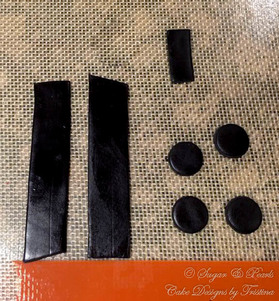
Photo 1. Two 1.5 x 3.5" rectangular strips of yellow fondant.
|
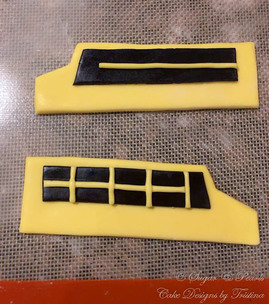
Photo 2. Two 1 x 3" rectangular of black fondant used as side windows.
|
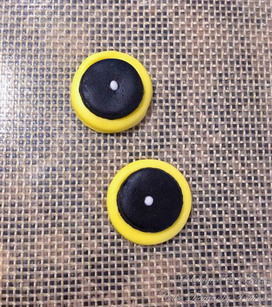
Photo 3. The bus wheels.
|
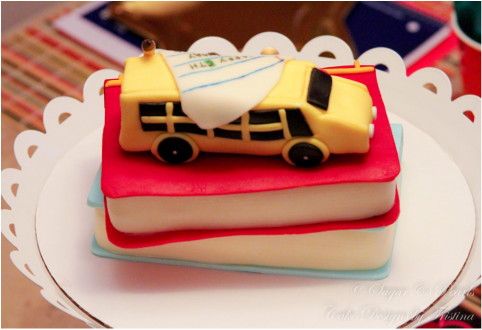
To assemble the bus, I line the bottom of the bus with one of the yellow rectangular strips and glue all of the side strips around it. I pick my son's favorite snack rolls and M&M candies to fill the hollow space and to give the bus that "chunky" look. I also add the headlights on the front and the back of the bus. I finish the bus by putting the last yellow rectangular strip on the top. Then, I leave the completed bus to dry overnight once again.
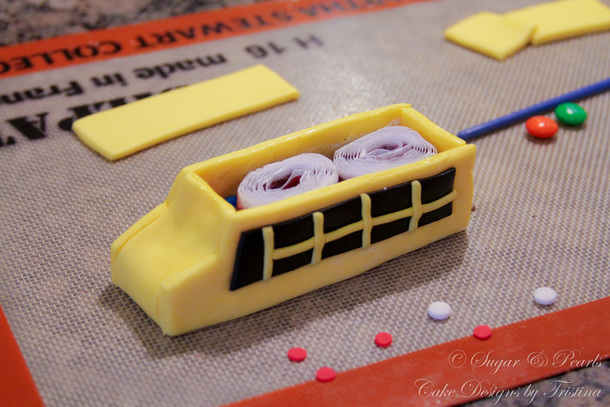
Photo 4. Assemble the bus with special treats inside.
To make the book cake, I start with 2 one-inch chiffon vanilla cake, stacking on top of each other. I use the 9 x 12 baking pan to make two books. The cake turns out perfect, making the decorating part a whole lot easier. This cake is filled and frosted with coconut buttercream. Stay tuned for my Vanilla Chiffon Cake recipe over the next few weeks.
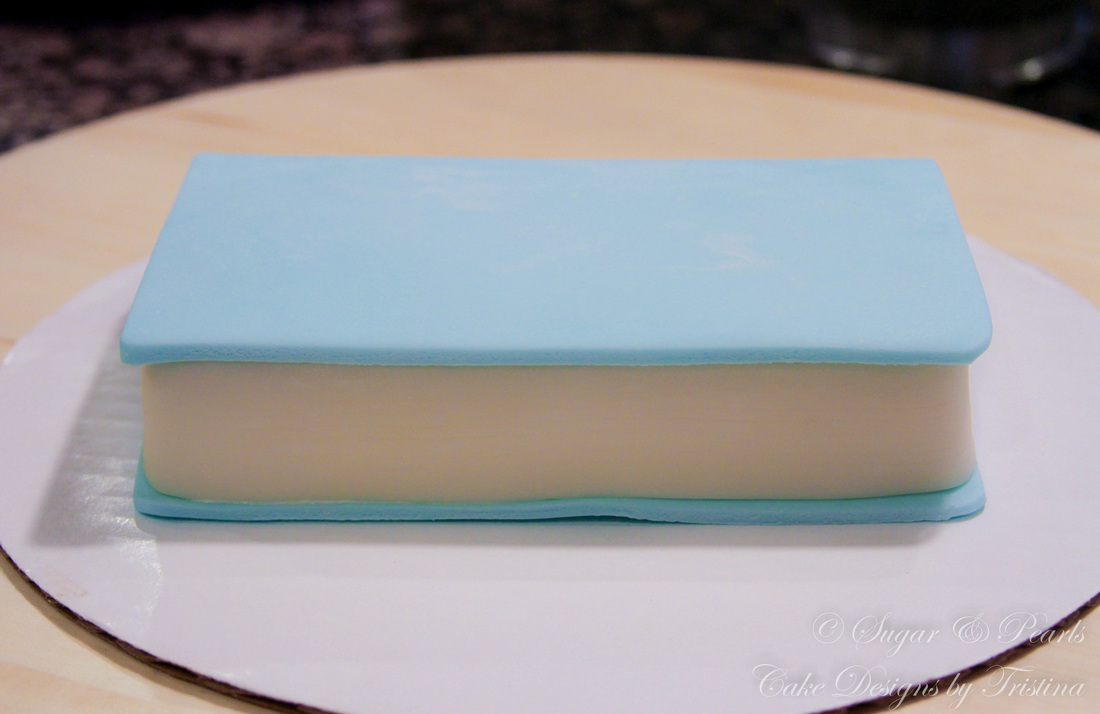
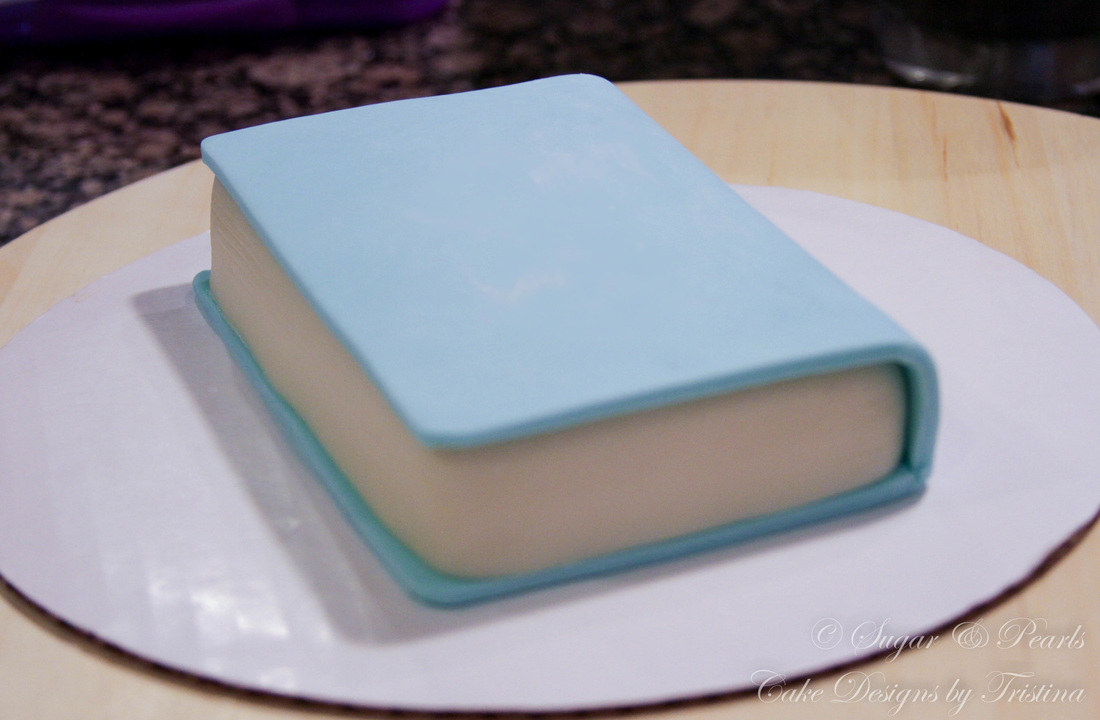
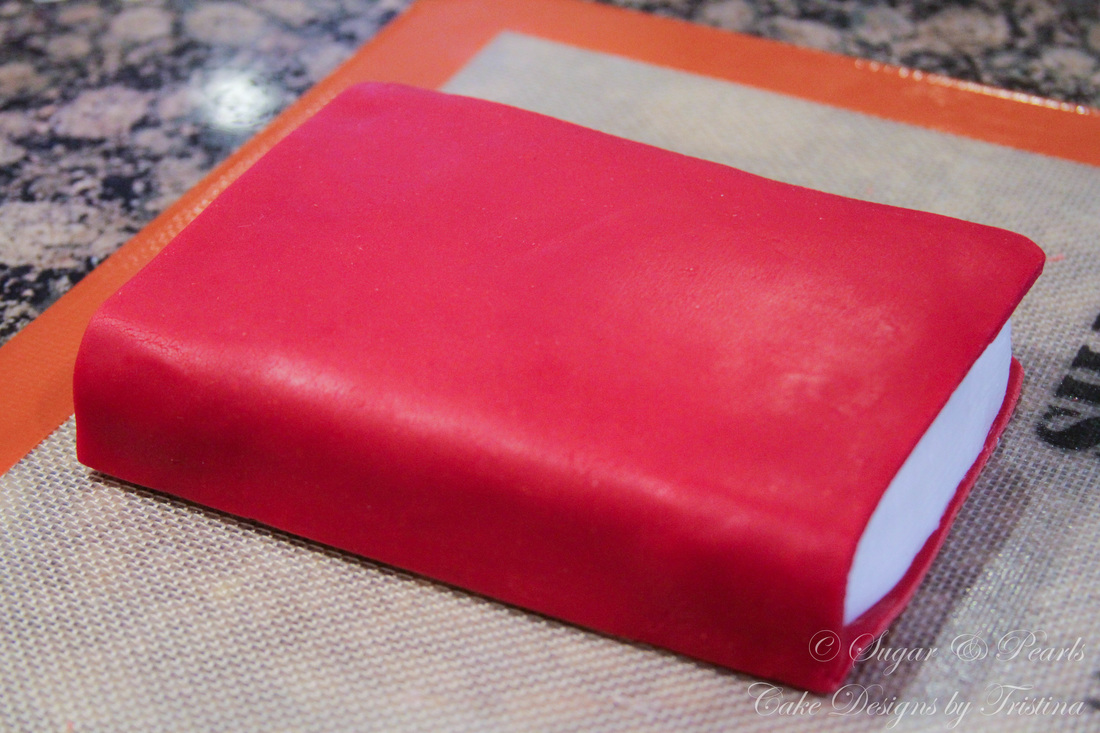
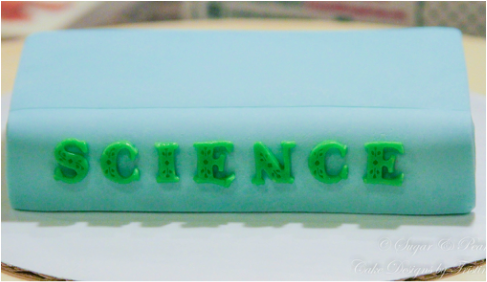
After frosting the cake, I lined an 2-inch white fondant strips around three surfaces of the cake, leaving the "spine" of the book uncover (Photo 5). Using my "sea-shell" fondant tool, I run a few times over the white fondant strip to create the "pages." Next, I line the front cover of the book on first and cover the back spine of the book as well. Make sure the cover page is slightly bigger than the actual book (Photo 6). I also recommend to roll the fondant a bit thicker for the cover page to create that "firm" look of the book. Once the front cover of the book is done, I cut another fondant to cover for the back of the book. I use the same method, except this layer does not need to cover the spine of the book (Photo 7). I flip the cake over and glue the back cover on using some buttercream filling. Using the cake smoother, I smooth out the surfaces of the book covers (Photo 8 and 9).
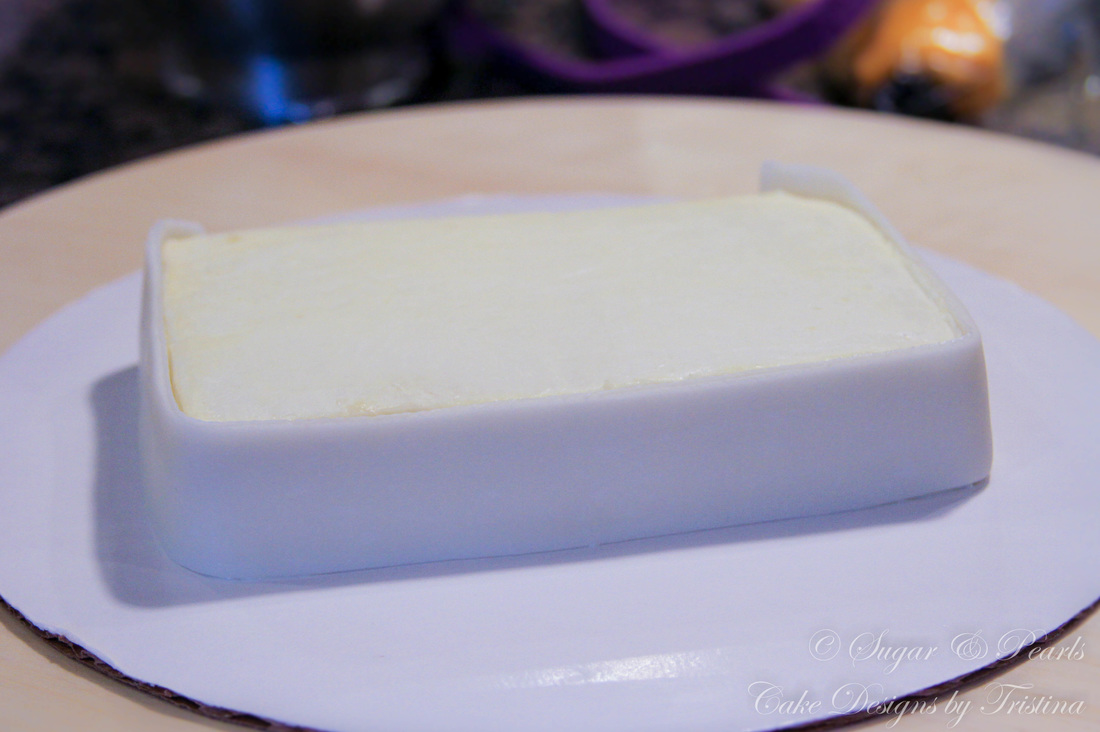
Photo 5. Line the "pages" of the book.
|
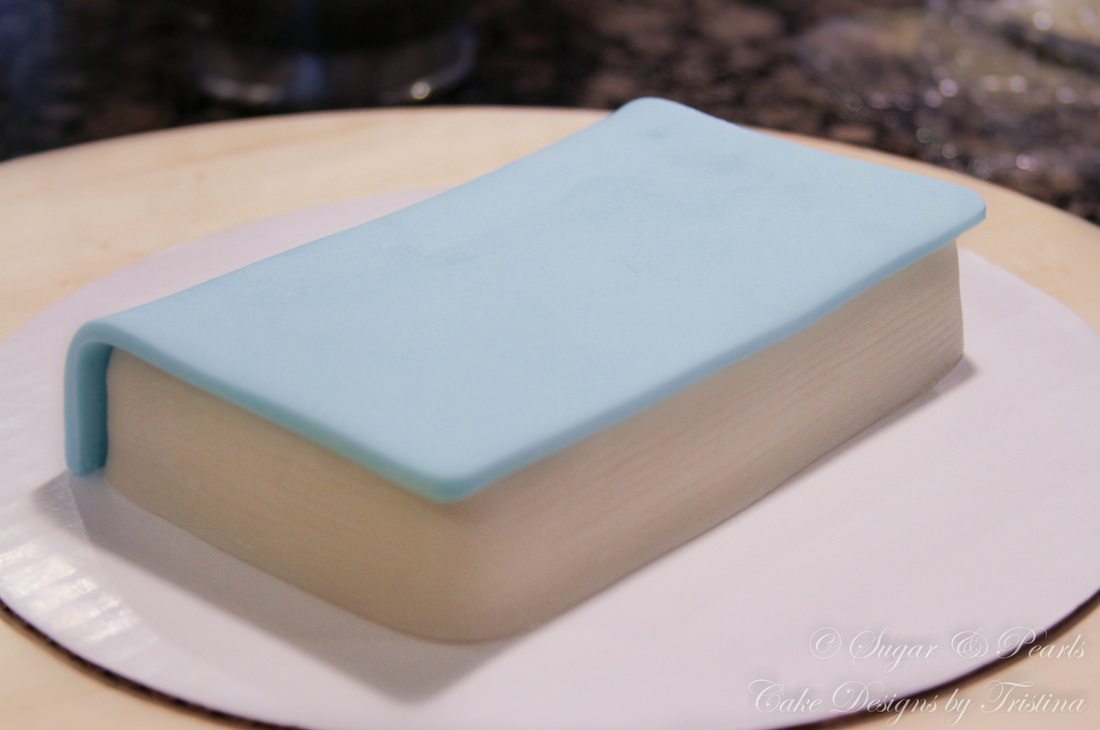
Photo 6. Line the book front cover.
|
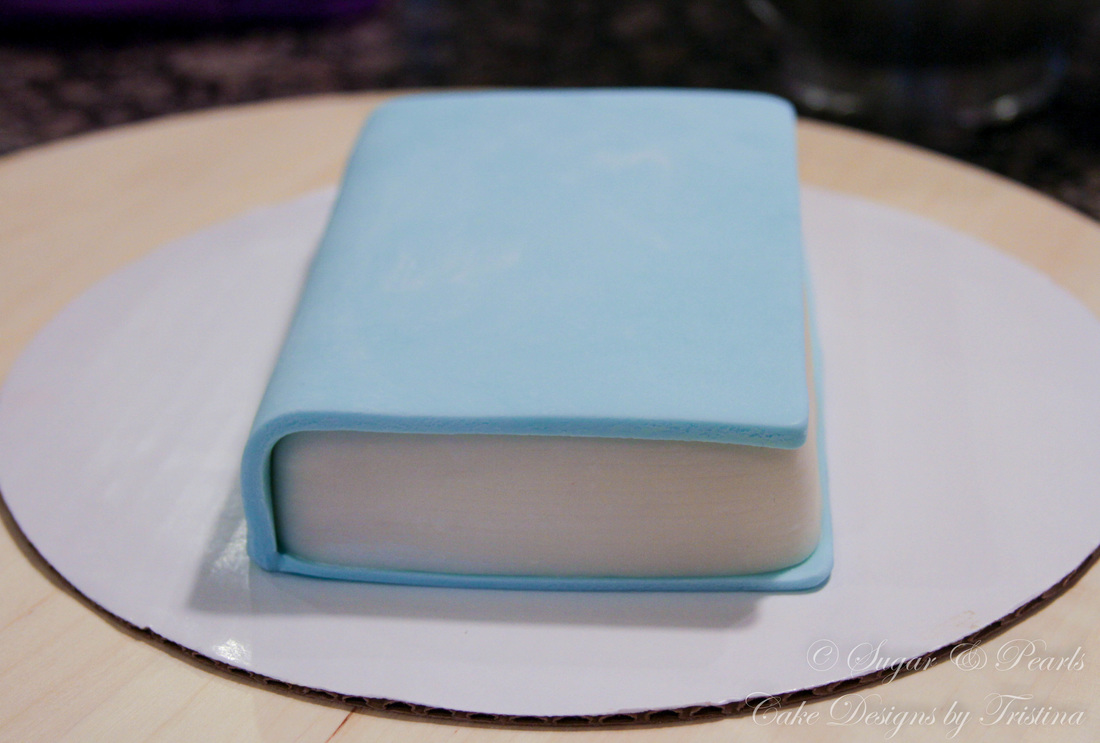
Photo 7. Line the book back cover.
|
|
|
Photo 8 and photo 9. A full view of the front, side and back of a complete cake book covered with fondant.
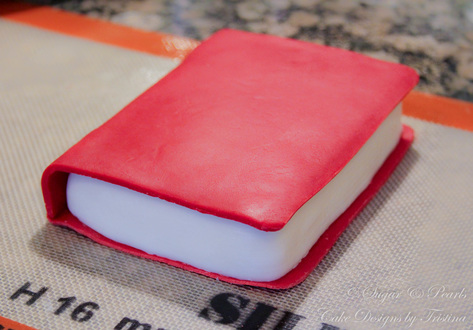
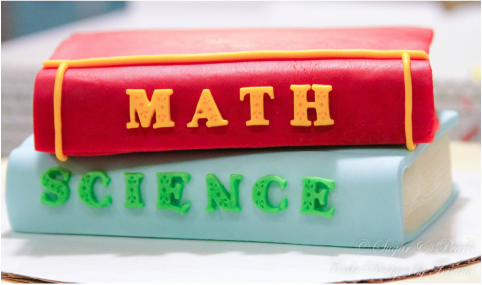
I repeat the same techniques for the second book. Except, the cover of the red book is made out of modeling chocolate instead. This is my first attempt to use chocolate, and I really like the way this book turns out. If you look carefully, you can see the wavy lines along the surfaces, and this gives the book a "used-leather" looking cover, which is what I am trying to achieve (Photo 10 and 11).
|
|
Photo 10 and photo 11. Repeat steps 5 to 7 for the second book.
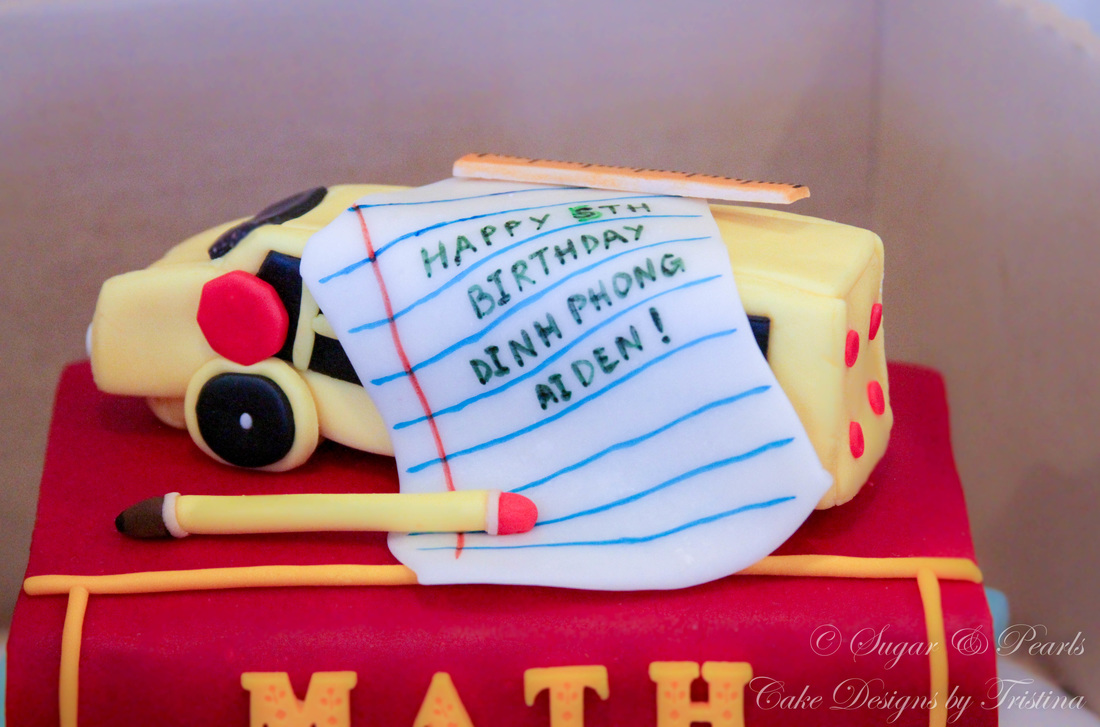
To make a pencil, I used three different fondant colors: red, yellow and brown. Red fondant is rolled into a round. Yellow fondant is rolled into a long cylinder. And the brown fondant is rolled into a shape of the triangle. Using water, I glue these three shapes together and let the "pencil" air dry overnight (Photo 12).
The ruler is probably one of the easiest "school supply" to make using orange fondant. Since I did not want to color my fondant orange for such a small item, I use the yellow fondant and paint it with orange food color. I shape the rule into a thin rectangular strip. I let the strip overnight to dry, and use the edible black pen to make the ruler marks (Photo 13). This literally takes less than 5 minutes to complete the ruler.
I use a white 2.5 x 3.5-inch rectangular fondant to make a piece of paper. For a torn look, I trim a part of the left upper corner. I use blue and red edible pens to draw horizontal and vertical lines on fondant paper (Photo 14). I use the black edible pen to write the wordings. The font used is to mirror the birthday invitation I made earlier this week. Once done, I store this "paper" fondant in a zip-lock to prevent it from drying out. I want to ensure I am able to bend the piece when I put the cake together. Make sure to add powder sugar on the all of the surfaces to prevent it from sticking to the zip-lock bag.
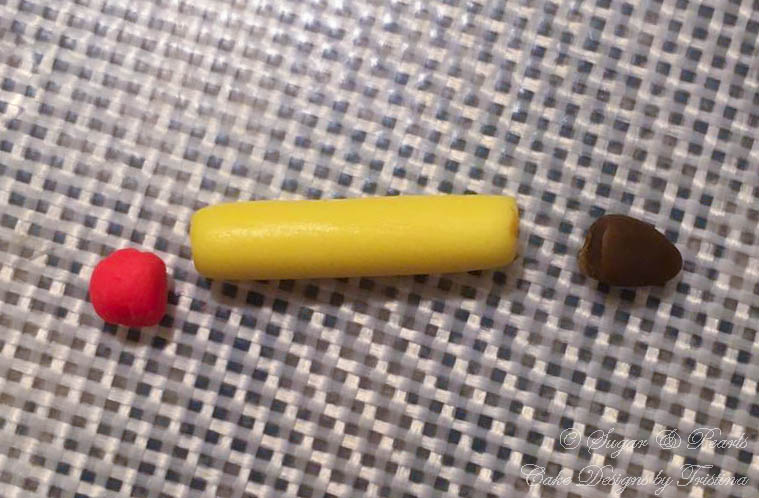
Photo 12. Pencil fondant.
|
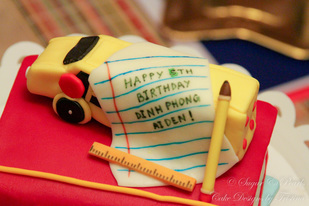
Photo 13. Ruler fondant.
|
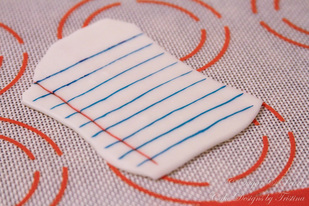
Photo 14. Paper fondant.
|
ASSEMBLE THE CAKE
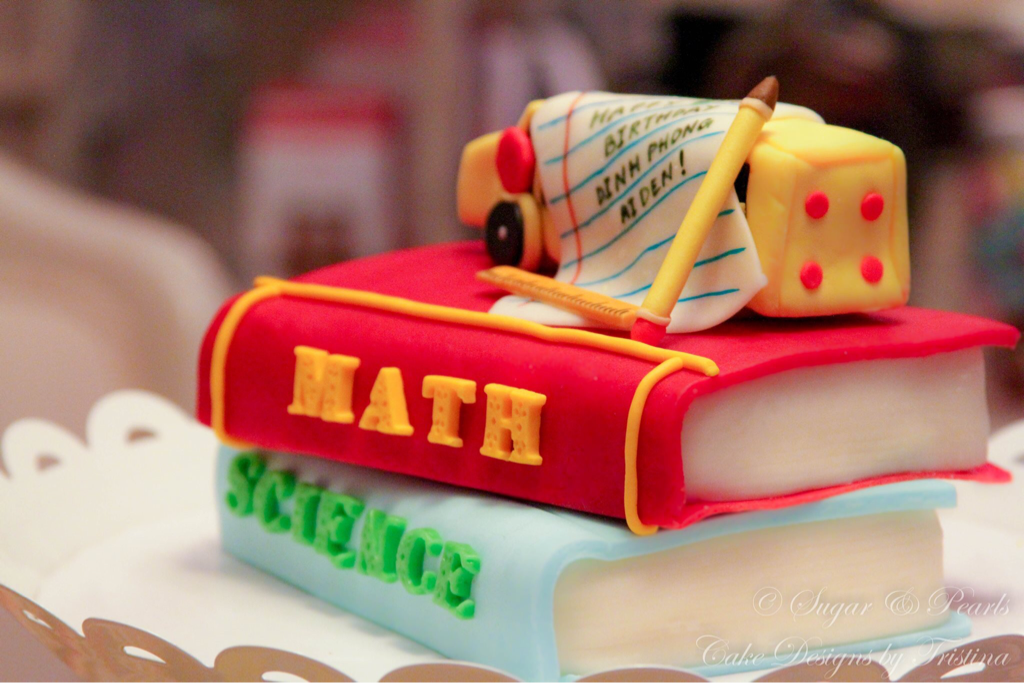
It is time to put this special cake together! I cannot be any more excited at this moment. After all, this is suppose to be a surprise party. I intentionally make the blue book a little bit bigger so I can stack the red book on it. Then, I add the lettering to the blue book first (Photo 15). Secondly, I place the red book on the top of the blue book, slightly crooked to the side. I add the yellow trims along the book spine, and finish the book with the lettering (Photo 16). A side note, I pick "MATH" because DinhPhong is learning math at school right now, and "SCIENCE" because he likes to learn about nature.
|
|
|
Photo 15. Stack the blue book first.
|
Photo 16. Stack the red book on second.
|
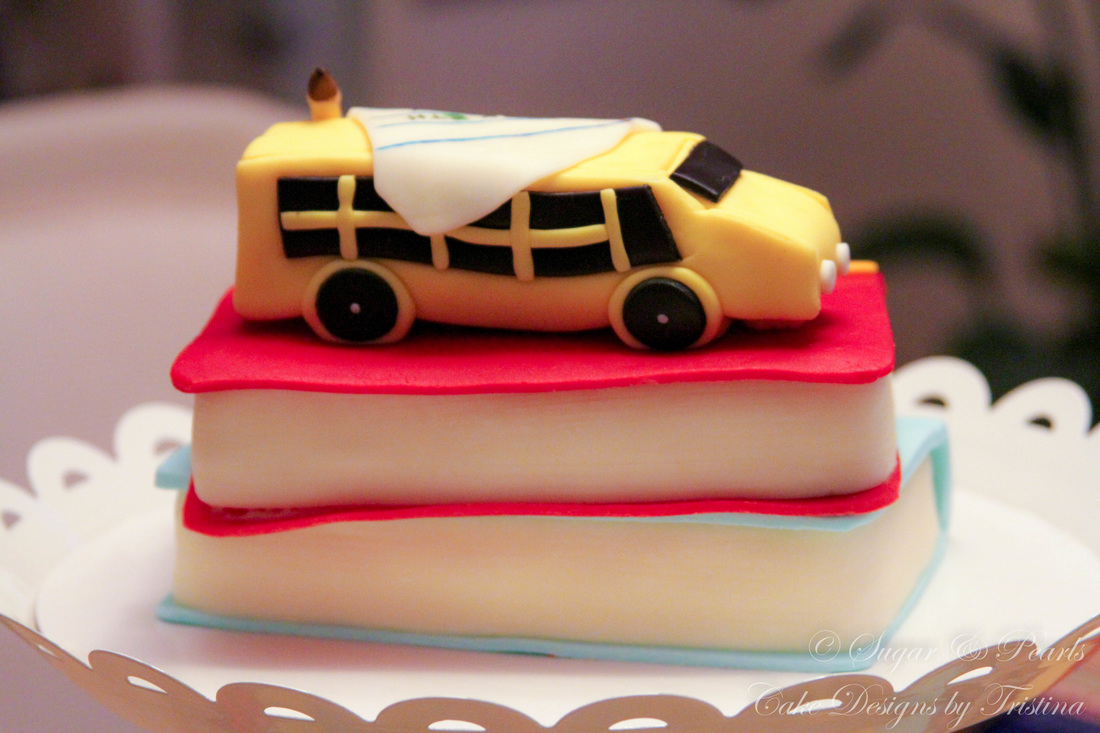
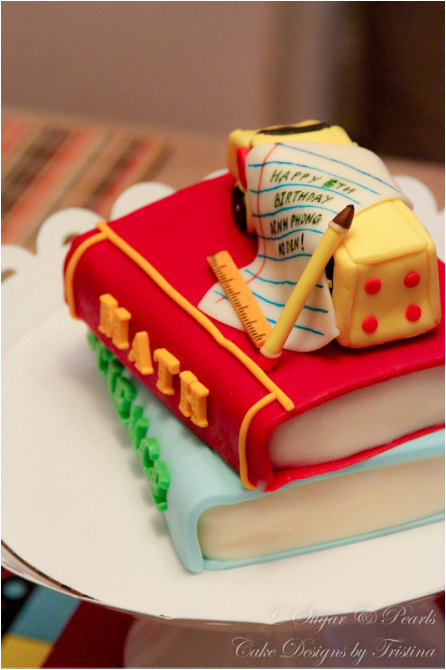
Lastly, I add the school bus diagonal on top of the red book (Photo 17). I place the piece of paper on the "front" side of the cake, and line the ruler and the pencil nearby. You may notice a few different lay out of the ruler and the pencil because I was having a hard time to decide which would look best on the cake (Photo 18).
|
|
|
Photo 18. View of the cake from the top.
|
Photo 17. Placing the bus on top of the books.
|
And there you have...a two-book stacked cake for my baby boy's 5th Back-to-School Birthday Party! Trust me, it is a lot simpler than it looks.
A few things I would change if I were to make this cake again: 1) make the school bus a little smaller and at least 1 week in advance, 2) scoring the pages on the book a little deeper as it is slightly difficult to see them in pictures.
I really enjoyed making this cake just as much as I am sitting here right now and writing down these instructions on how to make it for you. I hope you find these instructions easy to follow and would give you the inspiration to make a book cake at your next event.
xoxo,
Tristina
COPYRIGHT © 2016 - SUGAR & PEARLS ~ CAKE DESIGNS BY TRISTINA
