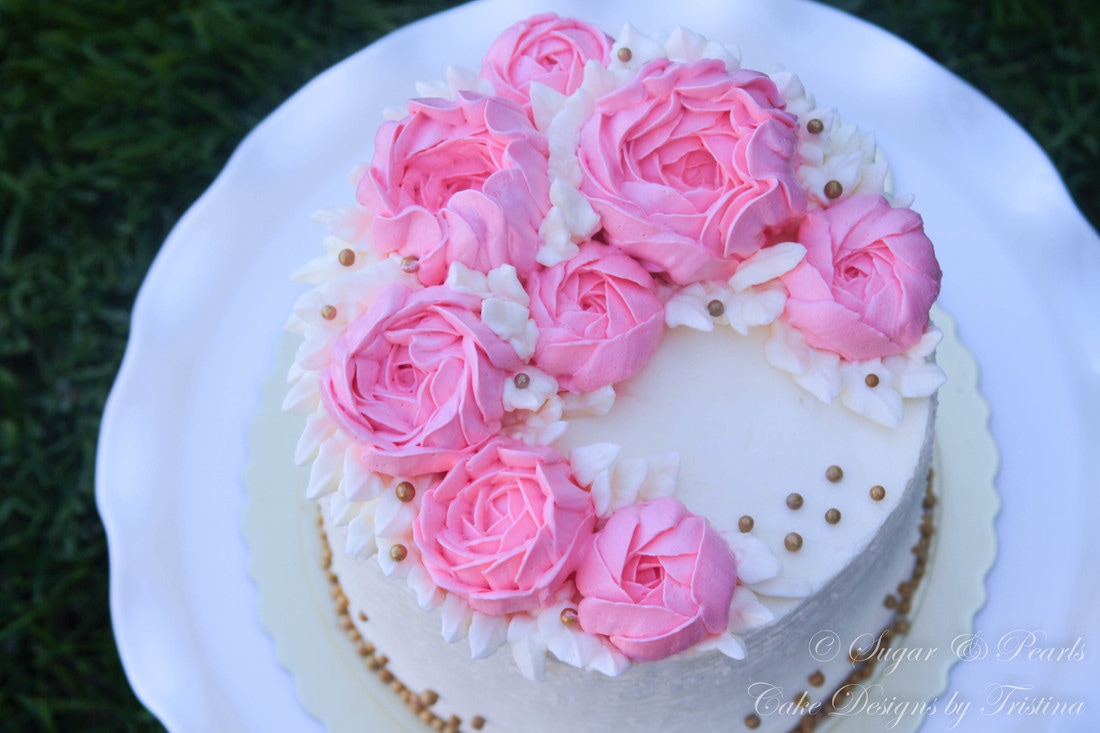
 Imagine that sweet romantic shade of soft pink pairs with the enriched, fresh scent of beautiful peonies. This combination makes an ideal theme for any celebration of love, and in this case, a hopelessly rustic dreamy bridal's shower. I made this cake for a friend, who was also my student a few years ago, before she becomes the Mrs. She likes gold, peonies and pink champagne. And I thought I should incorporate all of these elements into this cake. I am extra fond with peonies as they were the main flowers for my wedding—a sentiment reason. And, if you haven't already noticed, pink is my favorite color (surprise!). Therefore, this request is almost too easy to deliver. I love looking at what seems to be “thousands of petals” covering a cluster of stamens in the center. One of these days, I should really plant more peonies in my garden and stop “stealing” them from my father-in-law’s garden. Sparkling champagne also brings a hint of sweetness here. I really enjoy making this pink strawberry buttercream for the cake filling. How can you not have champagne for any celebrations, especially this one important milestone in a girl's life. So, I begin my journey of practicing buttercream peonies... I am going to be up front with you that it takes practice to master piping beautiful peonies buttercream! It took me three trials and hours of watching videos on YouTube in between to achieve a partial success. But it is also so fun and satisfying to achieve the somewhat “real-looking” flowers once you get a hang of it. And it makes this entire learning process so worth it. 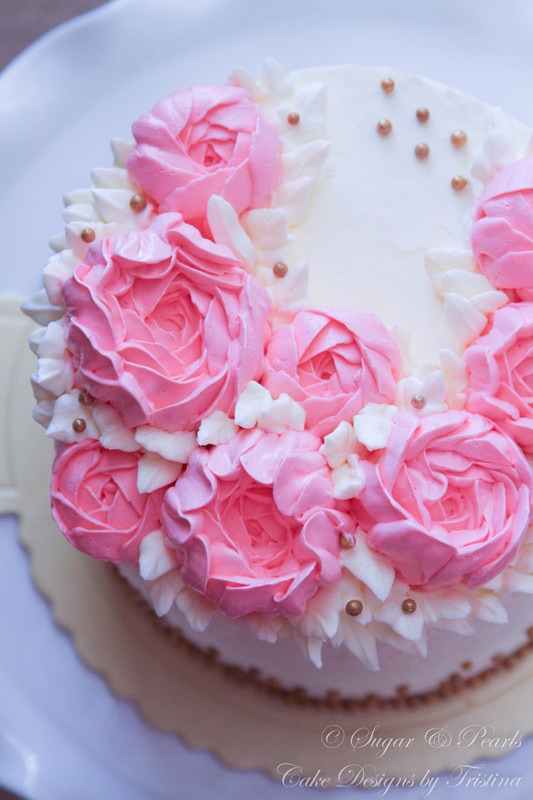 PREPARING AND BAKING SPONGE CAKE This recipe is for cake using a no-failed sponge cake recipe I came across. I promise this is an easy recipe and you will a soft and fluffy cake every time. This recipe is slightly different than my previous Savory Sponge Cake, with a use of more corn starch to create that soft cake. As usual, you will want to ensure your eggs and milk are at room temperature before you start baking. First, I turn the oven on at 320 degrees F and line the bottom of the baking pan with parchment paper. Then I start to prepare the dry ingredients by mixing all-purpose flour, corn starch and salt together and set aside. Moving on to the wet ingredients, I measure the vegetable oil, milk and vanilla extract, and whisk them together until they are combined. In a clean mixing bowl, I beat the egg whites until foamy on medium speed with a whisk attachment. Without stopping the mixer, I add a pinch of tartar and continue to beat the egg whites at the same speed until soft peak forms. I add granulated sugar and continue to beat the egg whites at high speed just till before stiff peak forms. Slowly I add in each egg yolk and beat for 10-15 seconds the lowest speed, one at a time, until well combined. The batter should be thicker with a slight color of yellow. Keeping at the lowest speed, I add the wet mixture of milk, vegetable oil and vanilla extract in slowly and beat for another 20-30 seconds. Then, I sift the dry ingredients over the egg batter in 3 additions, beating for about 10-15 seconds in between each addition. As I remove the bowl from the stand mixer, I use a spatula to fold the batter to avoid deflating the white eggs further. I pour the cake batter into the prepared 6-inch cake pan and bake this sponge cake on the lowest rack, at 320 degrees F for about 45-50 minutes. It is done when the cake springs back as you press on the top. I then remove the cake from the oven and invert it onto the cooling rack. I do this to avoid the cake from collapsing onto itself. After about 10 minutes of cooling, I remove the cake from the baking pan. MAKING STRAWBERRY CHAMPAGNE BUTTERCREAM FILLING First you will need reduced champagne for this recipe. I use 1 cup of Cook's sparkling champagne and heat it over medium high heat in a small saucepan for 10 minutes or until the liquid has reduced to about 1/4 cup of champagne. You can use any champagne brand here, and stronger the smell the, better you can infuse the flavor into your filling. While waiting for the reduced champagne to cool, I wash and chop the fresh strawberries and set aside. In a mixing bowl with a whisk attached, I beat butter and powdered sugar for approximately 3-4 minutes on medium speed (Speed 4). Then I add fresh strawberries and beat for about 1 minute, following by reduced sparkling champagne, vanilla extract and milk. I continue to beat for another 1-2 minutes at the same speed or until the desired consistency is achieved. MAKING VANILLA WHIPPED BUTTERCREAM As you have already noticed, I love using vanilla whipped buttercream to frost my entire cake. I find that this is easy and simple to make. In a clean mixing bowl, I beat the softened butter for about 2-3 minutes on medium high speed. I add powdered sugar, vanilla pudding powder and vanilla extract and beat on the same speed for another 2 minutes. To make the frosting more fluffy, I add milk slowly, one tablespoon at a time, until I achieve the desired consistency. See the bottom of my post on Vanilla Chiffon Cake for more details and recipe on how to make this buttercream. ASSEMBLE THE CAKE I cover the cake with a crumble coat of vanilla whipped buttercream, chill it in the fridge for about 20-30 minutes, and cover it again with a generous layer of the buttercream. Using a large spatula, I start at the bottom of the cake and turn the cake on the rotating stand as I go to even out the buttercream around the cake. For the top, I start from the center and spread the surface evenly with the same spatula. If needed, you may wipe the spatula off sporadically to help keeping the surface smooth. Hot water would also work well for this technique. Placing the cake on a rotating cake stand, I create these "strokes" along the cake using a fork and going around the cake from bottom to top until I cover the cake completely. These lines do not have to be even, but you do want to remove the excess buttercream building up along the lines to create a cleaner look. To remove these excess, I put the cake back into the fridge for another 10 minutes to harden the buttercream, and find that it is easier to remove them afterward with the use of paper towel to sweep them off the cake. 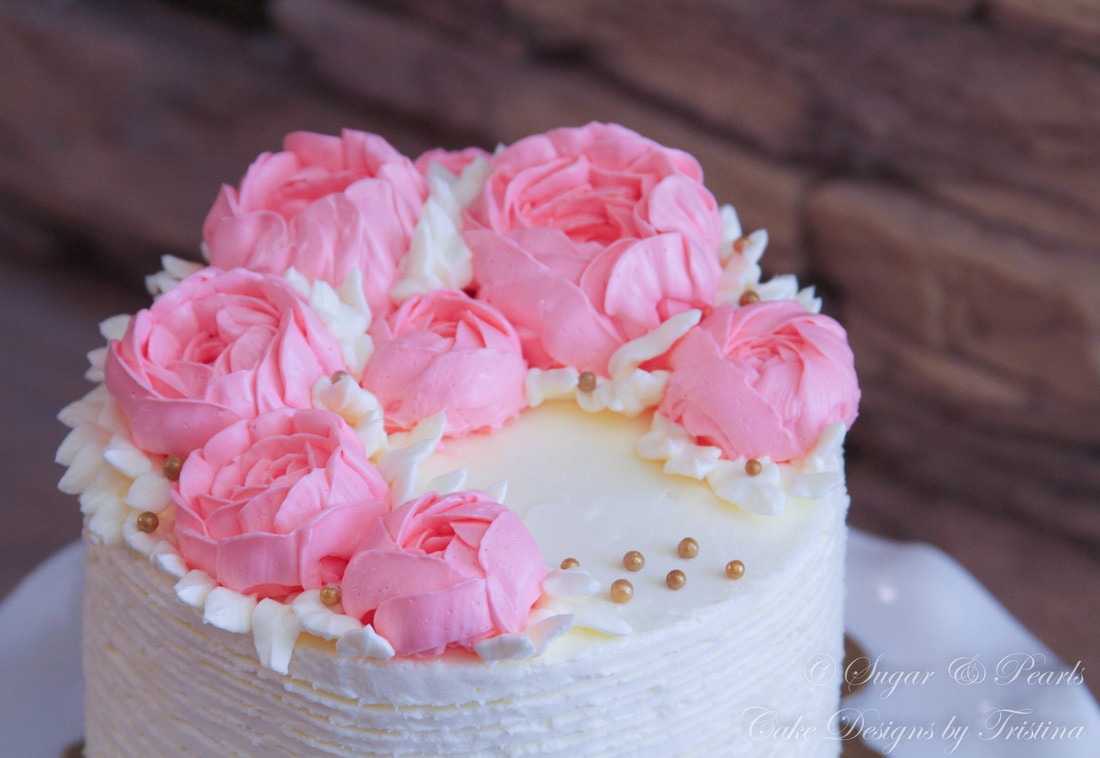 For the peonies, I place some buttercream and color it in light pink and place them in a pastry bag fitted with a Wilton tip #127 and some white buttercream in a pastry bag fitted with Wilton tip #352. To pipe budded peonies, I start out with a small dab of pink buttercream in the center and create "petals" on top of each other. Make sure you line these petals closely together and facing more horizontal then vertical to create that "close budded" look. I repeat this motion until I achieve the desired size of flower. For the bloomed peonies, you would repeat the same step at first, but as you add more petals to the flower, you can line the petal slightly more vertical to create the blooming look.  I decide to make the leaves the same color as the cake base to bring out the dominant pink color. Using the prepared pastry bag, I just add leaves along the side of the cake and the bottom of the flowers to cover the imperfect areas. To tie the cake to the theme color, I sprinkle gold pearls around the cake and around the bottom of the cake. I also add a few pearls on the top of the cake to give it an elegant look. I am going to be honest with you that these peonies did not look anything like this at my first attempt. They were more like roses the first few times when I tried to pipe them. The piping skill does require a lot of practice. Unless you are born with this talent, and I am not, it is going to take some practice and time to achieve these natural looking peonies. As you may have guessed, the smaller, budded flowers were one of the last trials I made. They are probably the best-looking ones in comparison to the bloomed flowers.  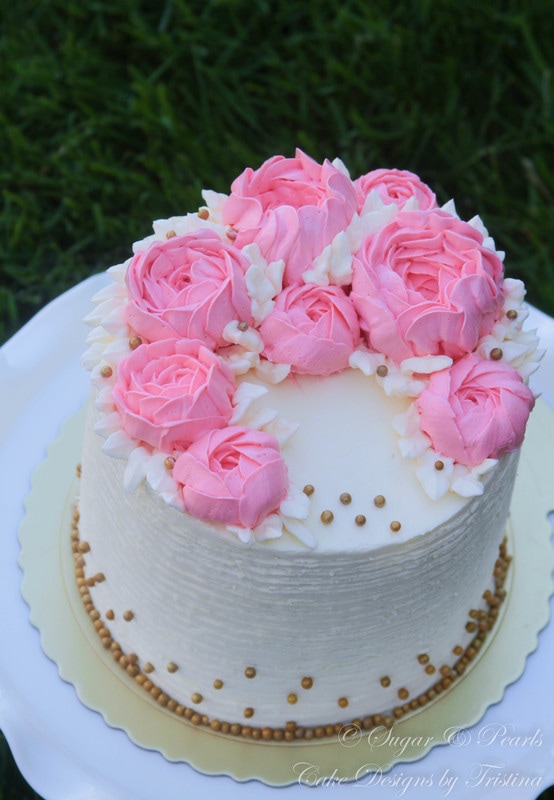 Therefore, practice makes everything perfect! This phrase proves me right every single time. I hope you will have some fun whipping up that buttercream and piping these beautiful flowers the next time you want to bake. And don't be discouraged, but you will only get better with practice, I promise! xoxo, Tristina Sponge Cake Recipe (No Failed) Make: 6-inch cake (about 1.75 inch tall) Total time: 1.5 hours Ingredients
Instructions
*This cake recipe is adapted by ChiChi Nguyen. Strawberry Champagne Buttercream FillingIngredients
Instructions
*To make reduced sparkling champagne, heat 1 cup of your favorite champagne on the stove under medium heat for about 5-8 minutes, or until the liquid has reduced to 1/4 cup. COPYRIGHT © 2017 - SUGAR & PEARLS ~ CAKE DESIGNS BY TRISTINA
0 Comments
Your comment will be posted after it is approved.
Leave a Reply. |

AboutTristina TiepNhu Nguyen is a pharmacist by weekday and a baker by weekend. She is also a wife and a mother of two children. Free Cake Tutorials!Sign up for my newsletter and you will be the first to know about my new recipes and cake tutorials!
Recent Posts
August 2020
RecipesTutorials |
|
|
sugar & pearls |


