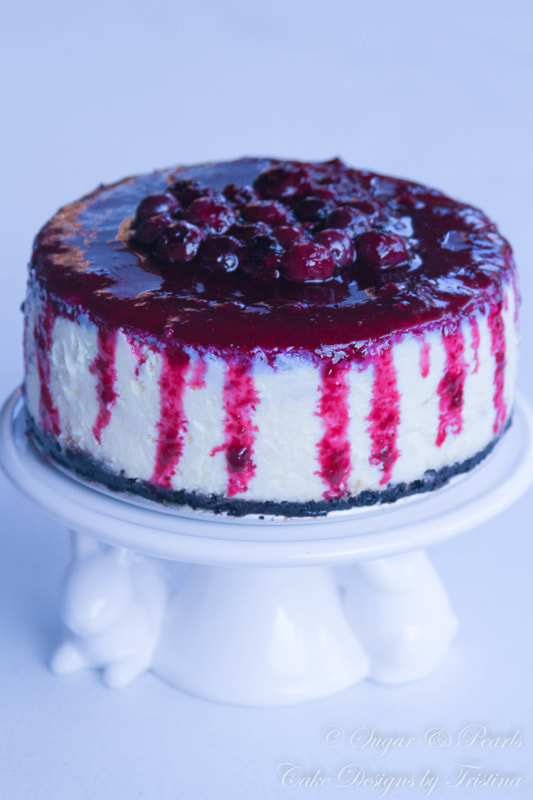
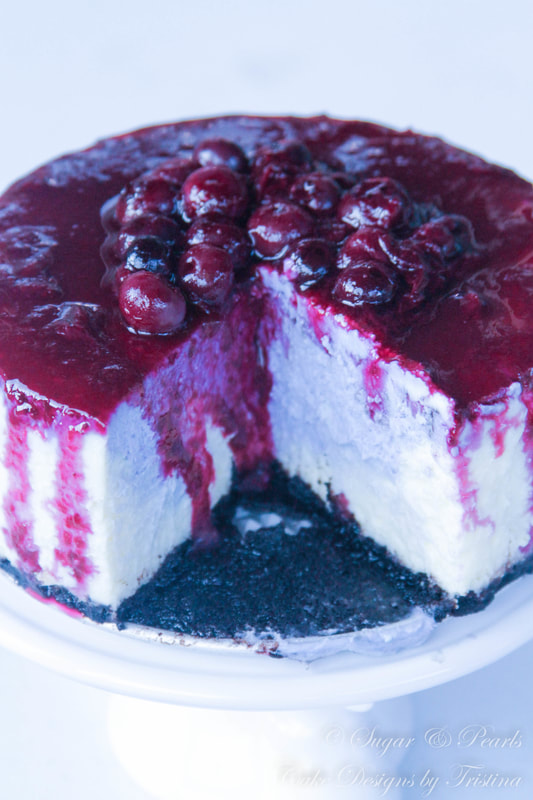
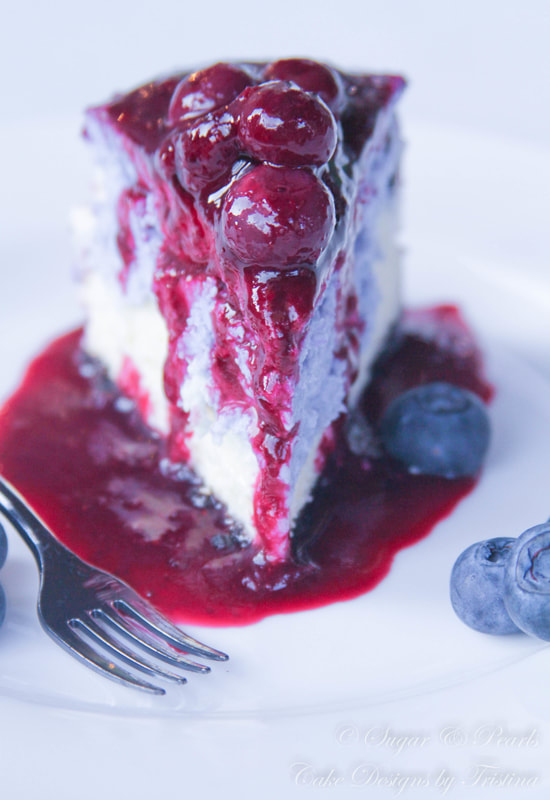
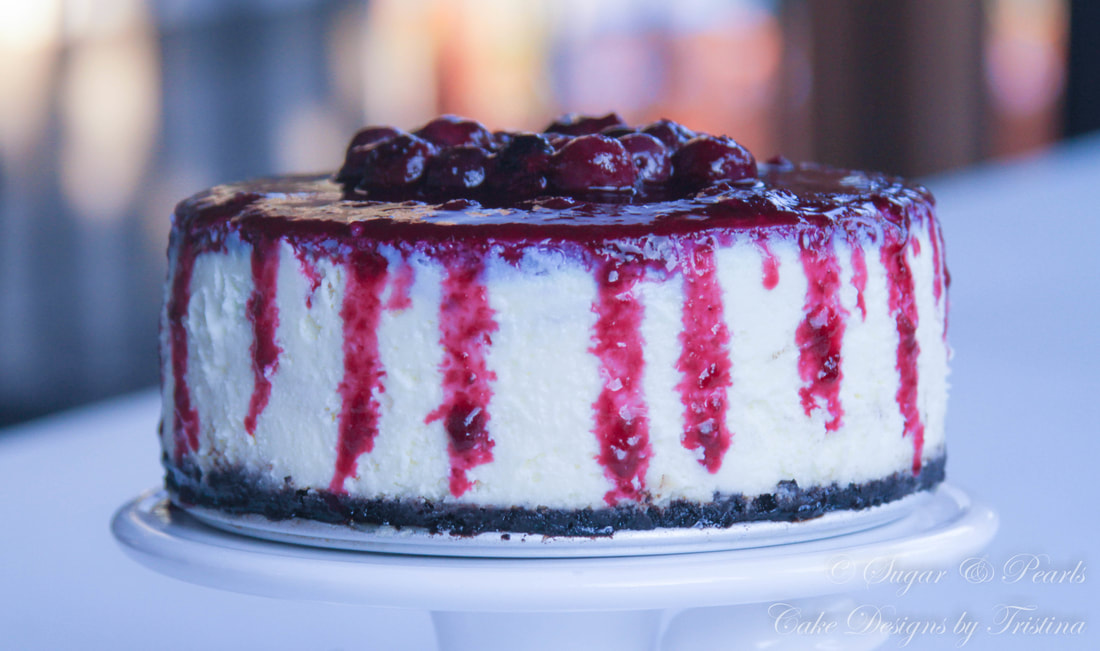
 We are blessed to be in the Northwest where summer is filled with delicious fresh fruits. It is even more special when these fruits—specifically blueberries—come from your own garden...or in my case, my mother's garden! I have been craving for cheesecake for about a month now, but I haven’t found the time to bake one for myself. There were always projects after projects, and then some weird bugs hit me hard last week that I had to stay in bed for almost the entire Saturday, which was no fun. So, as soon as I recovered, I insisted to bake this during a workweek, which I usually avoid as I want to spend more time with the kids after a long day at work. This is also another reason why I love (and thankful) for the long summer days. 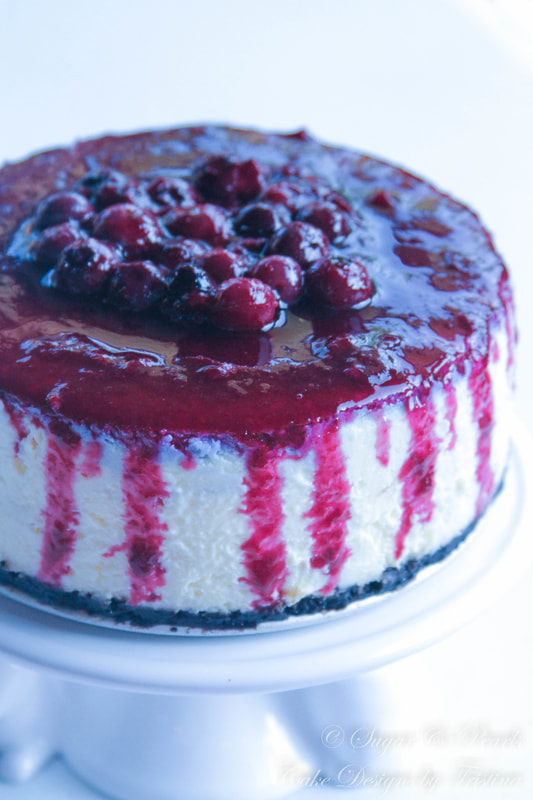 Cheesecake is one of my weaknesses. I think it was also the very first dessert I attempted to bake way back when I was a teenager and failed that time miserably. I remembered throwing the end-result in the trash, and could not help feeling sad about the money I spent on those high-end quality ingredients. This was the time where internet access was limited, and YouTube and Pinterest did not exist! That must be the reason why I never went back to baking again until recently. I love the buttery taste of cream cheese that perfectly melts into your mouth. The richness and not-so-sweet tangy of blueberries make this dessert irresistible. I was never a big fan of blueberries until now. But I think I still love baking desserts with blueberries more than eating them fresh. I have an endless list of blueberries desserts that I am trying to get through before a bag of fresh blueberries goes rotten in my fridge.  MAKING THE CRUST I don't always eat Oreo cookies and they are mostly saved for the kids. But every single time I make cheesecake, I always rely on Oreo cookies to make the crust. One of these days, I will attempt another type of crust, but this will do it for now. I used the same recipe from the previous recipes for this crust. This is a tall 6-inch cheesecake that I am making, so I crushed about 22 Oreo cookies. I did not remove the cream from the cookies because I was too lazy to do so, and I thought the crust turned out just fine. However, you can certainly remove the cream the if you want a healthier crust version. First, I crushed the cookies in a bag, and then grinded them in my blender until they are fine for about 1-2 minutes. I added about 3 tablespoons of melted unsalted butter and then mixed them together until fully combined. I poured it into the cake pan with a removable side and pressed the crust down using the bottom of a glass or a stainless-steel spoon. I also wrapped 2 layers of aluminum foil around the pan to prevent water from seeping into the pan. To add an extra protection, I also wrap a plastic about around the pan first. Once done, I stored the crust in the freezer and started on making the cheesecake filling. Tip: if I was to bake this cheesecake again, I would have lined the parchment paper on the bottom of the crust to make it easier to remove the cheesecake from the pan. MAKING THE CHEESECAKE For a smooth cheesecake batter, the key is to ensure all the ingredients are at the same temperature. I took the cream cheese, eggs, butter and sour cream out of the fridge about 1 hour before I started to bake. Using a stand mixer with a paddle attachment, I beat cream cheese on a medium speed (Speed 4) until smooth and then added the melted butter to the batter and continue to beat at the same speed until combined. Next, I poured in eggs, one at a time, and beat just until the batter is fully incorporated. Here I added granulated sugar, lime juice, and corn starch and beat just until combined. The batter is slightly thinner than most cheesecake. If you like your cheesecake to be slightly firmer, add extra 1-2 tablespoons of corn starch. The cheesecake is done when the top has a darker shade of purple than what it originally started out as. It should also jiggle at the center of the cheesecake with a slight shake. I leave the cake in the pan and stored it in the fridge overnight before removing it from the pan. Tips: cheesecake can crack during the cooling process as the sides shrink and pull away from the pan. Run a clean knife around the cheesecake about 5-10 minutes after removing it from the oven to prevent the cake from cracking. MAKING BLUEBERRY TOPPING There is nothing better than making toppings for your desserts with fresh, organic fruits. I rinsed the blueberries in cold water before placing them in a small sauce pan. I added granulated sugar, water and lime juice and cook it over medium heat for about 10-15 minutes. I also added more blueberries toward the end of the cooking process, as I want the blueberries to hold their shape and maintain a true blue-coloring rather than red as the fruits burst during the cooking process. ASSEMBLE THE BLUEBERRY CHEESECAKE I did not use a lot of sugar for the blueberry sauce because I really liked the tangy and sour taste of blueberries. It perfectly complements the sweetness of cheesecake. Noted that this recipe makes about 3-4 cups of topping, and for this cheesecake, you would only use about 1 cup at the most. I stored the leftover sauce in a tight glass jar in the fridge. This should be good to use over the next 2-3 weeks in the fridge. You can use the sauce on many other things including pancakes! Once the topping is completely cool, I spread the sauce on the top of the entire cheesecake. I also added some of the whole blueberries in the middle. I also spread extra sauce so the drippings would fall along the side of the cheesecake. 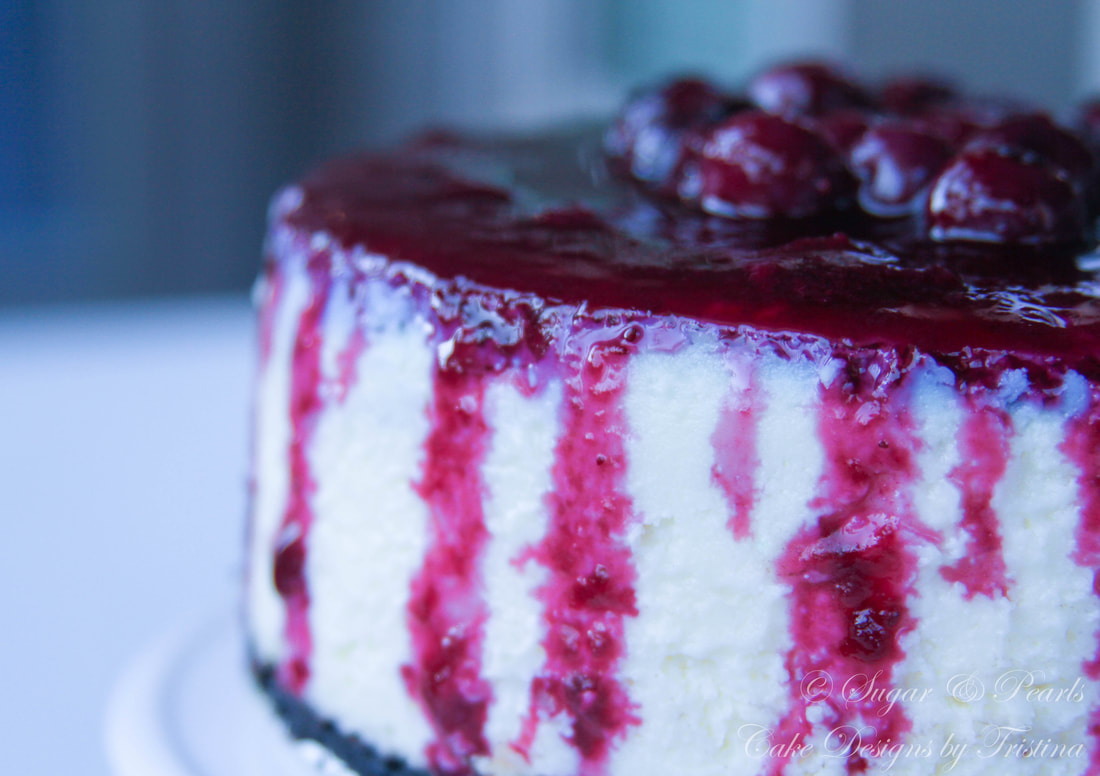 This cheesecake is slightly on the softer side. If you like your cheesecake firmer, you can store it in the sealed container and placed it in the freezer. Just remove it about 30 minutes before serving. It should taste extremely buttery as well as delicious. However, most of my tasters said they sought the softness texture of this cheesecake. I love the dark burgundy, purplish color of this blueberry cheesecake. As soon as I showed my friends these beautiful pictures, they all asked to come over for a test trial. Some even texted me to ask if I could save them a slice as they would not make it to my place until the weekend. Surely, this cheesecake was gone by the end of the week.
I cannot express how much in love I am with these gorgeous photos, yet they cannot justify how amazing this cheesecake tastes. The beautiful dark purplish, tangy sauce that blends extremely well with the richness texture of the cheesecake. I urge you to try it as you will not be disappointed with the result. This sure has satisfied my month-long cravings for cheesecakes. xoxo, Tristina Blueberry Cheesecake Recipe Make: one 6-inch cake Total time: 2.5 hours Ingredients Crust
Filling
Topping
Instructions Crust
Filling
Topping
*The cheesecake filling recipe is adapted from Tall and Creamy New York Cheesecake by Art and The Kitchen. COPYRIGHT © 2016 - SUGAR & PEARLS ~ CAKE DESIGNS BY TRISTINA
0 Comments
Your comment will be posted after it is approved.
Leave a Reply. |

AboutTristina TiepNhu Nguyen is a pharmacist by weekday and a baker by weekend. She is also a wife and a mother of two children. Free Cake Tutorials!Sign up for my newsletter and you will be the first to know about my new recipes and cake tutorials!
Recent Posts
August 2020
RecipesTutorials |
|
|
sugar & pearls |