Rusty Winter Woodland Cake
December 18, 2016
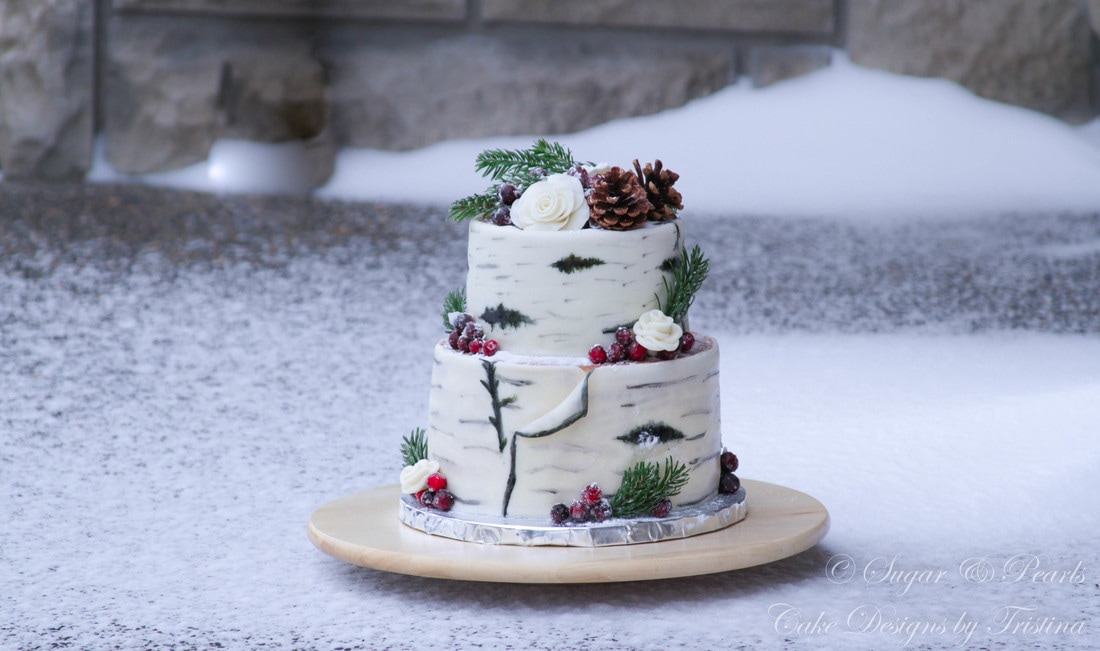
Woodland theme screams for a natural, forest look that yields an extremely cozy feeling. This is the simplest yet elegant cake I have made this year, and I love how it was almost all "white" to resemble the snowy winter we are currently experiencing here at the Pacific Northwest. Just a few days ago, I was still flipping through websites for ideas, and nothing seemed to fit what I am trying to convey in this year Christmas cake. I freaked out when I was two days away from having to decorate the cake and I have yet selected the theme or able to envision how the cake would look like. This is unlike me, and I was extremely stressing out. It is not easy when I have a gazillion other holiday obligations, including putting up the Christmas tree, getting presents for more than thirty people of both families and making gifts for the kids' teachers before they take off for the Winter Break. Thankfully, I came across an article embedding the new wedding trends of natural wood throughout the event and it hit me...this would perfect for the cake for the clinic Holiday Party.
Winter Woodland calls for birch trees, cranberries covered in snow, twigs, pine cones and green branches. And of course snow! As I was finishing up the cake, we had our second snow storm and my family was "iced in." I was thrilled to be able to capture my cake using real snow as my background. How PERFECT can this be? I am so excited to share the details of how I made these items with you. This is also my first time using "real" fruits and trees on my cake and I am about to share with you a simple method that I used to coat non-edible decorations onto the cakes without having to worry about food safety.
Winter Woodland calls for birch trees, cranberries covered in snow, twigs, pine cones and green branches. And of course snow! As I was finishing up the cake, we had our second snow storm and my family was "iced in." I was thrilled to be able to capture my cake using real snow as my background. How PERFECT can this be? I am so excited to share the details of how I made these items with you. This is also my first time using "real" fruits and trees on my cake and I am about to share with you a simple method that I used to coat non-edible decorations onto the cakes without having to worry about food safety.
DECORATIONS PREPARATION
To make this cake you will need the following decorations: cranberries covered in snow, pine tree branches, pine cones, white roses, and "snow." I prepare cranberries and pine tree branches first as they are relatively easy to make. For cranberries covered in snow, I pour simple syrup over them and let them dry overnight, and then toss them in granulated sugar the following morning (Photo 1). You may wait for about 1-2 hours after coating with simple syrup and toss the fruits with granulated sugar thereafter.
To make simple sugar syrup, I use a 1:1 ratio for water and granulated sugar. Over medium heat, I stir the liquid until sugar has dissolved and let it sit on the stove until boil. Remove the liquid and leave the syrup to cool for about 10 minutes. Here, I use 1/2 cup of water and sugar and have more than enough left over after coating the cranberries and the pine tree branches.

Photo 1: Cranberries covered in snow.
I was about to make these pine branches out of chocolate, but I find that the real trees are much more beautiful and would make sense since I am using real cranberries as well. Luckily, we have a real Christmas tree in the house, so I use a few of these branches. To ensure these branches are safe to place on the cake, I use sugar syrup to coat the pine tree branches (Photo 2). My rationale is that if the pine branches are coated with sugar syrup, creating a barrier between the actual cake and the real branches, thus making them "somewhat" safe. I leave these branches overnight to dry and sprinkle granulated sugar on top of them the following day. Simple sugar syrup can always be added to help stick the "snow" on to the branches.

Photo 2a: Wash and dry branches.
|

Photo 2b: Coat in sugar syrup.
|

Photo 2c: Add more syrup for the icicle look.
|
Next, I decide to make white roses to keep the cake simple and stay true with the theme color (Photo 3). These white roses are made using white fondant. I start out cutting round circles with the cookie cutter. I use the round ball fondant tool to thinning the rose's petals. I roll each circle up, gluing them at the bottom and adding one layer after another. These roses are left overnight to dry. You can add as much or as little of rose petals to make large roses or mini roses. For this cake, I make 2 medium size roses, and 2 mini roses.
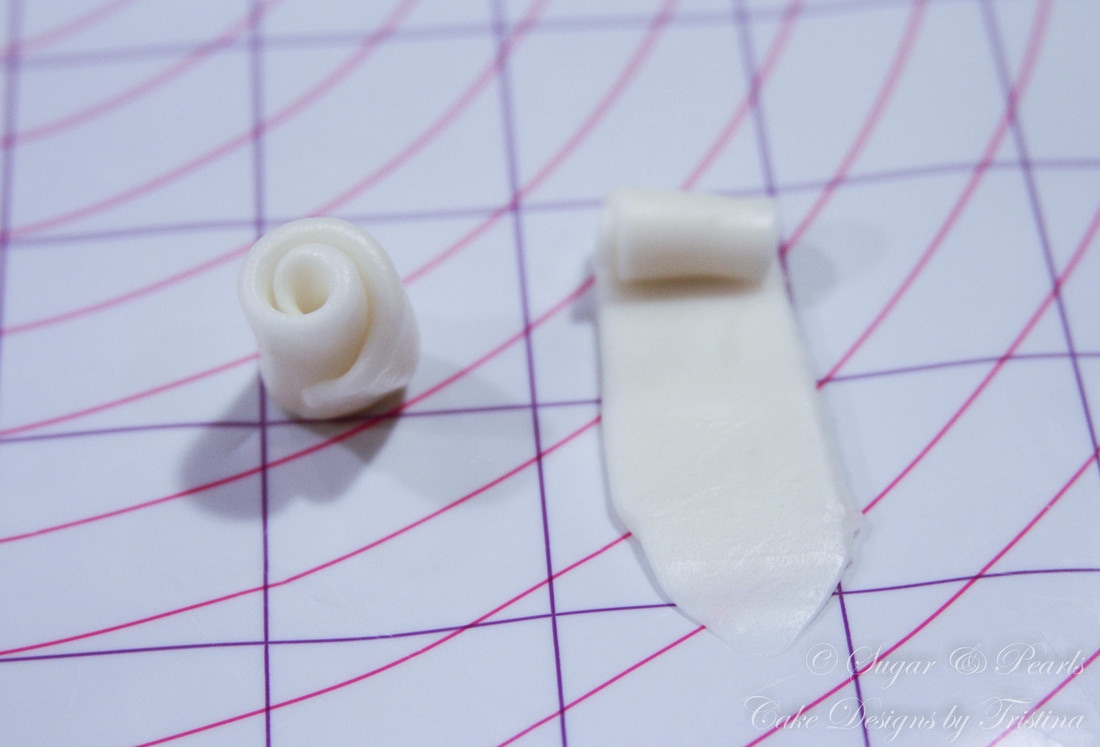
Photo 3a: Rolling fondant strip up.
|
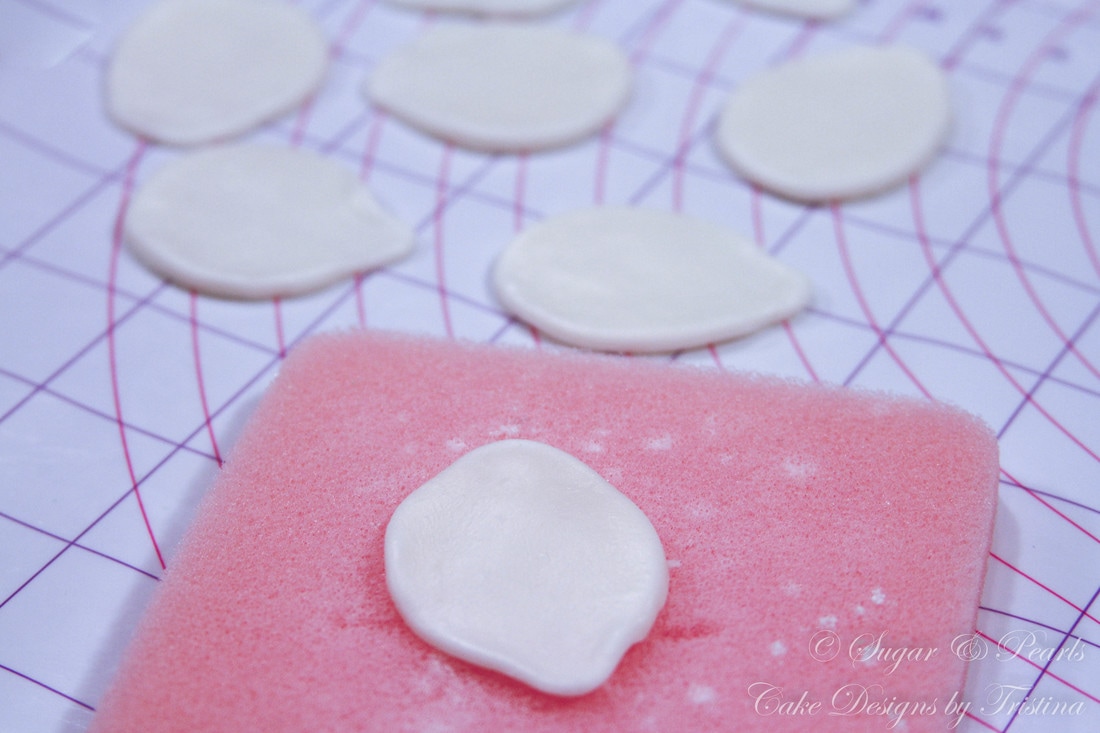
Photo 3b: Cutting round circles.
|
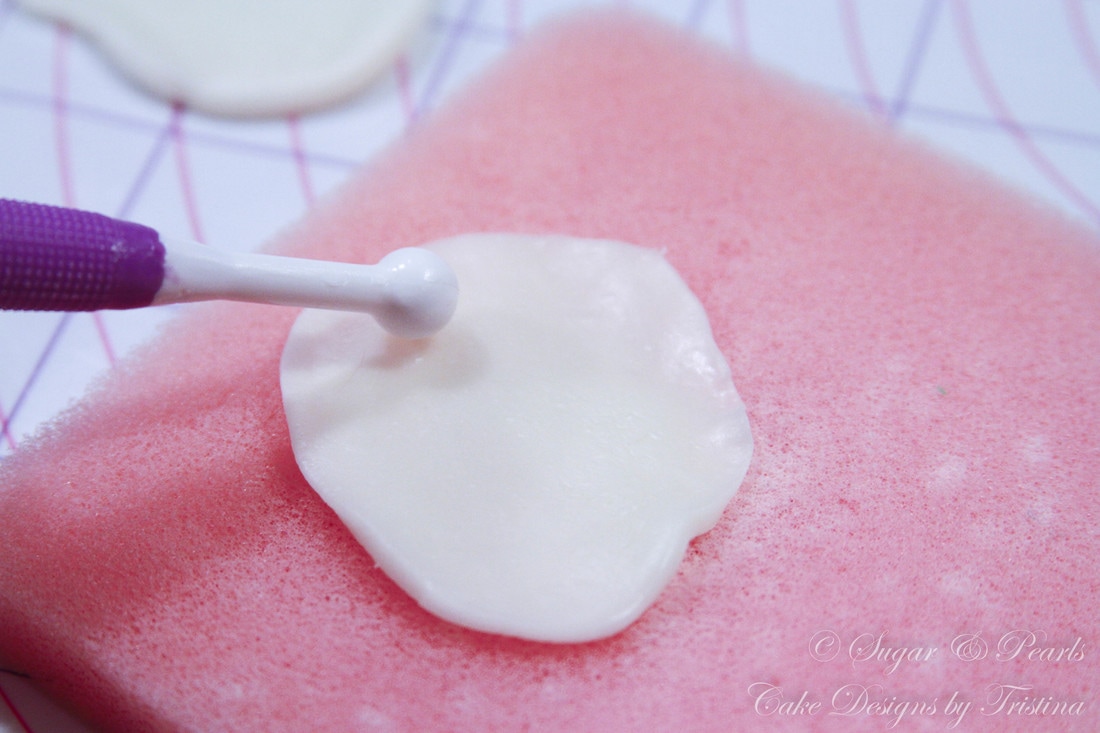
Photo 3c: Thinning the petals.
|

Photo 3d: Fondant rose.
The pine cones are the most difficult item to approach (Photo 4). I do not have any brown modeling chocolate at home. The snow storm was coming so I was afraid to get out of the house. I have pine cones at home for decorations, so I use them on the cake at first. I cover the cake with saran wrap and place the pine cones on that area. The cake looks amazing. But, I still want to try making edible pine cones. I found a leftover piece of Hershey's chocolate from the kids' Halloween bag (yes!). After a few trials to perfect my chocolate modeling, I finally am able to put together a few pine cones. I start with a cone shape and then cut out round circles in multiple sizes for the "needles" (leaves) part of the cones. I attach these leaves to the bottom of the cone, adding layers after layers until I reach the tip of the cone. They turn out pretty cute, but I still like the "real" pine cones more. So, I kept both version of photos in this post for you to judge. If you'd rather make the chocolate modeling ones, you can follow my simple instructions to create these little cuties. With some left over chocolate, I make a few twigs just by shaping them in sticks and attach them together to make small branches.

Photo 4a: Mold a cone shape and attach from the bottom up.
|

Photo 4b: Use napkins to hold the shape.
|

Photo 4c: Leave pine cone to dry.
|

Photo 4d: Chocolate pine cones.
ASSEMBLE THE CAKE
For this project, I use my favorite chocolate cake with whipped chocolate-coffee buttercream. I am making a two-tiered stacked cake, using an 8-inch four-layer cake on the bottom and a 6-inch three-layer cake on the top. After both tiers have been frosted, I cover around the cakes with white fondant (Photo 5). Using a small spatula, I make rounds on the cakes' tops to resemble the tree trunks (Photo 6).
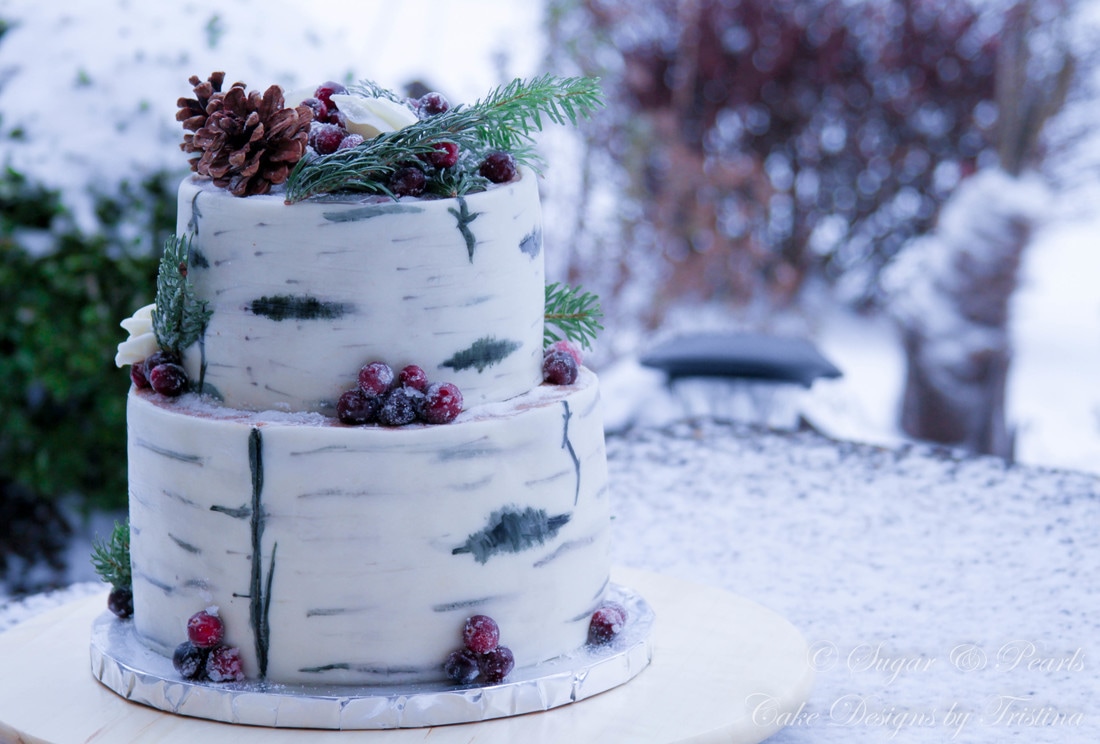
To mimic the birch tree appearance, I draw streaks around the cakes with black food coloring (Photo 7). I am not following any particular pattern; all you need is to draw random, imperfect lines. After that, I paint some black spots and create "cracks" around the tree trunks (Photo 8). You can basically step things up and make them as plain or as intricate as you want, there is not a wrong way to pain a birch tree trunk here. The same technique is repeated for the second tier (Photo 9 and 10).

Photo 5: Cover around the cake with white fondant.
|

Photo 6: Draw circles on cake top.
|

Photo 7: Draw black lines.
|

Photo 8: Fill black spots.
|

Photo 9: Cover around the cake with white fondant.
|
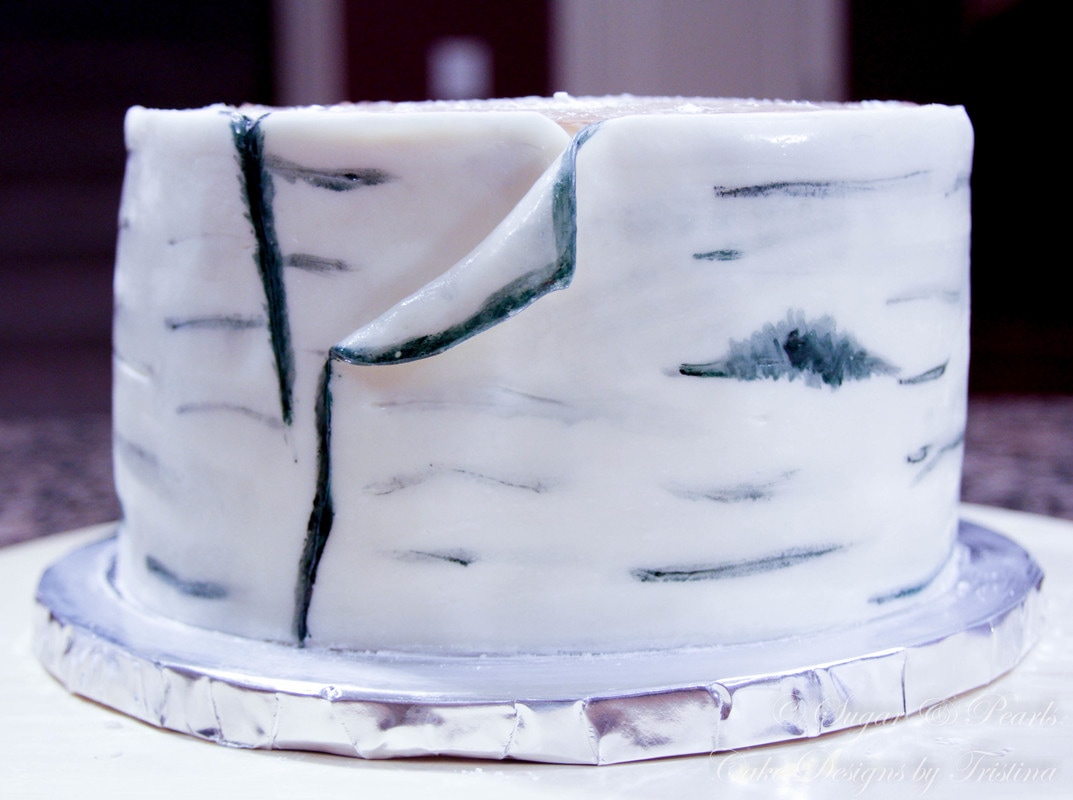
Photo 10: Draw black lines and spots.
|
The most exciting step is when I can finally place all of the "decorative toppers" on to the cake. Arrange these items in any ways you please. I place a bunch of cranberries on the top tiers and add two white roses on top, along with two pine cones and pine tree branches around the edge of the cake. I spread the cranberries around the cake and add a few pine branches and the mini roses nearby. Twigs are also tucked in between pine branches throughout the cake.

For a realistic icy-snowy look, I mix granulated sugar and powder sugar together and sprinkle them onto the decorations. For an icicle appearance, you may dip the pine tree branches into thick sugar syrup and leave overnight to dry. This will yield a shiny, glossy look that you'd love to see on those green branches.

Photo 11: Using real pine cones.

Photo 12. Using chocolate pine cones.
And that's really all there is in making this Winter Woodland Cake. Next time when you need a festive cake during the wintertime, do not hesitate to grab some of those pine trees in the backyard and start working your next creation!
Now, back to Christmas shopping as I still have about ten people left to get gifts for. I hope you will have a wonderful time with your family and friends. Stay warm and Merry Christmas to you all!
xoxo,
Tristina
COPYRIGHT © 2016 - SUGAR & PEARLS ~ CAKE DESIGNS BY TRISTINA
