Melted Ice-cream Cake
September 16, 2016

One last sweet treat to celebrate the end of Summer.
Can you believe that Fall is already here? The crisp breeze of wind in the early morning is one of the signs that Autumn has arrived in Portland, Oregon. September has always been one of the busiest months for me. Between my husband and my family, there are roughly seven birthday celebrations. And it does not help with the returning of school for my two little ones.
As you can see I have been behind on planning for birthday parties this year. So, when my sole favorite nephew, Ethan, told me he wanted to have an ice-cream cake, I was pleasantly happy to go along with the idea, knowing that it probably won't be too time consuming. Ethan does not like fondant, so we decided to go with a buttercream cake. Of course, I had to pick his favorite ice-cream flavor which is cookie dough. And there we go with the cake theme...

PREPARATION
I decided to make a three-layer cake with the ice-cream being a middle layer. Since Ethan's favorite cake is white, I chose to bake a 6-inch vanilla white-cake (Photo 1). I cannot express how delicious and soft this cake turn out to be. Even after 4 days, I can still taste the "moistness" in the cake just as if it was freshly baked out of the oven. Stay tuned for the cake recipe here!
To create the ice-cream filling, I fill about 2-inch of ice-cream using the same pan I use to bake the cake. Noted I use the entire one-pint (473 gram) ice-cream container for this filling. I put it back in the freezer overnight to set (Photo 2).

|

|
|
Photo 1. White vanilla cake.
|
Photo 2. Cookie dough ice-cream middle layer.
|
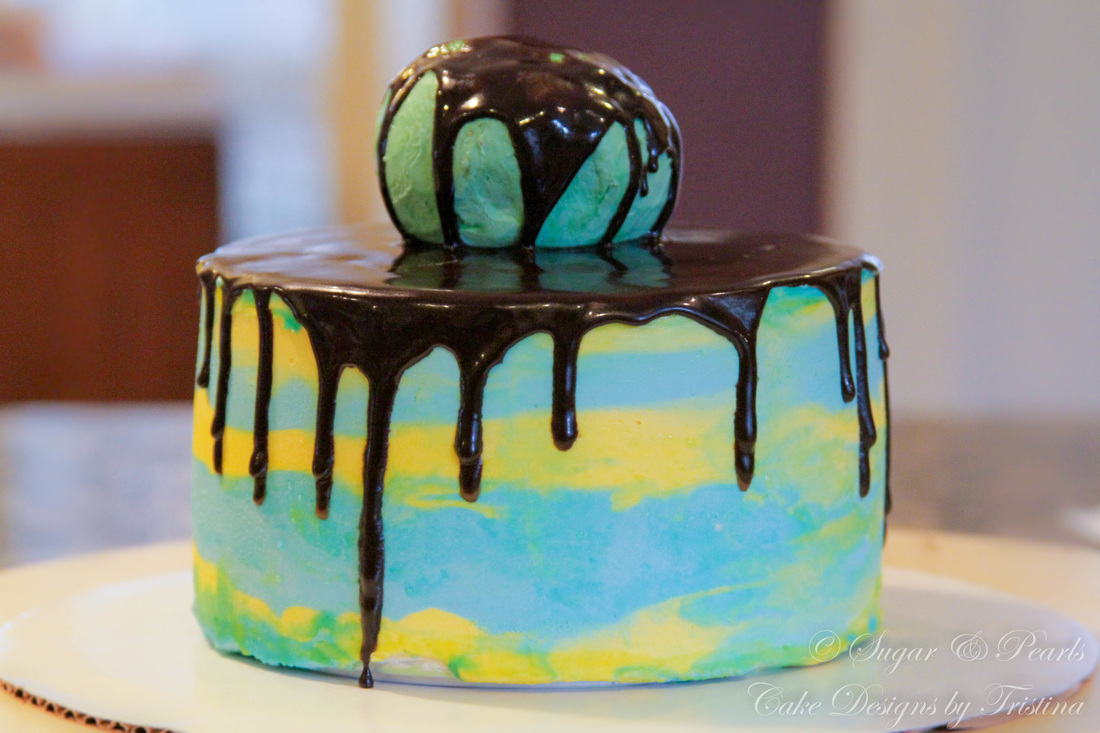
For an ice-cream scoop on top, I use some left over cake and roll it into a three-inch round ball. This does not have to be perfect. I then frost the ball with some yellow and blue buttercream.
To make the chocolate drippings around the cake, I mix melting chocolate and half-and-half milk together, and heat it in the microwave for 2 increments of 30-second (total 60 seconds). Of course, more milk and/or heating can be adjusted to achieve your desired consistency (Photo 3). Make sure the ganache mixture is semi-cool otherwise it could melt the cake buttercream.
To make the chocolate drippings around the cake, I mix melting chocolate and half-and-half milk together, and heat it in the microwave for 2 increments of 30-second (total 60 seconds). Of course, more milk and/or heating can be adjusted to achieve your desired consistency (Photo 3). Make sure the ganache mixture is semi-cool otherwise it could melt the cake buttercream.
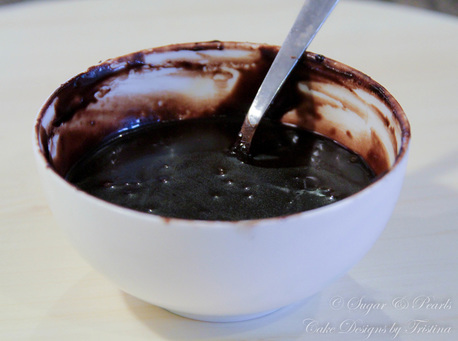
Photo 3. Chocolate ganache
ASSEMBLE THE CAKE
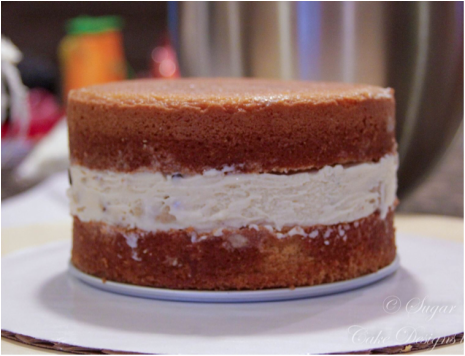
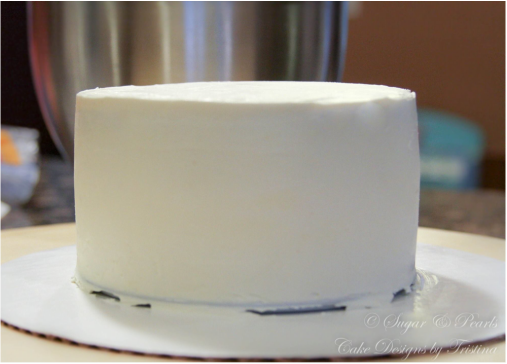
I stack the ice-cream layer between the cake, and frost the cake with the base white vanilla buttercream. This is a little thicker than the standard crumb coat (Photo 5 and 6). I quickly store it back into the freezer for 30 minutes while I work on my buttercream.
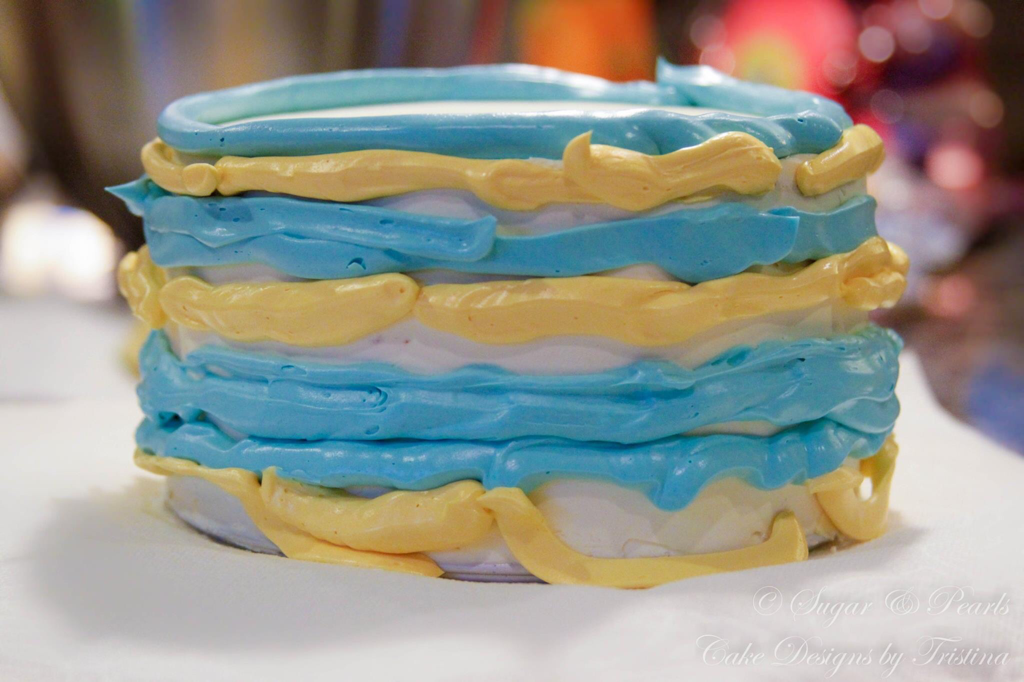
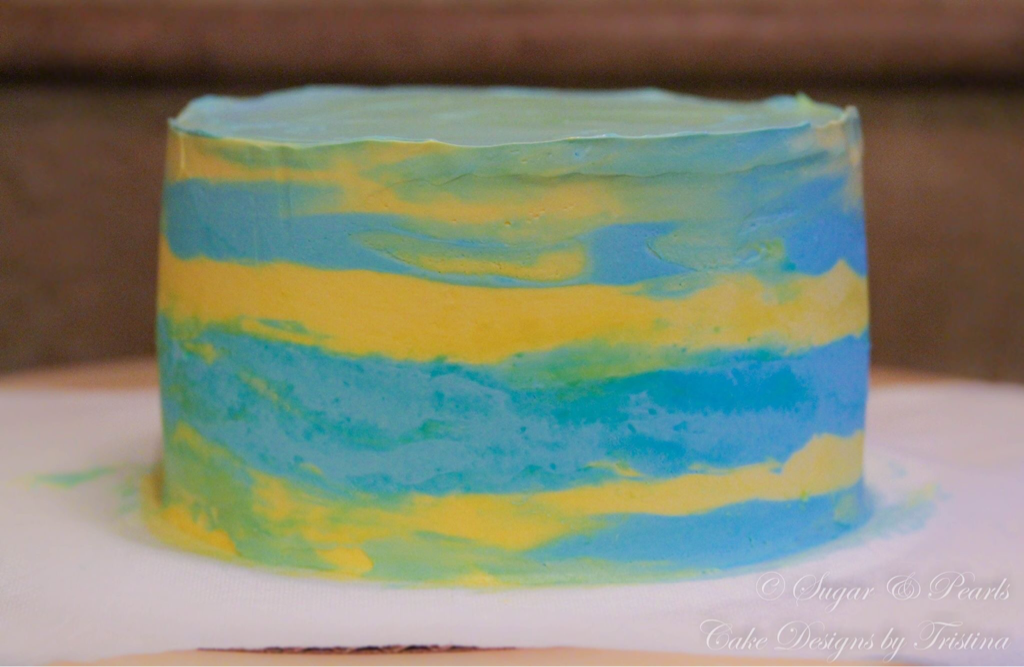
To create an earthy look, I pick blue and yellow as the base colors for the vanilla buttercream. I create the subtle watercolor effect by piping one layer of blue buttercream alternating with yellow buttercream (Photo 7). I do this for the entire cake, and then smooth the cake out using a cake scraper (Photo 8).
|
|
|
Photo 4. Stacking the coat with ice-cream layer.
|
Photo 5. Frosting the cake with the base layer.
|
|
|
|
Photo 6. Piping alternating colors.
|
Photo 7. Smooth the cake with a scraper.
|
Time to create those ice-cream drips. I start out by working with only a few drips at a time around the edge of the cake. Using a spoon, I start making drips around the edges. I find that I am able to control the drips more this way and to make they look more imperfect and natural. Once I ensure that all of the individual drips are looking their best, it is time to fill in the center. At this point, the ganache sometimes thickens up, so I would double check the consistency. If the glaze thickens up too much, heat it up for another 30 seconds in the microwave. I pour the ganache on top of the cake and use the small off-set spatula to gently even out the glaze. Make sure to tap the bottom of the cake on the counter to help the glaze to settle.
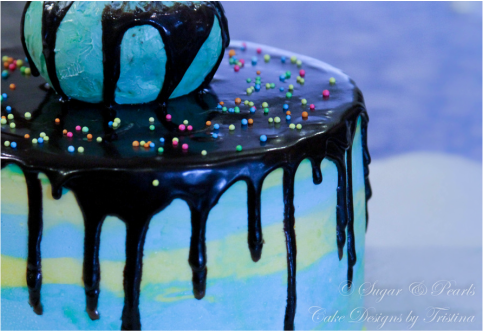
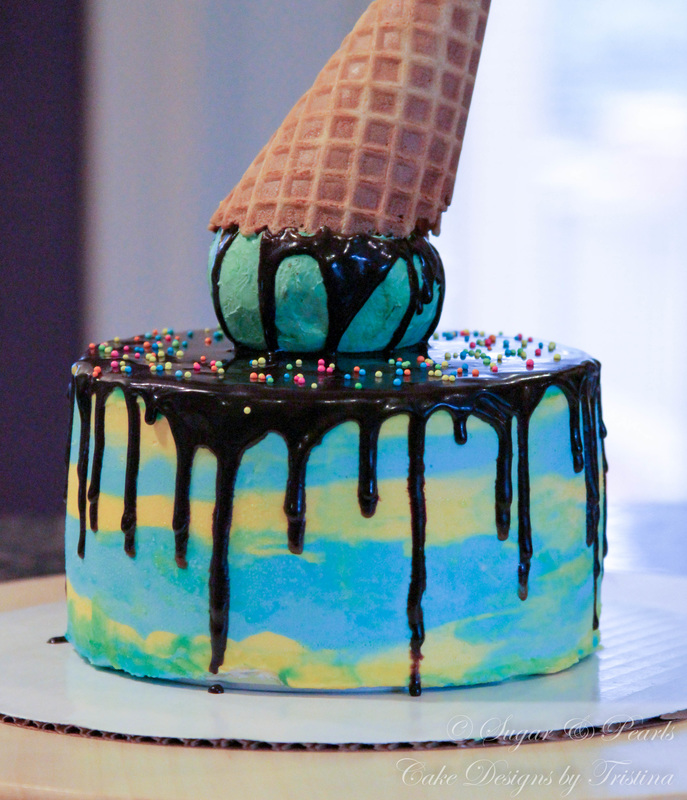
Then, I add the cake "ball" on top of the cake and pour some chocolate ganache onto this ball. I did not want to cover the entire ball, but you can certainly give it a try. I complete the cake with a waffle cone along with some colorful sprinkles I have in my baking cabinets.
Then, I add the cake "ball" on top of the cake and pour some chocolate ganache onto this ball. I did not want to cover the entire ball, but you can certainly give it a try. I complete the cake with a waffle cone along with some colorful sprinkles I have in my baking cabinets.
|
|
|
Photo 8. Drizzle of chocolate ganache.
|
Photo 9. Add sprinkle.
|
And there you have it...an ice-cream cake!
I have to say, this is one of the easiest cakes I have made thus far. It does not require a lot of planning or time. If you want something you can make in a short notice, this would be an ideal cake to make!
xoxo,
Tristina
COPYRIGHT © 2016 - SUGAR & PEARLS ~ CAKE DESIGNS BY TRISTINA
