Peter Rabbit's Vegetable Garden Cake
March 15, 2018

I have been lazy for the last couple of weeks, which is why you only saw a posting from February. I am not busy, at least not as busy as I was during the holiday seasons, so I really had no excuse to not complete a post. Actually, I was almost sure that I was able to finish and publish this post last Sunday. But that did not happen. I was eager to start this past week fresh, but then I was bombarded with an "unusual" week of mixed news and has allowed emotions engulfing all over me. Let's just say that there was some good news, along with a few bad ones. I won't go into details, as this could get a little too personal. However, I was a little overwhelmed with the news that was delivered to me. This announcement did not directly affect me, but it made me sad. My resident informed me that she was preparing for a letter of resignation. This is definitely the first conversation I had over the past eight years as a preceptor. I was caught off guard because she had just started her rotation with me the week before. I don't know her story behind that closed door, but I am sure that the decision did not come easy for her. Although it is not required, residency is difficult to obtain in pharmacy; especially in this era where students are gambling their faith to find the "right program" in hope the experience could define the course of their entire career. Sometimes things work out, and sometimes things don't. This incident makes me start to wonder about the path that each of us take in life...one way or another.
Well, that really has nothing to do with this fun and exciting theme of Peter Rabbit and the smash cake a cute baby boy got, to celebrate his first birthday with over a few weekends ago. A colleague approached me with this theme and I cautiously accepted the offer, not knowing how I would execute this design. But I'm so glad I did, because it was definitely a fun theme to build a cake on. I was more than thrilled with the outcome, and loved to mold these vegetables fondant over and over again. You bet I will be making more of them in the future.
Well, that really has nothing to do with this fun and exciting theme of Peter Rabbit and the smash cake a cute baby boy got, to celebrate his first birthday with over a few weekends ago. A colleague approached me with this theme and I cautiously accepted the offer, not knowing how I would execute this design. But I'm so glad I did, because it was definitely a fun theme to build a cake on. I was more than thrilled with the outcome, and loved to mold these vegetables fondant over and over again. You bet I will be making more of them in the future.

PREPARING FOR THE DECORATIONS
Peter Rabbit
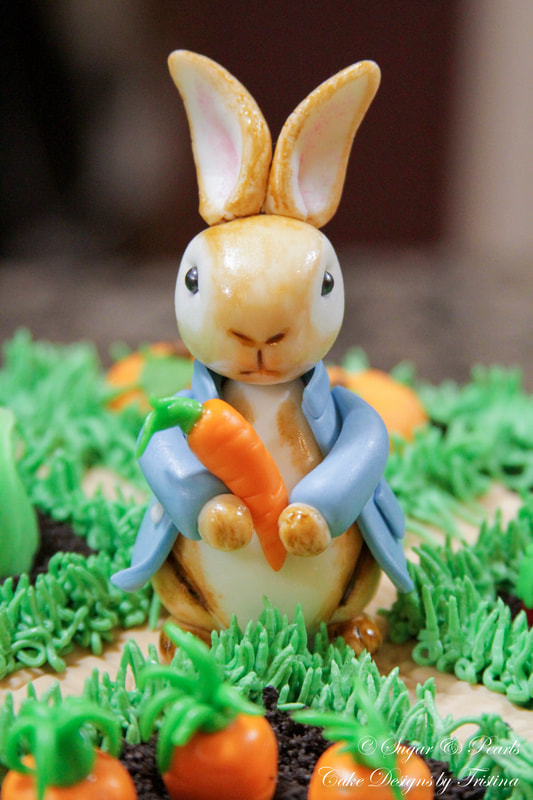
I start out making "Peter" two weeks before the cake so the rabbit could hold its shape. I use white fondant for the entire rabbit, and then paint its fur in light brown food coloring. First, I roll the head of the rabbit using a round medium size ball fondant. I mold it into a teardrop shape and punch the two deep holes on both sides to make his eyes. I use two mini circles of black fondant to create the eyes. I also make the marks in the middle to create the mouth creases. Next, I create the body using an oblong shape white fondant. I create the two deep indents on the sides to create its thighs. I also use a tool to create "marks" in the center of the rabbit's chest the resemble its fur. Noted, it is difficult to see these markings with white fondant. I use the toothpick to hold the head and the body together, and leave both overnight to dry.
I make the ears and the feet using the flat teardrop shapes. I make the ears almost two times bigger than the feet. I just create a crease in the middle of the ears, and curve the top slightly. Whereas, I make two tiny creases to mimic its toes. Then, I also roll up a small pea-sized, round fondant to make his tail. I left all of these over a day to dry.
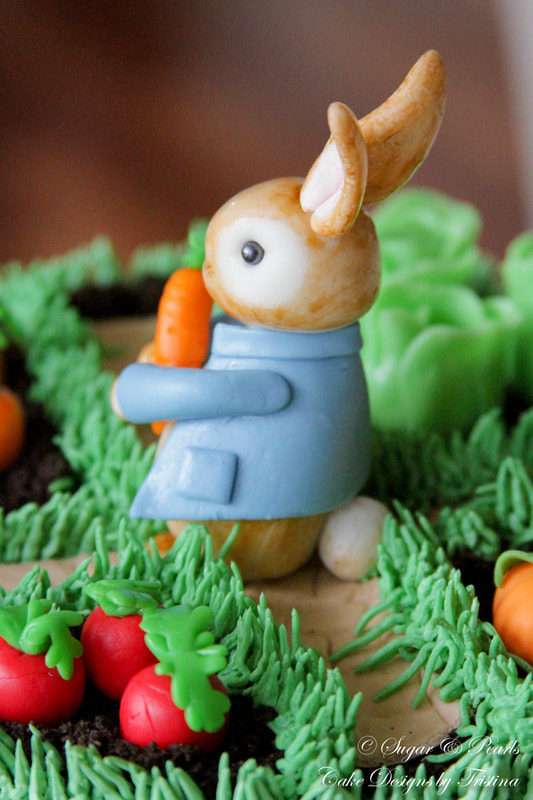
Lastly, I make Peter's jacket using light blue fondant. I cut out a thin rectangular blue fondant, about 2 x 2 inches. I make sure the jacket would wrap around his entire body. I clip the two sides diagonally and curve the lower tip of the jacket up slightly. I cut a thin long strip to create a collar and a tiny square for the pocket. I leave this jacket wrapped around Rabbit overnight so it holds the shape before I glue it on to him. For the jacket's arms, I create two oblong blue fondant droplets and press the "shoulders" flat so they could glue easily onto the jacket. I use the end of a ball fondant tool to create the holes on both sleeves. I make the hands using two short teardrop balls and create two creases as in his feet.
Peter Rabbit
I start out making "Peter" two weeks before the cake so the rabbit could hold its shape. I use white fondant for the entire rabbit, and then paint its fur in light brown food coloring. First, I roll the head of the rabbit using a round medium size ball fondant. I mold it into a teardrop shape and punch the two deep holes on both sides to make his eyes. I use two mini circles of black fondant to create the eyes. I also make the marks in the middle to create the mouth creases. Next, I create the body using an oblong shape white fondant. I create the two deep indents on the sides to create its thighs. I also use a tool to create "marks" in the center of the rabbit's chest the resemble its fur. Noted, it is difficult to see these markings with white fondant. I use the toothpick to hold the head and the body together, and leave both overnight to dry.
I make the ears and the feet using the flat teardrop shapes. I make the ears almost two times bigger than the feet. I just create a crease in the middle of the ears, and curve the top slightly. Whereas, I make two tiny creases to mimic its toes. Then, I also roll up a small pea-sized, round fondant to make his tail. I left all of these over a day to dry.
Lastly, I make Peter's jacket using light blue fondant. I cut out a thin rectangular blue fondant, about 2 x 2 inches. I make sure the jacket would wrap around his entire body. I clip the two sides diagonally and curve the lower tip of the jacket up slightly. I cut a thin long strip to create a collar and a tiny square for the pocket. I leave this jacket wrapped around Rabbit overnight so it holds the shape before I glue it on to him. For the jacket's arms, I create two oblong blue fondant droplets and press the "shoulders" flat so they could glue easily onto the jacket. I use the end of a ball fondant tool to create the holes on both sleeves. I make the hands using two short teardrop balls and create two creases as in his feet.


I leave all of the body parts of Peter to dry overnight before I glue them together. Once I am happy with his appearance, I color his outer ears and around the body in light brown before I glue the jacket permanently around him. Noted that I color the two creases around his thighs a bit darker to reveal their shapes. I also color his face light brown, but leaving the area around his eyes white. I do the same for his tail, leaving the majority of it in white. I finish him with a light pink dust for the inner ears and a few freckles around his lower cheeks.
|
|
Lettuces
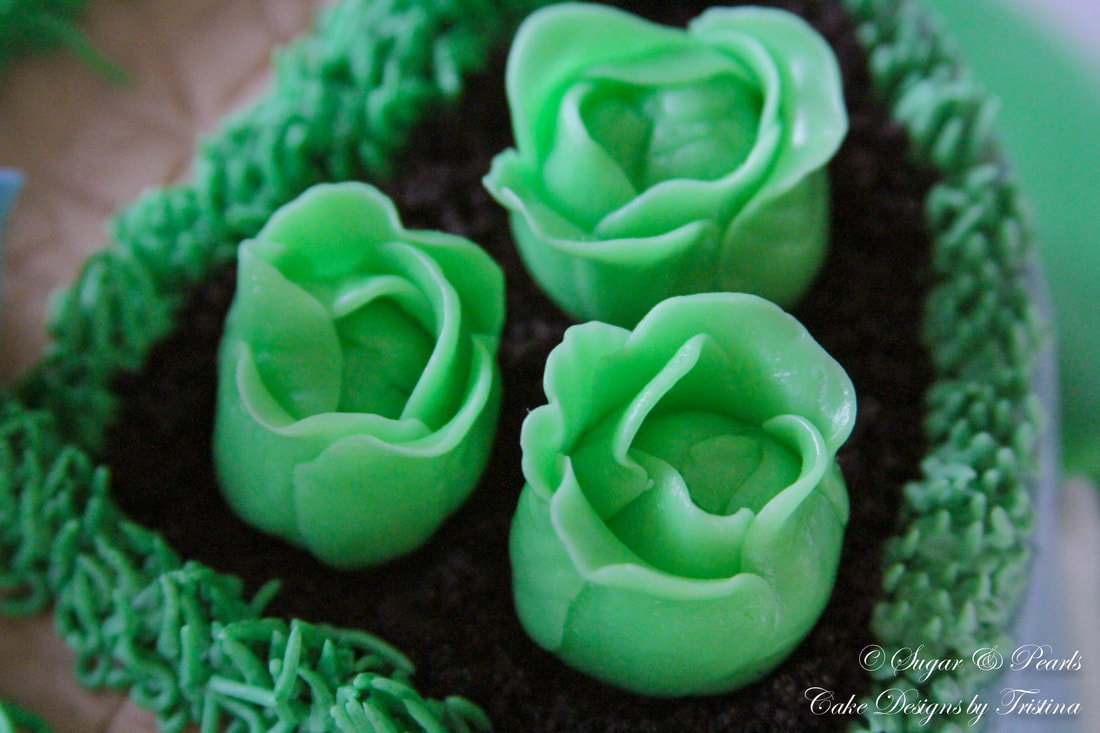
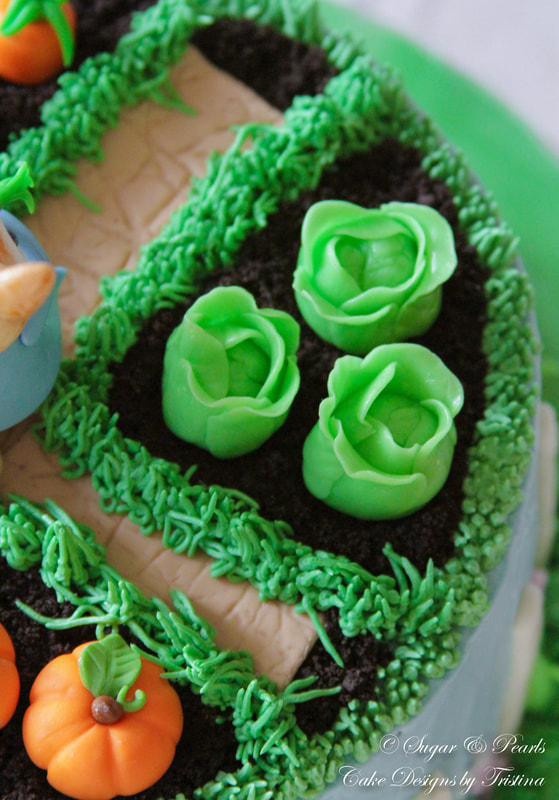
I decide to make four different type of vegetables: lettuces, carrots, radishes and pumpkins. I just like the idea of four different types of vegetables for the garden. I start out making lettuces first. I roll up a round green ball where I create some small indents at the center. Then, I use the small rose fondant cutter to create the "lettuce leaves." I use my leaf mold to create the veins and thinning the top of each leaf out using the ball fondant tool. Once the leaves look good, I wrap it around the green ball and fold each leaf around the ball. I twist and turn the leaf to mimic the real lettuces.
I decide to make four different type of vegetables: lettuces, carrots, radishes and pumpkins. I just like the idea of four different types of vegetables for the garden. I start out making lettuces first. I roll up a round green ball where I create some small indents at the center. Then, I use the small rose fondant cutter to create the "lettuce leaves." I use my leaf mold to create the veins and thinning the top of each leaf out using the ball fondant tool. Once the leaves look good, I wrap it around the green ball and fold each leaf around the ball. I twist and turn the leaf to mimic the real lettuces.


Carrots
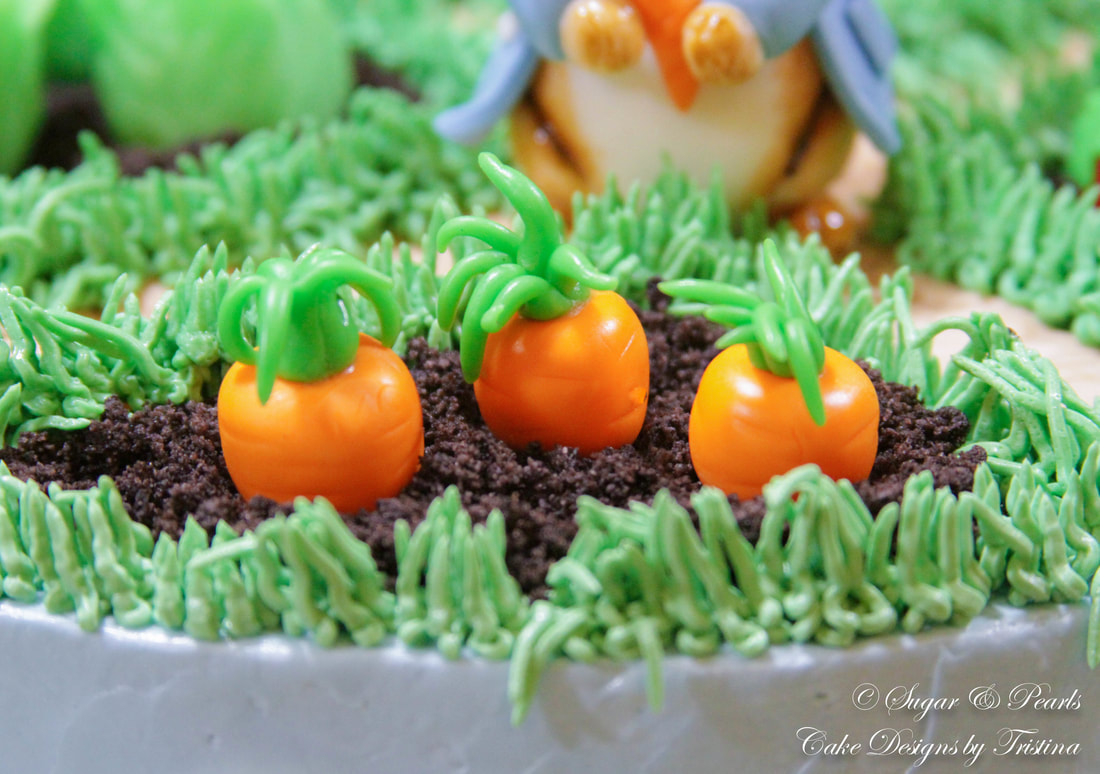
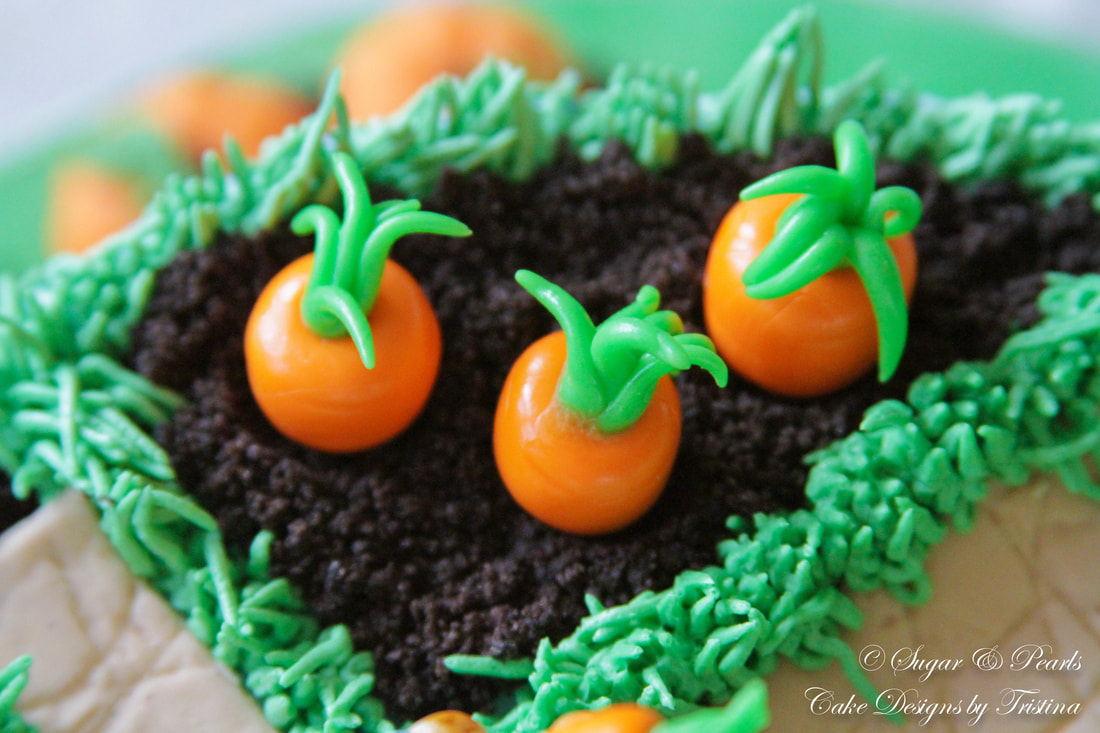
I love molding the carrots. They are simple and relatively easy to make. I know I want to make some growing on the garden, and also make one or two for Peter to carry on his hands. For the top of the carrots, I just simple roll the orange fondant round and smooth the bottom of the carrots. Using a sharp tip, I create the indent on the top of the vegetable and then added 4-5 strings of green fondant to create the stem and leaves. I also create some light indents around the carrots.
For the whole carrot, I create an oblong shape in orange fondant. I flatten the top of the carrot, add the indents for the stem and leaves, and then make the random marks around the entire vegetable.


Radishes
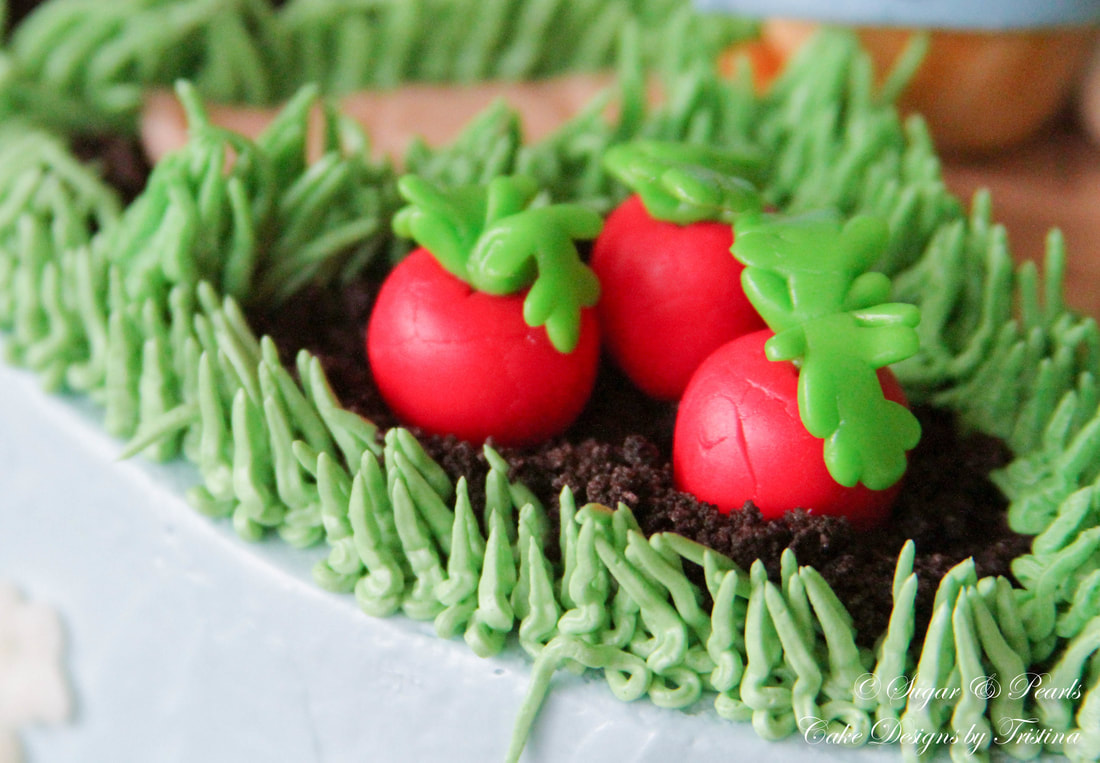
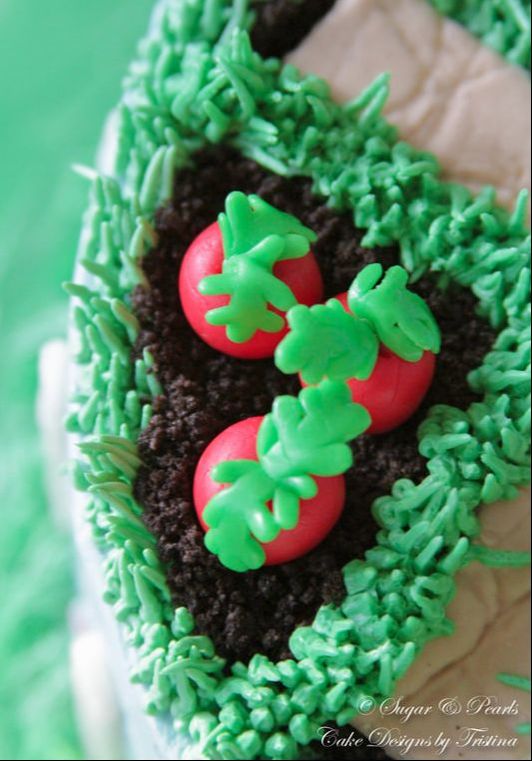
I use the similar technique from the carrot to make the top of the growing radishes. For the whole radish, I create a red fondant ball and shape the end into a pointy. Then, I use the top part of my snowflake mold to punch out three green fondant leaves. I gather these together to make a stem for each radish.
I use the similar technique from the carrot to make the top of the growing radishes. For the whole radish, I create a red fondant ball and shape the end into a pointy. Then, I use the top part of my snowflake mold to punch out three green fondant leaves. I gather these together to make a stem for each radish.


Pumpkins
I make a mistake thinking I have already taken some pictures during the process of making these pumpkins, and found out that I didn't. I am a little disappointed.
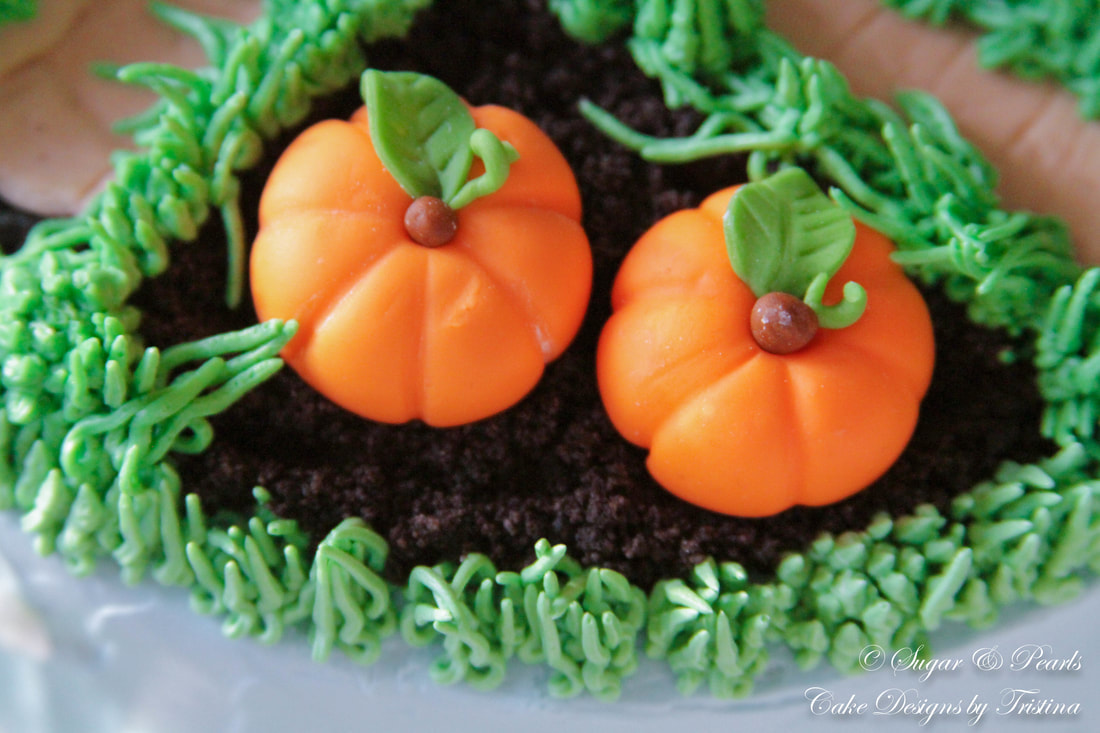
These are not too hard to make though. I start out with a slightly bigger, round orange fondant ball and flatten on the top to create its "sphere" shape. I create the rinds and ribs of the pumpkins using a fondant tool, starting from the top center to the bottom of the vegetable. I roll a round brown fondant to glue on top of the pumpkin for its stem. Then, I cut the leaf shape out of green fondant, and draw the marks on the leaves. The vines are created using a thin strip of green fondant and swirl it around a stick or toothpick overnight to hold its curvy shape. I glue both the leave and the vine onto each pumpkin once they were completely dry and hold their shape.
I make a mistake thinking I have already taken some pictures during the process of making these pumpkins, and found out that I didn't. I am a little disappointed.
These are not too hard to make though. I start out with a slightly bigger, round orange fondant ball and flatten on the top to create its "sphere" shape. I create the rinds and ribs of the pumpkins using a fondant tool, starting from the top center to the bottom of the vegetable. I roll a round brown fondant to glue on top of the pumpkin for its stem. Then, I cut the leaf shape out of green fondant, and draw the marks on the leaves. The vines are created using a thin strip of green fondant and swirl it around a stick or toothpick overnight to hold its curvy shape. I glue both the leave and the vine onto each pumpkin once they were completely dry and hold their shape.


Garden Decorates
I want to create a real garden thus it would not be completed without the traditional white fence. I begin with the white fondant fence, using thing rectangular strips with wood imprint mold. I cut them out in rectangular shape and leave them to dry for about 1-2 hours.
I also create white and light purple flowers and grass around the fence. I used a flower cutter to punch these flowers out, and using thin green strips to make the tall grass. I love the two bunches of light purple, fondant Campunula bellflowers the most. I create the bell flowers by rolling purple fondant rounds into teardrop shapes, and then using the end of my fondant tool to create the "hollows" on each flower. I pinch the end of each flower to create the "bell" appearance. These simple bunches are made within a few minutes before I complete the cake.


ASSEMBLING THE CAKE
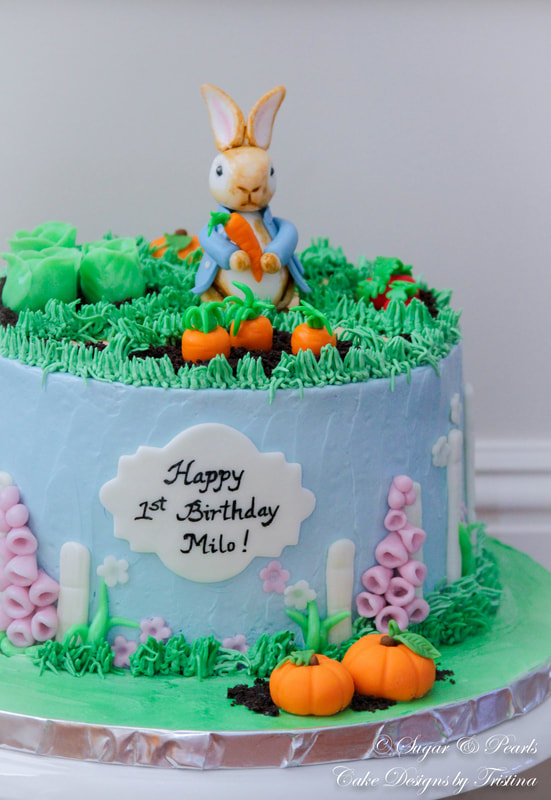
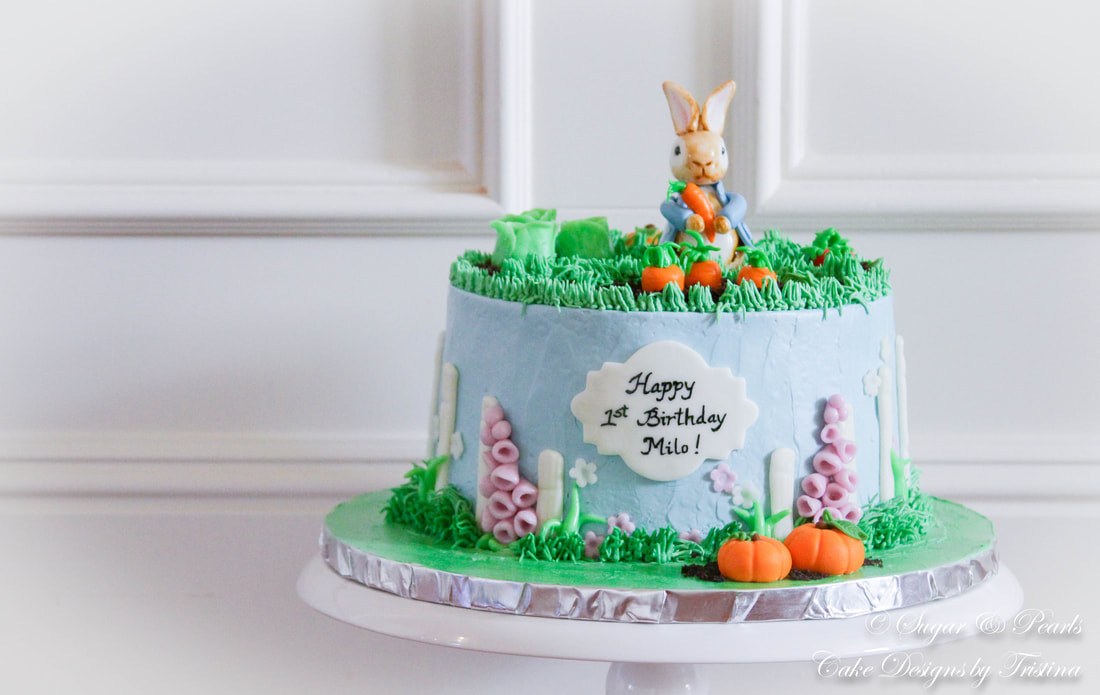
This is a 8-inch, three-layer vanilla sponge cake with homemade whipped cream and strawberry jam fillings, and frosted with vanilla buttercream. I learn that I can create this light blue buttercream by mixing blue and purple food coloring together. I also frost the unevenly swirls for the cake to give it more "depth," rather a boring smooth appearance.
First, I place the white fences around the entire cake, and left the front center just enough space for the name plaque as requested by the client. Next, I attach some tall, green fondant grass along the white fences. Following the grass, I add a few light purple garden flowers on the bottom to give a realistic look of a blooming garden.
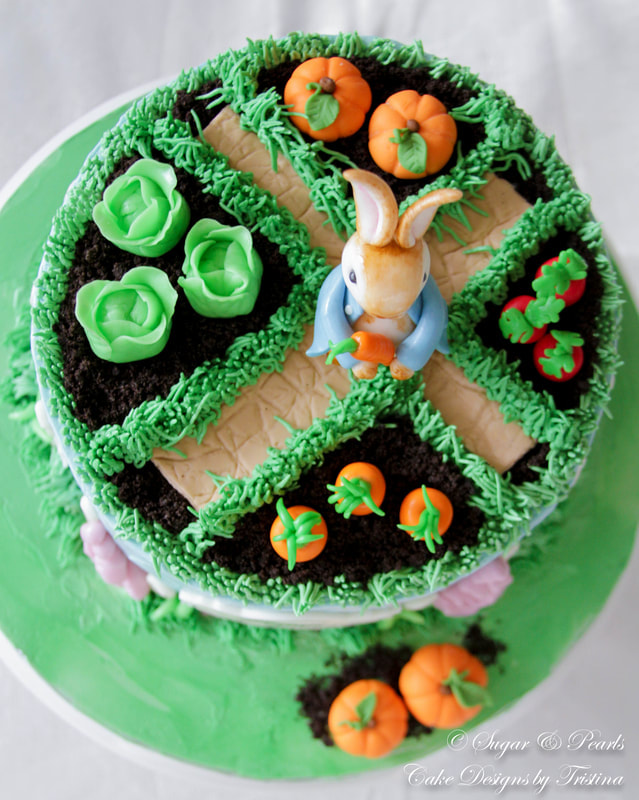
I find the fondant grass to be a little spotty, so I decide to add buttercream grass, which is definitely a best decision to bring this garden cake to life. I pipe grass around the bottom of the cake, using the decorative Wilton tip #233 and green buttercream. Since I like the look of the buttercream grass more, I decide to create the vegetable garden on top of the cake. I pipe the grass around the rim of the top of the cake, then I divide four corners of the cake to house each vegetable. I use Oreo cookies crumbles to resemble soil and place the vegetables on top of them. This is also another way to prevent the fondant vegetables from touching the buttercream frosting.
I create the step stone using light brown fondant to cover the walkway of the garden. I place Peter Rabbit in the middle of this walk way, and give him a tiny carrot to hold on his hands. I want to yield to look as if he has just picked a carrot up from the garden. I finish the cake by placing the name plaque in the center of the cake.
This is a 8-inch, three-layer vanilla sponge cake with homemade whipped cream and strawberry jam fillings, and frosted with vanilla buttercream. I learn that I can create this light blue buttercream by mixing blue and purple food coloring together. I also frost the unevenly swirls for the cake to give it more "depth," rather a boring smooth appearance.
First, I place the white fences around the entire cake, and left the front center just enough space for the name plaque as requested by the client. Next, I attach some tall, green fondant grass along the white fences. Following the grass, I add a few light purple garden flowers on the bottom to give a realistic look of a blooming garden.
I find the fondant grass to be a little spotty, so I decide to add buttercream grass, which is definitely a best decision to bring this garden cake to life. I pipe grass around the bottom of the cake, using the decorative Wilton tip #233 and green buttercream. Since I like the look of the buttercream grass more, I decide to create the vegetable garden on top of the cake. I pipe the grass around the rim of the top of the cake, then I divide four corners of the cake to house each vegetable. I use Oreo cookies crumbles to resemble soil and place the vegetables on top of them. This is also another way to prevent the fondant vegetables from touching the buttercream frosting.
I create the step stone using light brown fondant to cover the walkway of the garden. I place Peter Rabbit in the middle of this walk way, and give him a tiny carrot to hold on his hands. I want to yield to look as if he has just picked a carrot up from the garden. I finish the cake by placing the name plaque in the center of the cake.


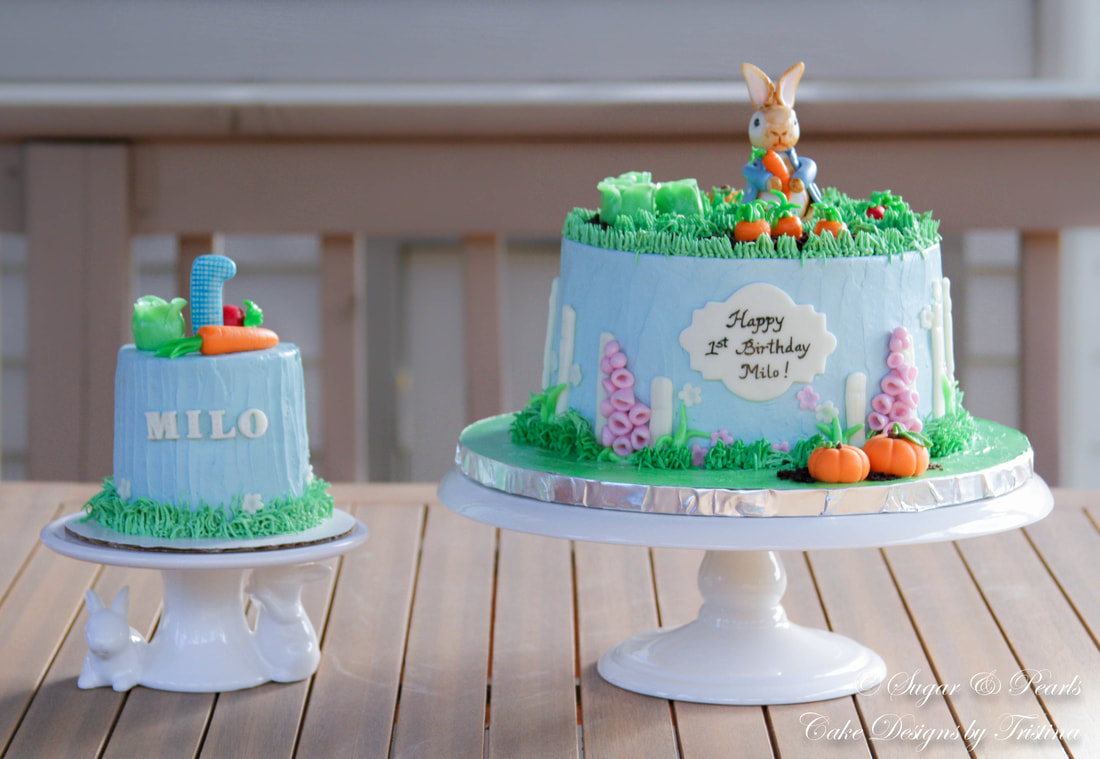
Since I make the pumpkins slightly bigger than expected, they do fit well into the garden space. I decide to extend my garden down onto the cake-board this time. I don't often do this, but I really like how the green buttercream is applied across the entire board, and then the pumpkins are placed on the side. I also add a bit of "Oreo cookies dirt" to appear as if these pumpkins were recently picked from the garden.
Aren't they cute? I'm sure you would fall in love with this cake if you enjoy gardening and harvesting vegetables.
Aren't they cute? I'm sure you would fall in love with this cake if you enjoy gardening and harvesting vegetables.
I cannot get enough of this beautiful vegetables. Though I am not a "garden" person, but I definitely enjoy harvesting fruits and vegetables when they are ready to be picked.
|
|
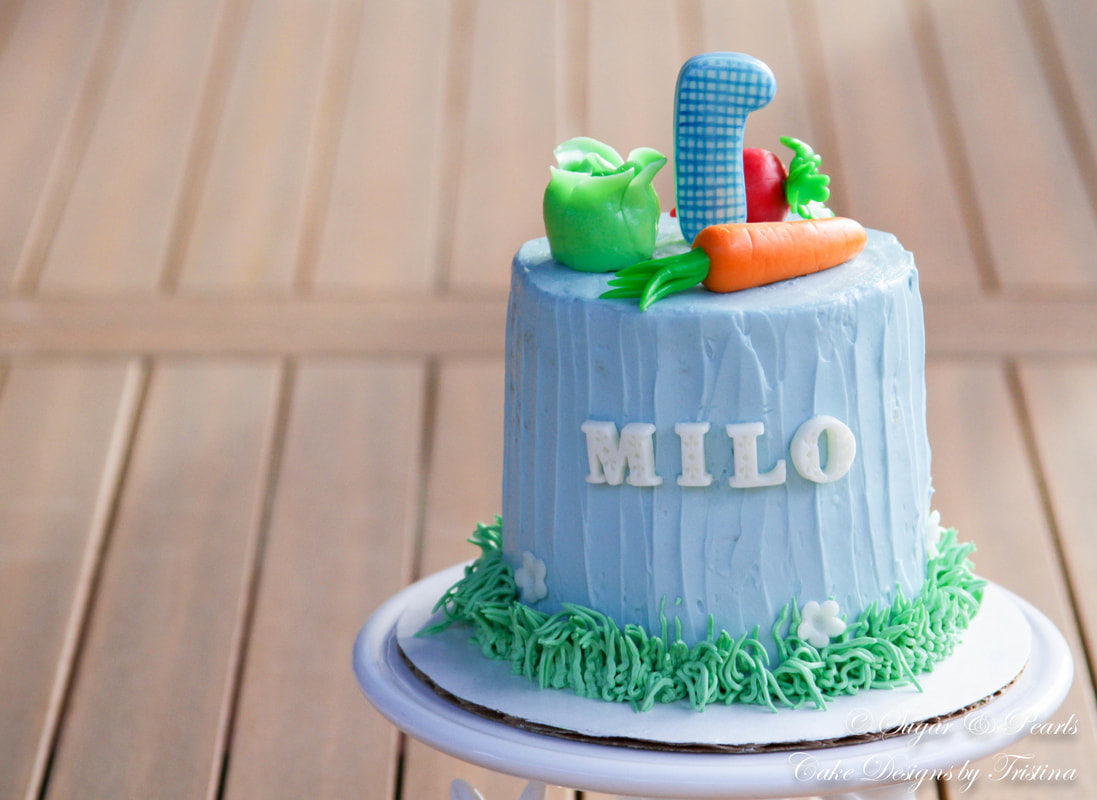
And a first birthday is NEVER completed without a smash cake! I make a 4-inch, double layer cake using the same filling and frosting as in the main cake. I also create the similar covering for this little cake. But instead of a real vegetable garden, I add buttercream grass around the bottom of the cake, and then position the three fondant vegetables around the number one. The gingham table cloth pattern on the number one is made to mirror the Birthday Invitation that my colleague has sent to me early on. This is me; I like to create little details unique to each party to give that personalize-feel to each of my cake. I finish the smash cake by adding the birthday's boy name, in white fondant, in the center of the cake.
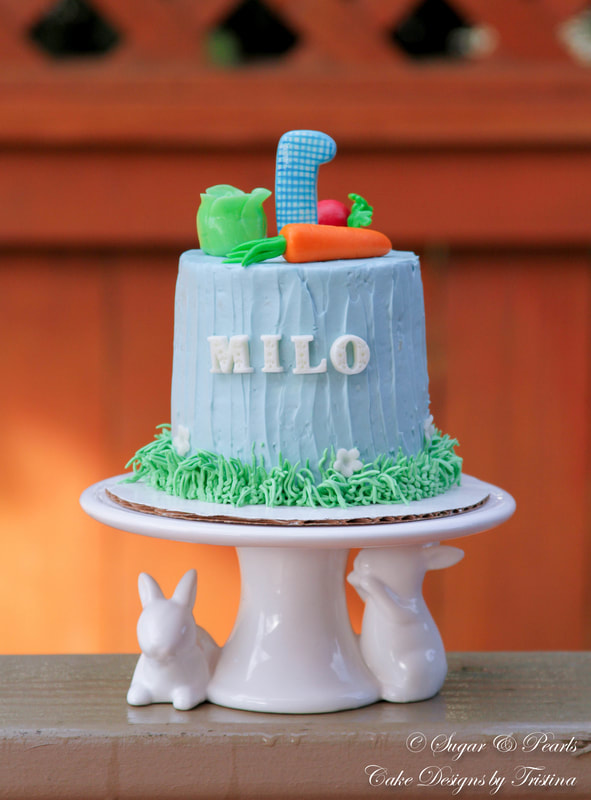
And I was super excited when I found that my rabbit cake stand holds the smash cake perfectly.
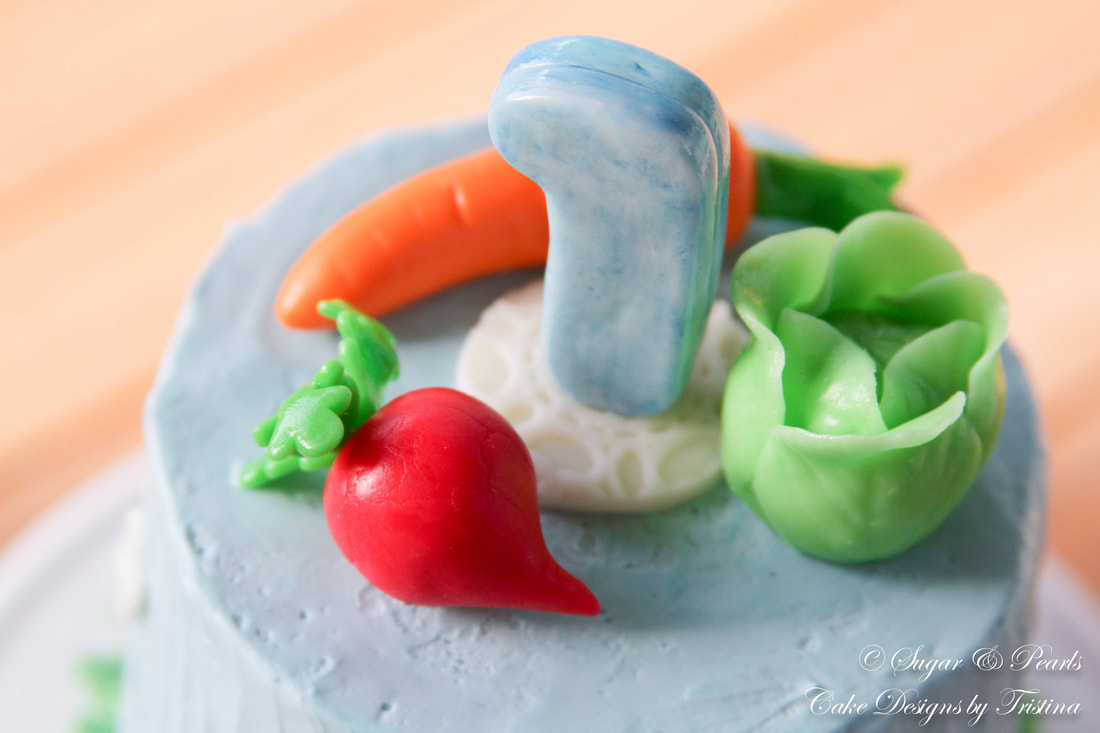
Another closer look of these beautiful, fun-to-make vegetables!
These are probably two of the most fun cakes I have made this year. The best part about them was that I did not feel rush or stress out about finishing them on time. I think I have mastered the planning process now. Wheww, finally!
I was also proud to say that I completed my "Mommy's daily tasks" while making this cake. This means, I spent quality time with the kids after work, helped them with piano lessons and read books together as a family. It was not easy, but it was definitely manageable with some planning. Now, I just need to figure out what to make for the next special event coming up. Stay tune for this...
xoxo,
Tristina
COPYRIGHT © 2018 - SUGAR & PEARLS ~ CAKE DESIGNS BY TRISTINA
